How to set up a roadwarrior config in OpenVPN, using "OpenVPN connect" for Android and iOS

EDIT: this post is a work in progres and it might be changed at a later date.
EDIT 2: the tutorial is in post 9. This documents is a confused mess of notes (some of them are also incorrect) that I wrote down as a basis for the tutorial.

I am having a back and forth discussion with @jon concerning the wiki documentation of OpenVPN for phones, I thought it would be more useful to discuss it with the entire community.

My problem is that the documentation as it is today is barely helpful for someone who understands a bit of system administration and I would argue even negatively helpful (as in just confusing) for a newbie. The reason for this is: obsolescence, as there are several moving part that have evolved over time, including OpenVPN server, OpenVPN connect (the official client for both platforms), iOS and android (the OSes).

I will describe below my understanding of the situation today, and propose several changes on the wiki to create a more helpful documentation.

Premise

OpenVPN connect needs 5 pieces of information to successfully establish a road warrior tunnel with OpenVPN server:

  1. the .ovpn configuration file;
  2. the client certificate;
  3. the private key;
  4. the Certificate Authority (CA);
  5. the HMAC authentication key (tls-auth).

These 5 pieces of information are provided in 2 possible forms by the CGI code behind the WUI.

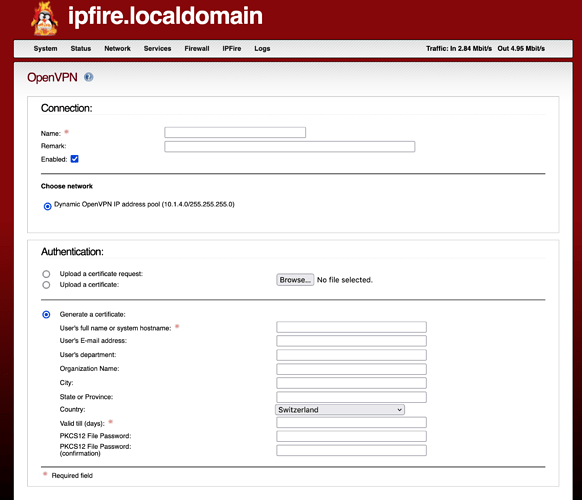
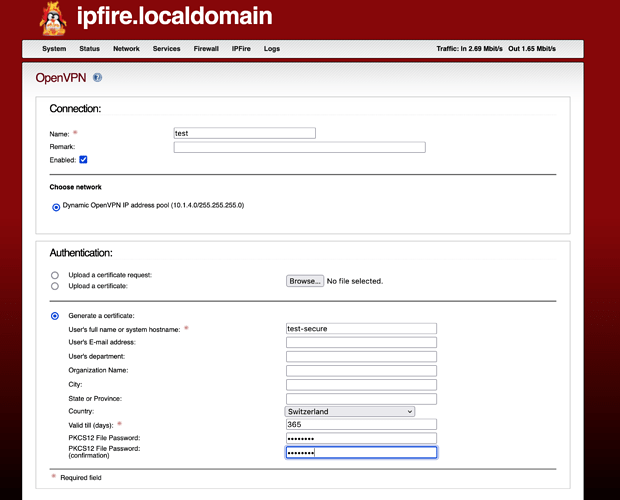
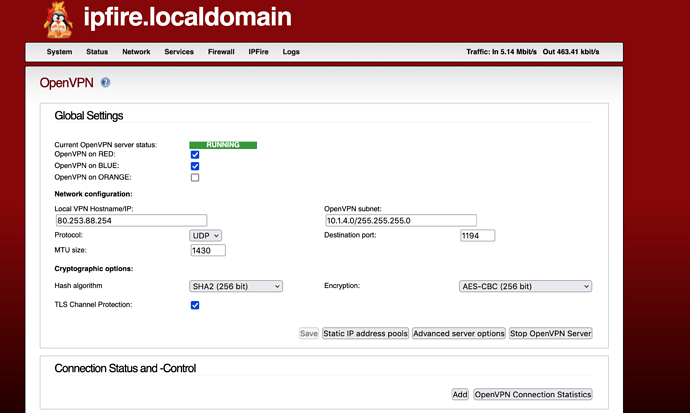
If during the roadwarrior configuration the PKCS12 File Password field is set to a string of characters then the code creates the following

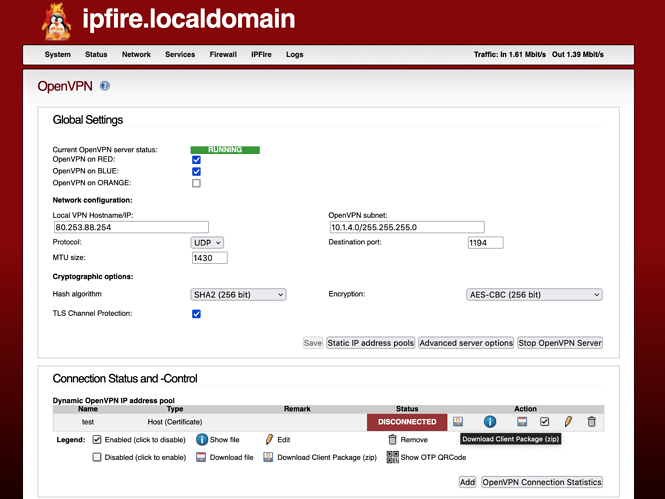
  1. a downloadable zip file named client package, composed by 3 files:

    • name-TO-IPFIRE.ovpn, contenting the configuration file, the first piece of information needed,

    • ta.key, containing the fifth piece of info, the HMAC authentication key

    • name.p12, containing the remaining information (client, private key and CA);

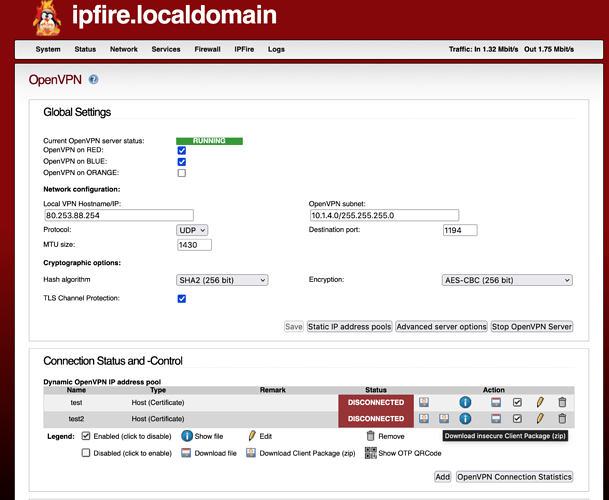
instead if PKCS12 File Password is LEFT EMPTY, there will be two zip files created, the same 1) as above and

  1. a second downloadable zip file named insecure client package composed by 5 files:

    • name-TO-IPFIRE.ovpn, contenting the configuration file, first piece of information needed, but this time including also all the other pieces of information embedded inside in xml tags. This file is called unified format

    • ta.key, containing the fifth piece of info, the HMAC authentication key

    • name.pem client certificate in text format

    • name.key containing the private key in text format

    • cacert.pem containing the CA certificate in text format

The .ovpn file is different between the standard and unified format. In the standard, more secure, format it will point to the ta.key and the .p12 certificates files with the following syntax

pkcs12 name.p12
tls-auth ta.key

in the insecure package it will NOT have the above directives, but commented out lines pointing to each of all four individual certificate

;ca cacert.pem
;cert name.pem
;key name.key
;tls-auth ta.key

AND also all those certificates embedded in xml tags

<ca>
-----BEGIN CERTIFICATE-----
censored
-----END CERTIFICATE-----
</ca>

<cert>
Bag Attributes
    friendlyName: name
    localKeyID: censored
subject=C = censored, ST = censored, O = censored, CN = censored

issuer=C = censored, ST = censored, L = censored, O = censored, CN = censored CA, emailAddress = censored

-----BEGIN CERTIFICATE-----
censored
-----END CERTIFICATE-----
</cert>

<key>
Bag Attributes
    friendlyName: name
    localKeyID: censored
Key Attributes: <No Attributes>
-----BEGIN PRIVATE KEY-----
censored
-----END PRIVATE KEY-----
</key>

<tls-auth>
#
# 2048 bit OpenVPN static key
#
-----BEGIN OpenVPN Static key V1-----
censored
-----END OpenVPN Static key V1-----
</tls-auth>

Android configuration

To configure OpenVPN connect on Android, you can import the .ovpn file from the insecure client package and it will work as it is and out of the box as it contains everything needed for the tunnel. Instead, if you use the client package there will be several problems to solve.

  1. in the .ovpn file, the directive
tls-auth ta.key

will trigger an error from OpenVPN connect even if you download ta.key in the same folder with the .ovpn file. Simply OpenVPN connect looks for this file in the wrong place and it will not import the configuration file, giving a file not found error.

  1. you will need to import the name.p12 file with the client, private, and CA certificates. This can be done from inside OpenVPN connect without any issue. If you manage to import the configuration file, you will be ask to link it to all the certificates which will be available if you have imported them.

Why would you want to use the second option, even with the ta.key issue? Because this is way more secure, as all the certificates are handled by Android using the dedicated hardware of the phone to protect this crucial piece of information. With the insecure package, anyone having access to the .ovpn unified format file will have everything necessary to connect to the server.

How to fix the ta.key issue? Modify the .ovpn file to include the ta certificate in the embedded format:

<tls-auth>
#
# 2048 bit OpenVPN static key
#
-----BEGIN OpenVPN Static key V1-----
censored
-----END OpenVPN Static key V1-----
</tls-auth>

with also the following directive:

key-direction bidirectional

AND comment out the directive tls-auth ta.key

;tls-auth ta.key

iOS configuration

All the information described in the previous section is valid also fo iOS, IN ADDITION TO another issue.

OpenVPN connect in iOS cannot get the CA certificate from the .p12 file.

By the way, to import the certificates in iOS name.p12 has to be renamed name.ovpn12 otherwise .iOS will not know that this file should be handled by OpenVPN connect.

How to tell .OpenVPN connect where to find the CA certificate? As in the TA certificate, it needs to be embedded in the .ovpn file.

First, to extract it from the .p12 file you need to have access to openssl and use the following command:

openssl pkcs12 -in name.ovpnp12 -cacerts -nokeys -out ca.crt

Then, you can copy and paste it like this:

<ca>
-----BEGIN CERTIFICATE-----
censored
-----END CERTIFICATE-----
</ca>

The rest, works exactly as in the Android configuration.

Summary

This post, including corrections from the community, should be distilled in an unified howto for mobile machines, with all the steps documented with images. Also, from the current wiki text, the part describing how to deliver all the files containing the 5 pieces of information to OpenVPN connect should be maintained as it is still relevant and well explained. The rest should be moved to a separate page that specify how the information is obsolete and left available only for historical reasons.
This is still Confusing as hell for a noob like myself.
I did struggle with the openvpn zip install on my Android phone.
Add zip file doesn’t work
Add unzipped files doesn’t work
Had to install two of the files threw the openvpn app
Then try to connect and it ask for the key file / cert.
Then I added that.
It was certainly not as easy as one would think.

@hvacguy
This is not the text I propose for the wiki, but a post containing all the relevant piece of information as it is today. From that a simpler, shorter and to the point text should be derived.

Also, the insecure package works out of the box. For a newbie, this is an option if you know how to create the package, which was not documented in the wiki. I changed the text and @jon objected (with reason) that this could make the configuration very risky. It was NOT my intention to do that, and I resented for a short while the implication that I was doing a sort of malicious attack on the wiki. However this is not my intention and probably @jon did not mean that as well.

However the issue remains, from these two options you can chose only one:

a) simple but insecure:
b) very complicated but way more secure.

I think we should document both these two options in the wiki and distill a post with all the UP TO DATE relevant information for both options.

1 Like

One can always find helpful information like this on the Community forum.
So documented here is always helpful.

1 Like

The instructions for the manual method for an iPhone came from the section
“I am having trouble importing my .ovpn file.”:

EDIT: support forum
https://forums.openvpn.net/viewforum.php?f=36&sid=9c687487490f01571342280e1427f409


There are FAQs for an android phone also
“I am having trouble importing my .ovpn file.”:


I had intended this Wiki page to be the above iPhone iOS instructions (above):

I’d suggest making a separate page for Android devices.

EDIT: Support forum:
https://forums.openvpn.net/viewforum.php?f=33&sid=9c687487490f01571342280e1427f409


Carlo - how do you want to go forward? Do you want to update the iOS_manual Wiki Page with the original post info? Or?

A helpful wiki is a wonderful thing.
The above is a little technical.
Would a link to something similar to above
Be added as an additional reference
Or web page in the wiki.
The wiki is nice that it tries not to be so technical as is.
Not sure if I can help in this area.
When I get lost. Links to other references
I find very useful.

@jon For android, I found out how to import from the standard client package all the certificates, including the ta.key, without having to edit the .ovpn file. When I have time I will update the original post of the thread with a much simpler howto, completed of screenshots. Here we do not need the insecure package method and the howto could be used to replace the current wiki entry.

Then, I will focus on the iOS and try to write an howto as simple as possible, but I fear it will require the unified format for the CA certificate, in this case we should include also the insecure package method as an alternative.

Finally, I think it is better that you decide what part (if any) of the howto I will post here you want to lift/modify for the wiki and how you want to structure it.

From my point of view, I will structure it here with the following outline, but feel free to follow your instinct:

  • road warrior configuration for mobile machine using OpenVPN connect client
    • Common intro
      What info is needed and where the config files have to go for OpenVPN connect to find them; how the WUI prepares the two client packages, security considerations.
      • Android howto <— should be simple enough, no need for the insecure package method
      • iOS secure howto <— probably the secure package method will require to extract the CA certificate and mangle the .ovpn file
      • iOS insecure howto <— hence I think this is needed (unfortunately)
    • Links, including the older wiki pages and the FAQs from the OpenVPN people

I would just like to remind you that there are two editions/versions of the openvpn client available on openvpn.net.

  1. the “official” version - OpenVPN Connect (current version 3)
  2. the Community Edition version (current version 2.5.7)

These editions, differ in the way they are configured.
Differences in configuration, have been a source of trouble, reported and explained on the IPFire forum.

Will these differences in configuration be explained on some Wiki page?

Roadwarrior configuration for mobile machines using OpenVPN connect client

Introduction

Premise: you have either an Android or an iPhone mobile device and you have installed from the app store OpenVPN connect. You also have a functioning IPFire OpenVPN installation and your goal is to create a roadwarrior tunnel between the server and the mobile device.

OpenVPN connect needs 5 pieces of information:

  1. the .ovpn configuration file;
  2. the client certificate;
  3. the private key;
  4. the Certificate Authority (CA);
  5. the TA certificate, HMAC authentication key (tls-auth).

First, you need to create the files, collectively containing all this data. Second, you need to deliver those files to OpenVPN client. The first step is common between Android and iOS, the delivery step instead diverges.

Common preliminary steps

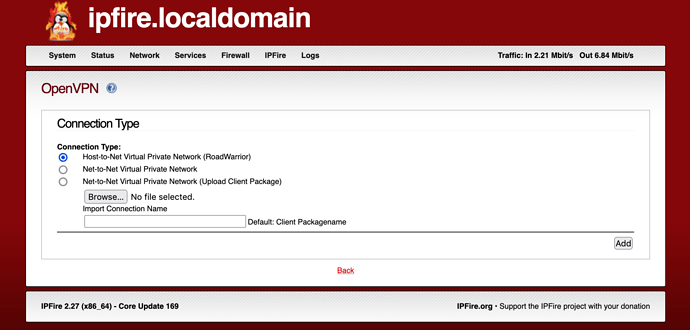
  1. from the Web User Interface, /Services/OpenVPN select add;

  1. Select Host-to-Net Virtual Private Network (RoadWarrior) and Add;

  1. Fill up the form, in particular the Fields with an asterisk and the Organization Name: and save;

  1. Here there is a fork in the road. If you fill up the PKCS12 File Password fields:

  1. after saving you will see that the WUI creates a zip file called Client package

The zip archive contain the following files:

test.p12 <--- CA, private and client certificates
ta.key <--- TA certificate
test-TO-IPFire.ovpn <--- configuration file

This is the best way to communicate the 5 pieces of information to OpenVPN connect, because the sensitive parts (the private and client certificates) are encrypted and password protected. Instead:

  1. If PKCS12 File Password fields is left empty in step 4, after saving there will be a second zip archive called insecure client package

which will contain the following files:

cacert.pem <--- Certificate Autority (CA)
test2.pem <--- Client certificate
test2-TO-IPFire.ovpn <--- configuration file
ta.key <--- TA certificate
test2.key <--- Private Key

All 5 piece of information here are unencrypted and in the open. Thus, OpenVPN connect will have everything it needs just by importing the .ovpn configuration file, as all the certificates are embedded inside the file. Therefore, you could have a functional installation for Android or iOS by just delivering this insecure version of the .ovpn file. This should be avoided and therefore this tutorial will show only how to accomplish the goal of a successful roadwarrior connection in a secure way (with the certificates encrypted and protected by the OS).

Now that you have created all the configuration files, you need to deliver them to OpenVPN client. We shall see in the next sections how to do this for both Android and iOS devices.

Android How-to

The following steps are tested in a stock android but they should work for any Android variant.

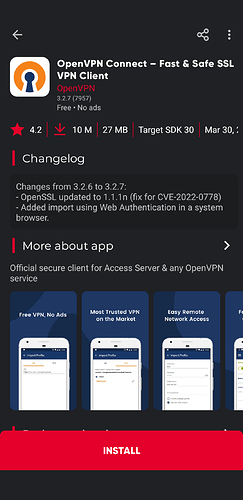
  1. First, Install from Google Store OpenVPN connect

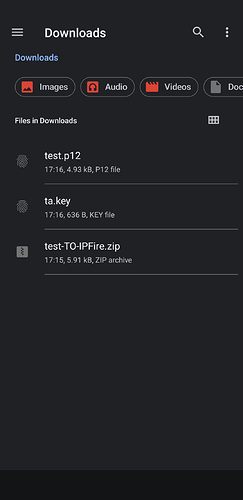
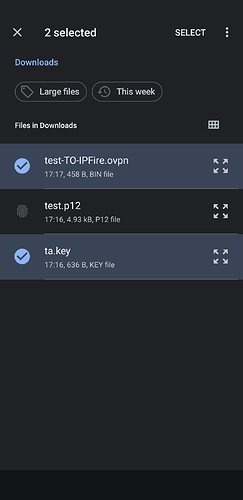
  1. Deliver the content of the client package from step 5 of the “Common preliminary steps” section to any folder you like in the android machine. Here I sent to myself an email with those 3 files in attachment and downloaded them in the Download folder (shown here with the stock Files app).

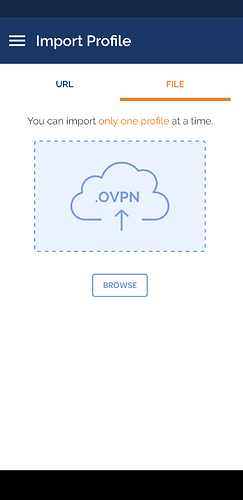
  1. Open OpenVPN connect client app and go to Import Profile/File

  1. Find the Download folder and select test.p12 file (the main certificates, encrypted)

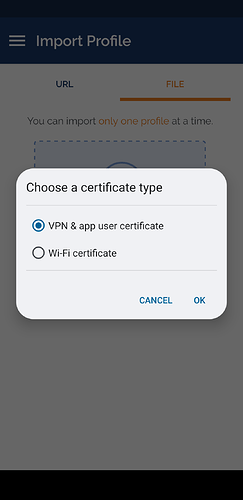
  1. Choose VPN & app user certificate

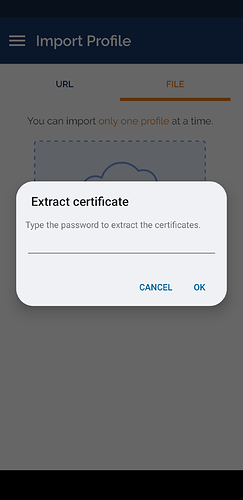
  1. Enter the password you have previously chosen

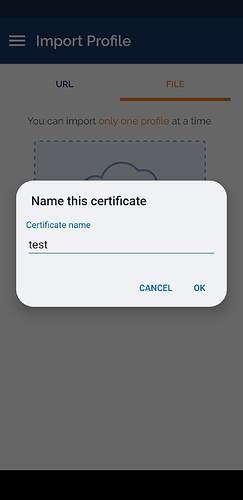
  2. Choose a name for the certificates bundle

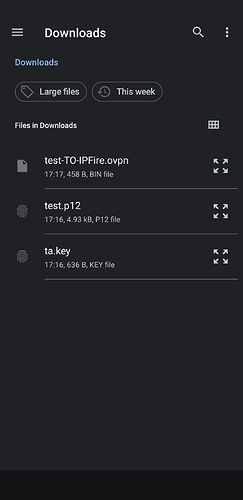
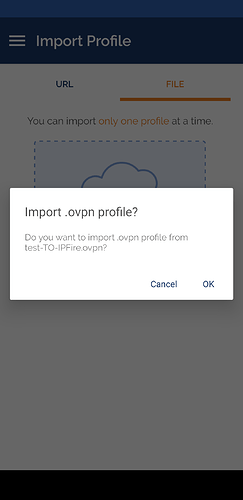
  1. Now import the .ovpn configuration file and the ta.key certificate, select both at the same time, otherwise the ta.key will not be found

  1. Select OK

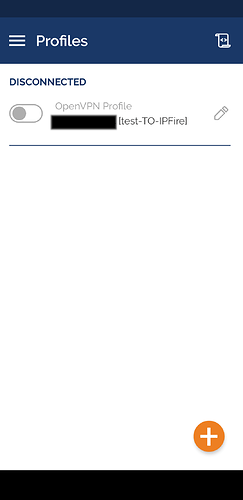
  1. The profile now has been imported, just choose Add

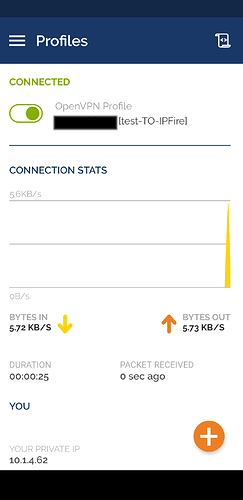
  1. you will see the profile ready to be activated

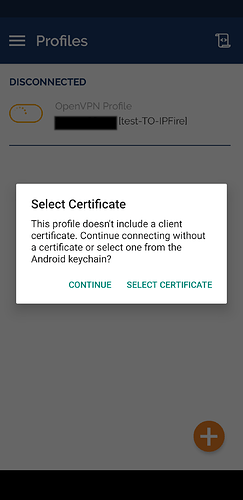
  1. Activate and choose SELECT CERTIFICATE

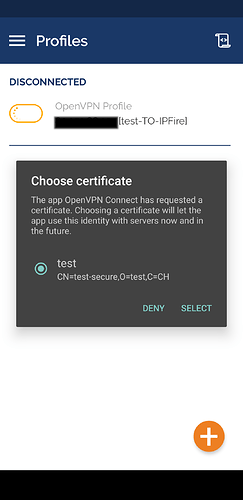
  1. Now OpenVPN connect will ask you which certificate you want to associate to this profile. You will see the one you have previously imported.

  1. Select, and success!!!

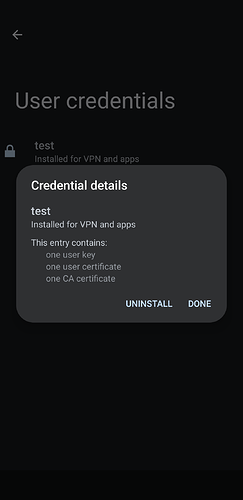
If you decide to delete the profile, the certificate will not be removed as it is protected by the Operating System. To remove it you need to go to Options\Security\Encryption & Credentials\User Credentials, there you can remove the certificate:

There is no mechanism for OpenVPN connect to communicate to any other App the use of a proxy server. For this you need to input the information in the WiFi or APN configuration file. You can find many tutorials online to accomplish this task. This is not true for iOS, which can be easily configured to relay this information to other apps, as we shall see in the next section.

The two factor authentication scheme is not supported at the moment for mobile devices.

iOS How-to

This tutorial has been tested with iOS 10.3.3 (ancient history), however it should work well also in modern versions. For iOS the setting is complicated by the fact that the OS does not make available the certificate authority (CA) from the .p12 bundle, therefore we need to extract the CA certificate and modify the .ovpn file to add a pointer to it.

  1. First, Install from Apple Store OpenVPN connect on your iOS machine;

  2. Deliver the content of the client package from step 5 of the “Common preliminary steps” section to any folder of your desktop or laptop where you also have installed openssl; after unzipping the package and changing directory to the unzipped folder, issue the following openssl command from the console:

openssl pkcs12 -in ios.p12 -cacerts -nokeys -out cacert.pem

It does not matter how you call the certificate, as long as you correctly point to it in the next step.

  1. edit with a text editor the .ovpn file. You need to introduce a link to the cacert file (here I put it below the tls-auth directive, but it should not matter where you place it):
tls-auth ta.key # <--- already present
ca cacert.pem # <--- add this, pointing to the cacert as you called it in the opnessl command
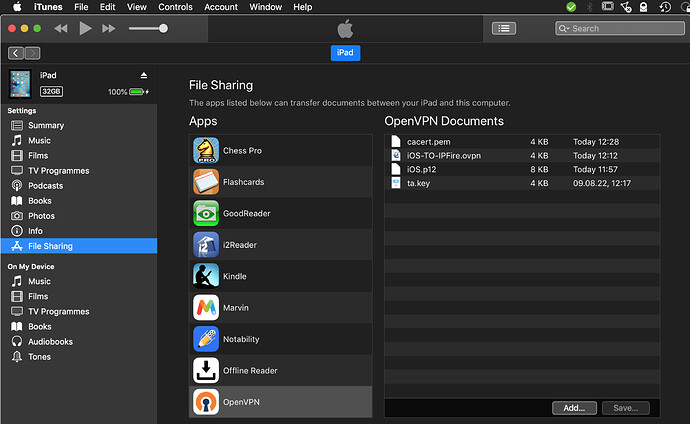
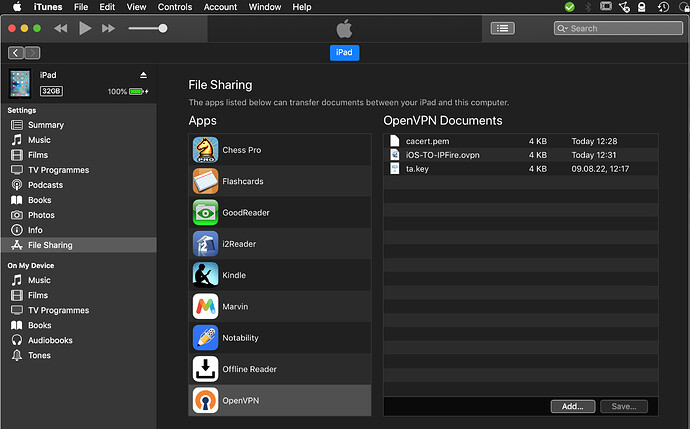
  1. Connect the iOS machine with a USB cable to your desktop/laptop and start iTunes. Using the file sharing section of iTunes, deliver into the OpenVPN connect folder the client package content, including the CA certificate and the modified .ovpn configuration file from previous steps:

  1. From the iOS machine, start OpenVPN connect

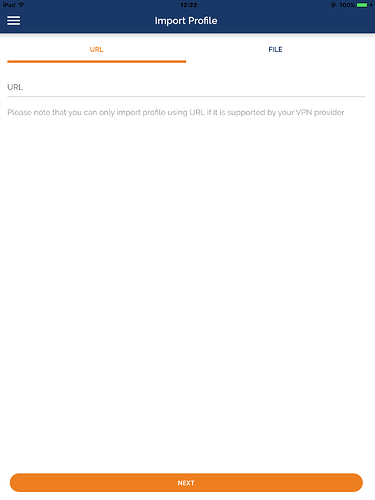
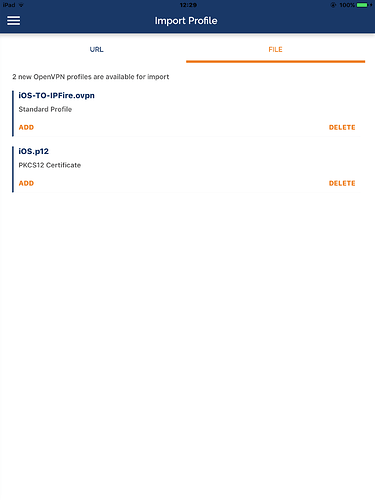
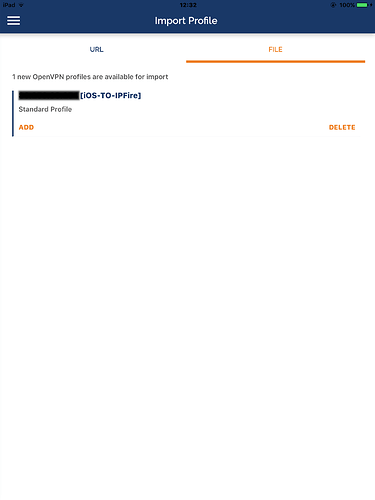
  1. Automatically the app will offer the possibility to import the configuration file and the .p12 certificates bundle:

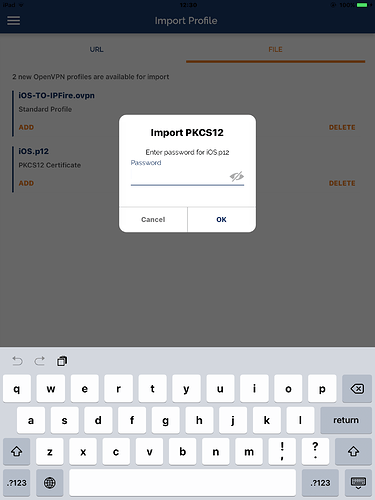
  1. First, import the certificates:

The app will ask for the password protecting the certificates you have entered in step 4 of the “Common preliminary steps” section; after you will be asked to save the certificate in the secure enclave of iOS:

You will be asked the pin protecting the iOS machine;

  1. Now the certificate has been imported and you will notice how the .p12 file has disappeared from iTunes window:

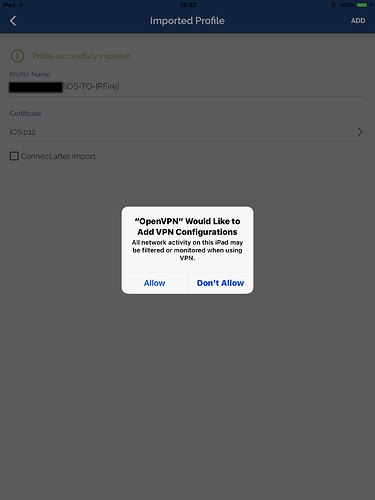
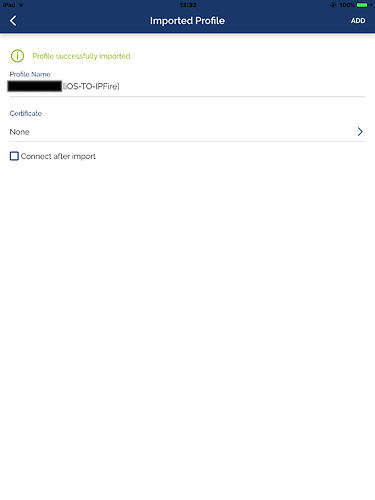
  1. Click ADD to import the .ovpn file

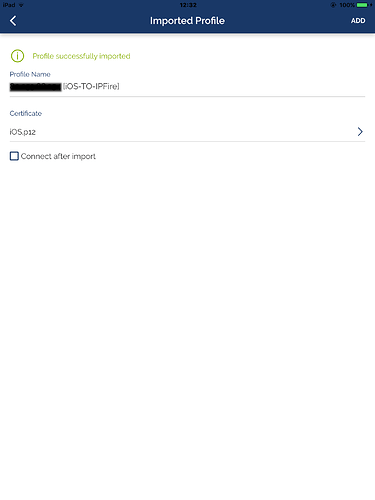
  2. Now you have to link to the profile the certificate previously imported:

You will find it listed in the Certificate section (select the symbol >) and click ADD:

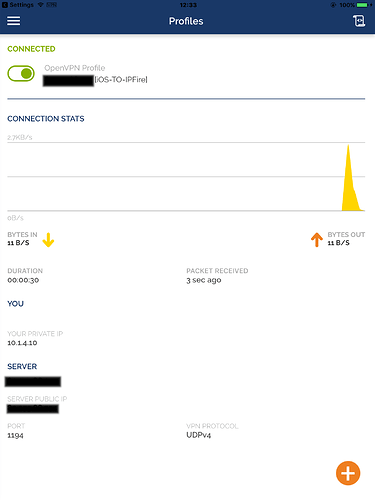
  1. Ready to connect:

  1. Success!

To have an automatic configuration for a proxy server in the OpenVPN tunnels, add the following directives to the .ovpn file before importing it:

dhcp-option PROXY_HTTP proxy_ip 800
dhcp-option PROXY_HTTPS proxy_ip 800

where proxy_ip is the IPFire local IP where squid is running.

In alternative, you can push this directive to any client adding the following directive to /var/ipfire/ovpn/scripts/server.conf.local, assuming you have selected Additional configuration from the Web User Interface Services/OpenVPN/Advanced server options

push "dhcp-option PROXY_HTTP proxy_ip 800"
push "dhcp-option PROXY_HTTPS proxy_ip 800"

Contrary to android, you can delete the certificates (if you so desire) from inside OpenVPN connect app, in the certificates section of the app.

Links

3 Likes

Not by me. I have tested everything in OpenVPN connect. I won’t repeat the job for another client. Someone else will have to continue this work. However, for Android and iOS OpenVPN connect works well enough.

Thank you for your reply.
Could you please test it with “Enable OTP” checked?

1 Like

Tested in android and it seems to me that it is not supported. The client is stuck waiting for the server to respond to a push request. I assume the client is the problem . I did a brief search and it seems to me that it is supported only on desktop app (windows and MacOS), I did not see any positive result on the mobile front.

Here the logs

09:50:09 openvpnserver[8037]:  130.223.148.213:47916 PUSH: Received control message: 'PUSH_REQUEST'
09:50:10 openvpnserver[8037]:  130.223.148.213:47916 PUSH: Received control message: 'PUSH_REQUEST'
09:50:12 openvpnserver[8037]:  130.223.148.213:47916 PUSH: Received control message: 'PUSH_REQUEST'

Do the mobile platforms even have an app “community edition”? I do not see anything like that in google store.

Edit, I found the answer, the “community edition” for Android is the app maintained by Arne Schwabe. I will test it for the 2FA functionality when I will find the time. First, I want to finish the howto part, including iOS. I will keep updating the document here.

Edit 2: also Arne Schwabe app failed to ask for the TOTP token, I guess it is not yet implemented

1 Like

That would be perfect to have such a great step-by-step explanation for IOS as well. Thank you so much in advance! :+1:

@jon The tutorial (post 9, ignore post 1) is complete, at least for now. You are welcome to changed it in any way you see fit, if you decide to include it in the wiki.

The 2FA is not working, or I did not manage to make it work. I guess this functionality will be added in the future. I will try to keep the tutorial up to date, but I make no promises. If you find problems or questions, please post them in this thread and I will try to address them.