Roadwarrior configuration for mobile machines using OpenVPN connect client
Introduction
Premise: you have either an Android or an iPhone mobile device and you have installed from the app store OpenVPN connect. You also have a functioning IPFire OpenVPN installation and your goal is to create a roadwarrior tunnel between the server and the mobile device.
OpenVPN connect needs 5 pieces of information:
- the .ovpn configuration file;
- the client certificate;
- the private key;
- the Certificate Authority (CA);
- the TA certificate, HMAC authentication key (tls-auth).
First, you need to create the files, collectively containing all this data. Second, you need to deliver those files to OpenVPN client. The first step is common between Android and iOS, the delivery step instead diverges.
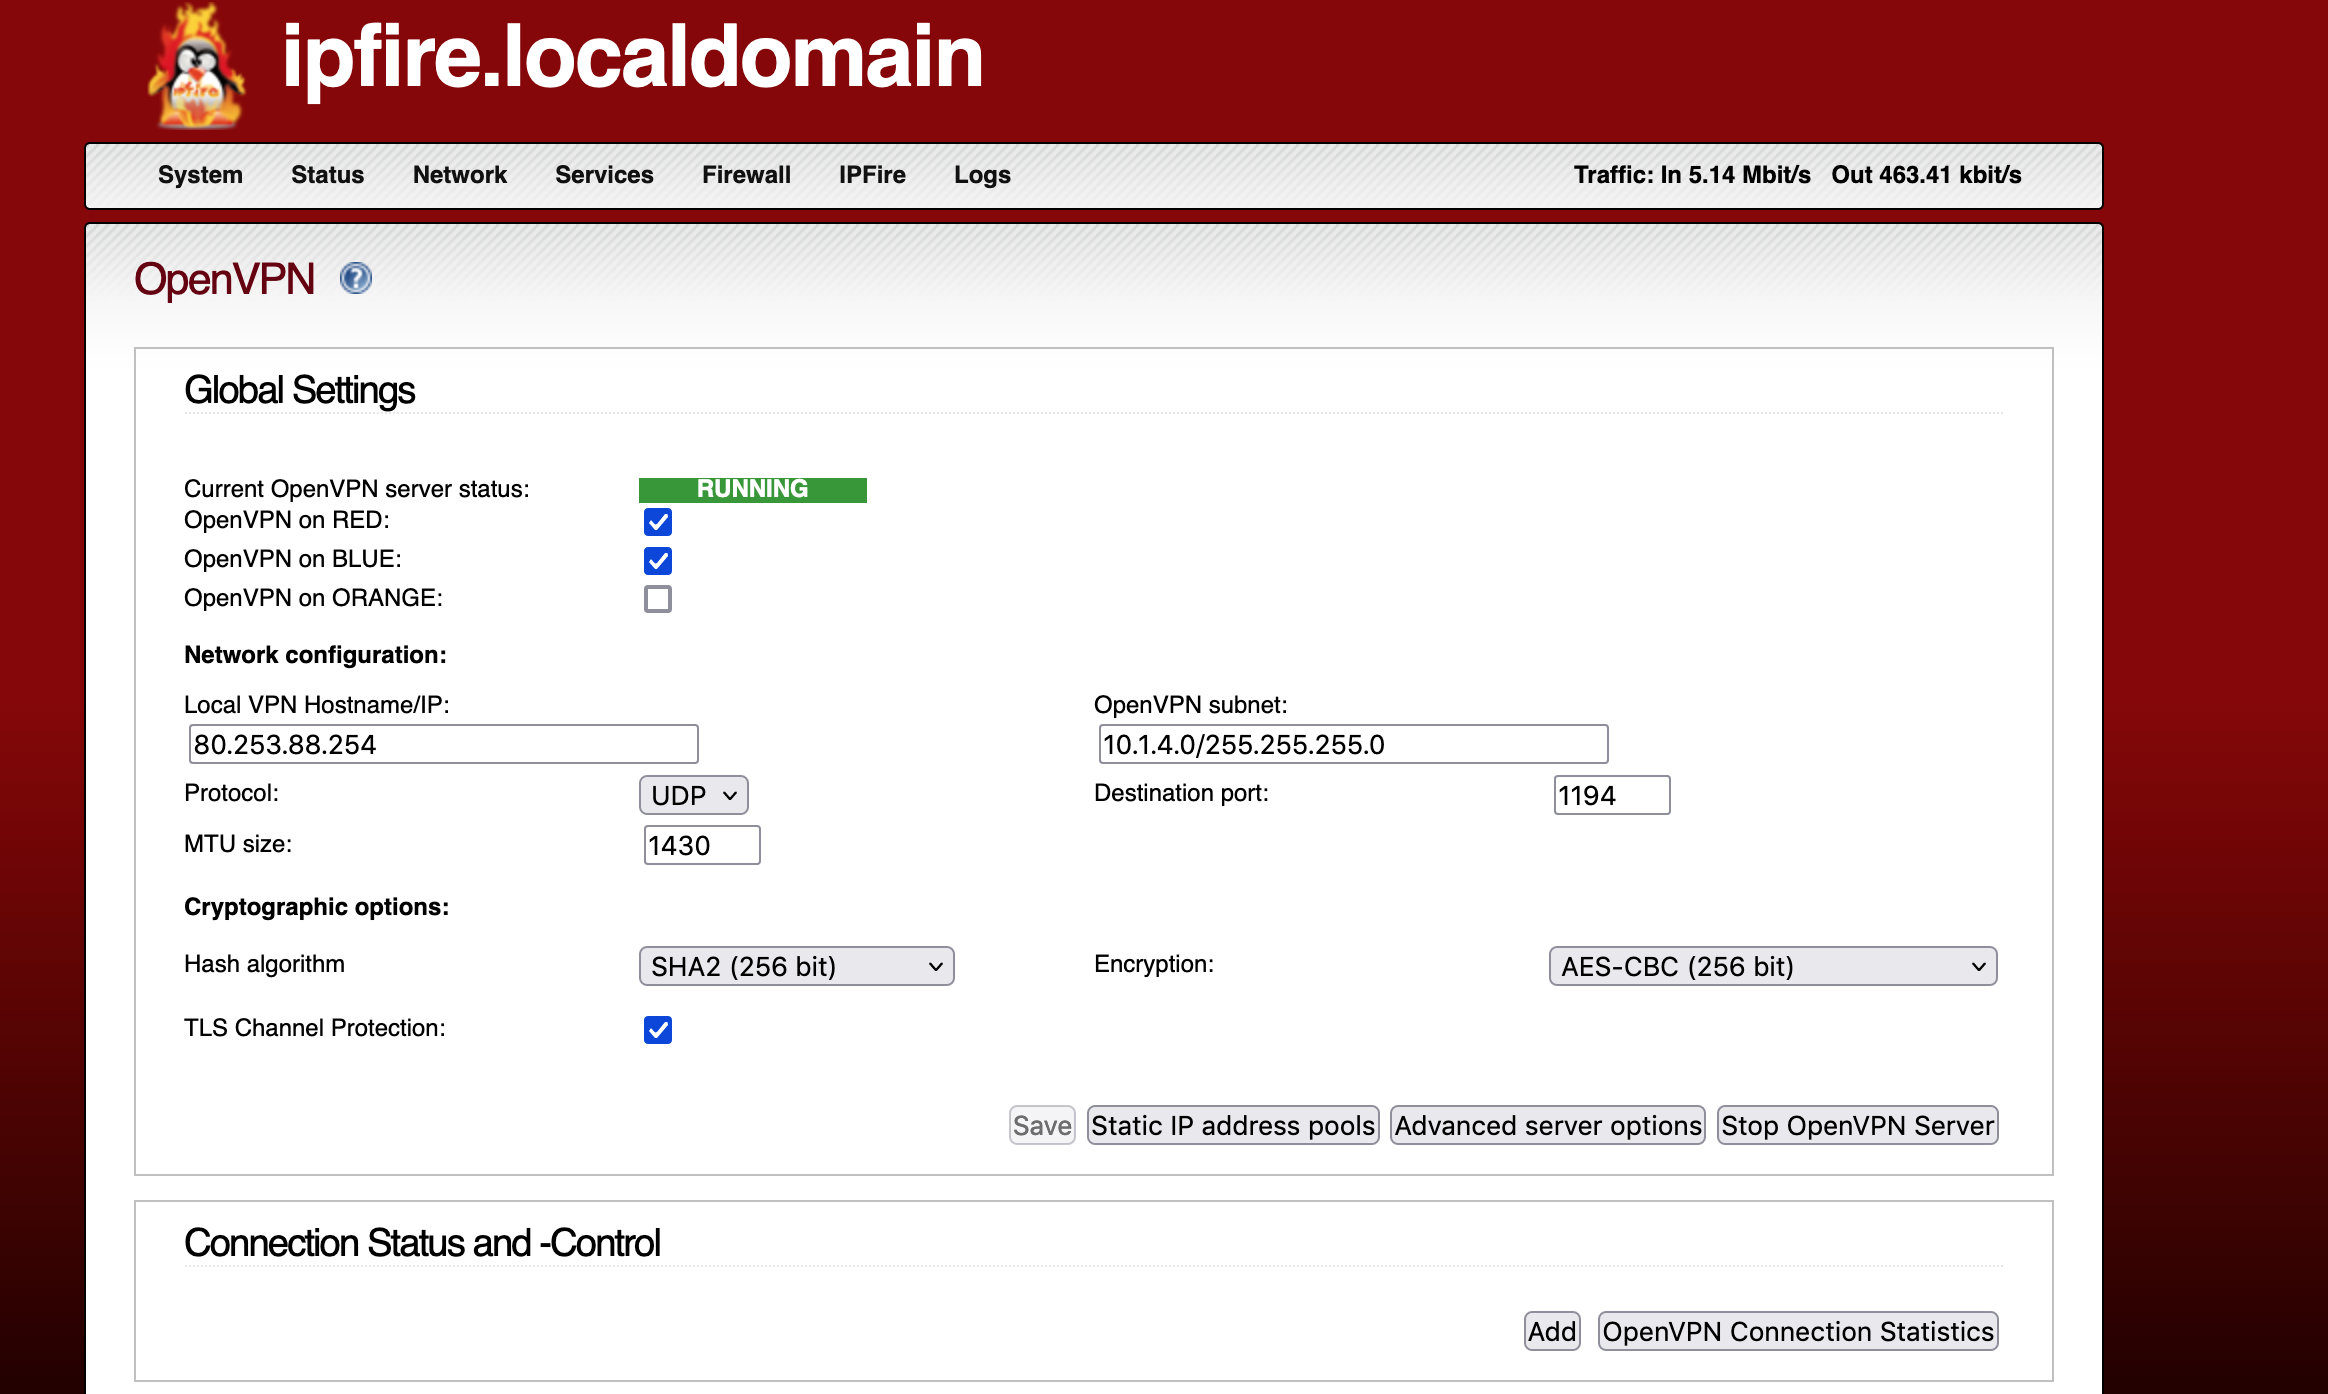
Common preliminary steps
- from the Web User Interface,
/Services/OpenVPNselectadd;
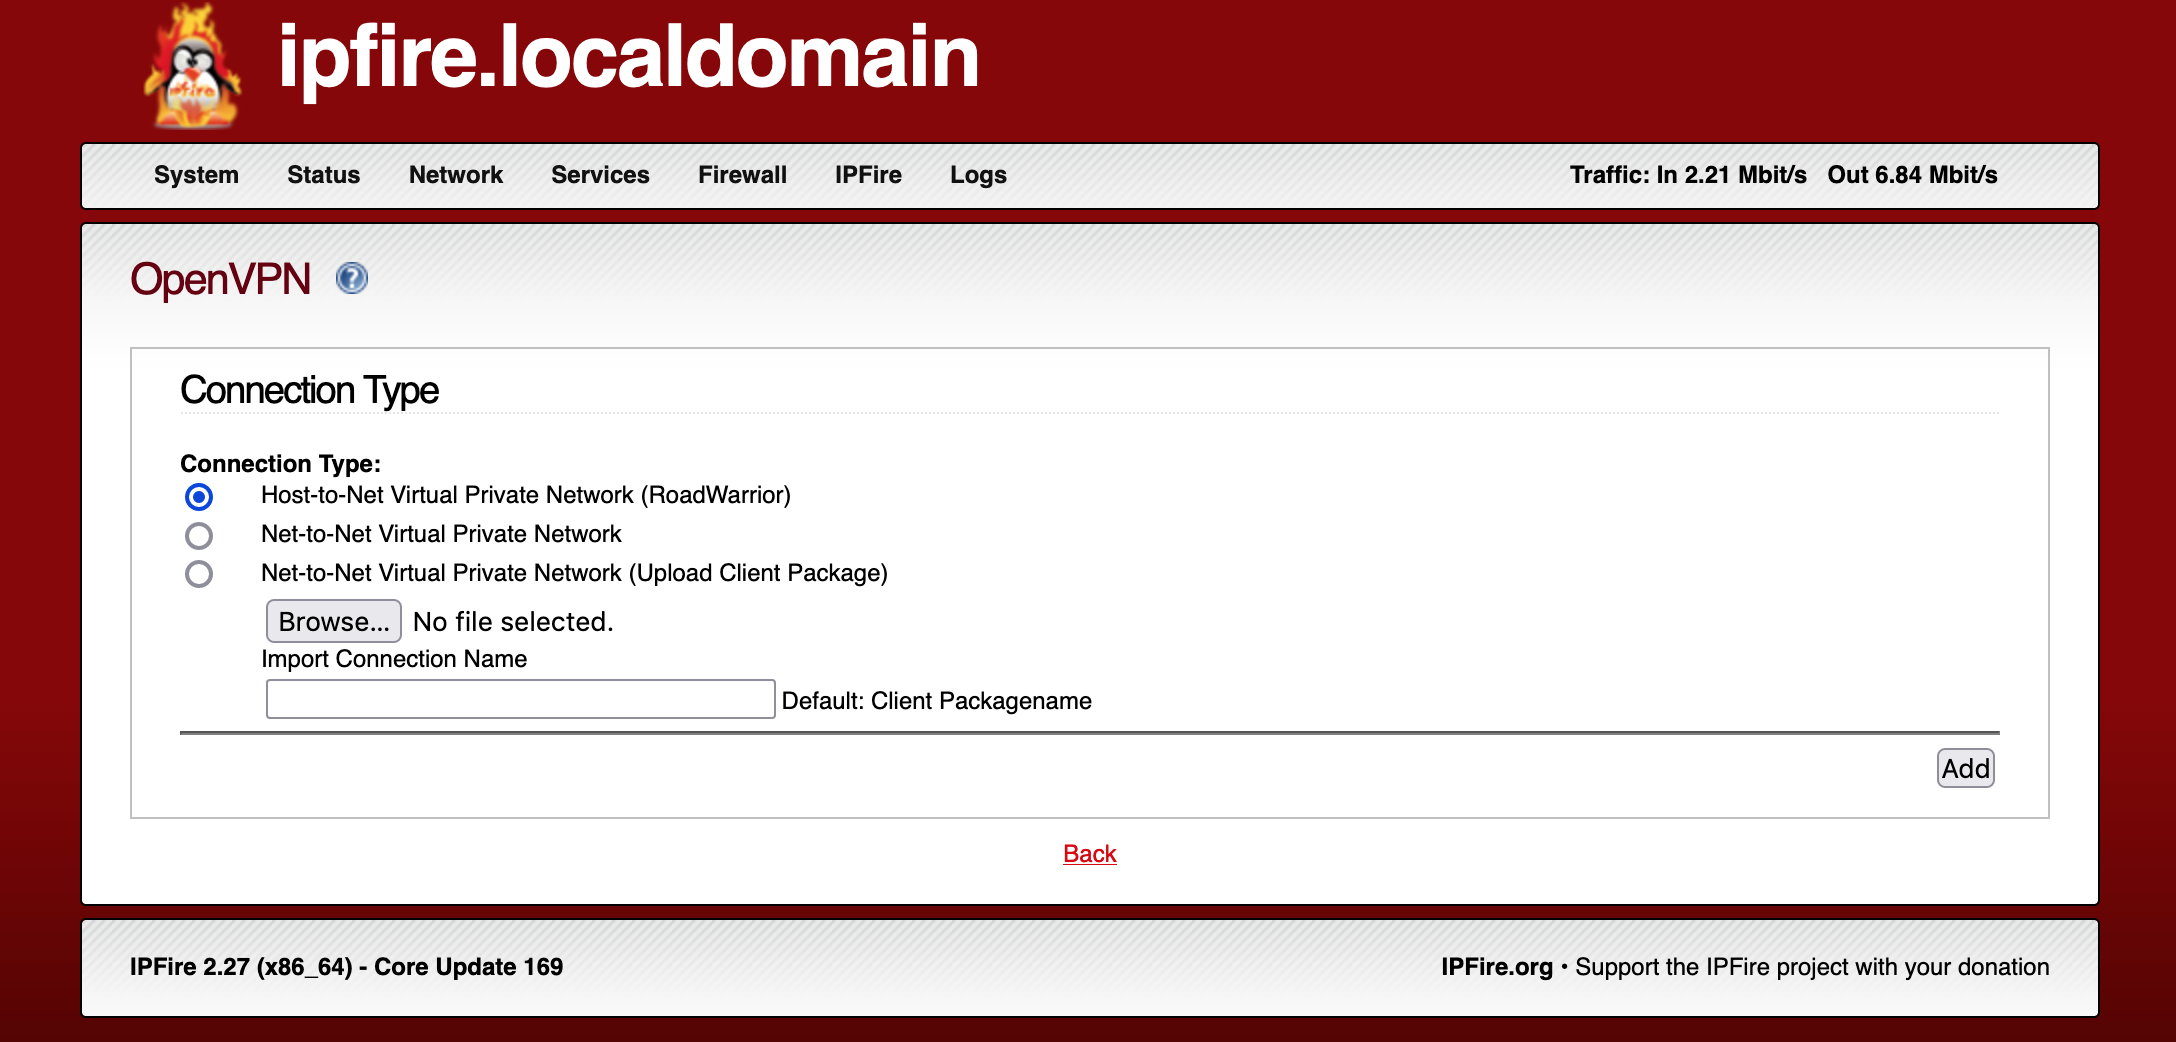
- Select
Host-to-Net Virtual Private Network (RoadWarrior)andAdd;
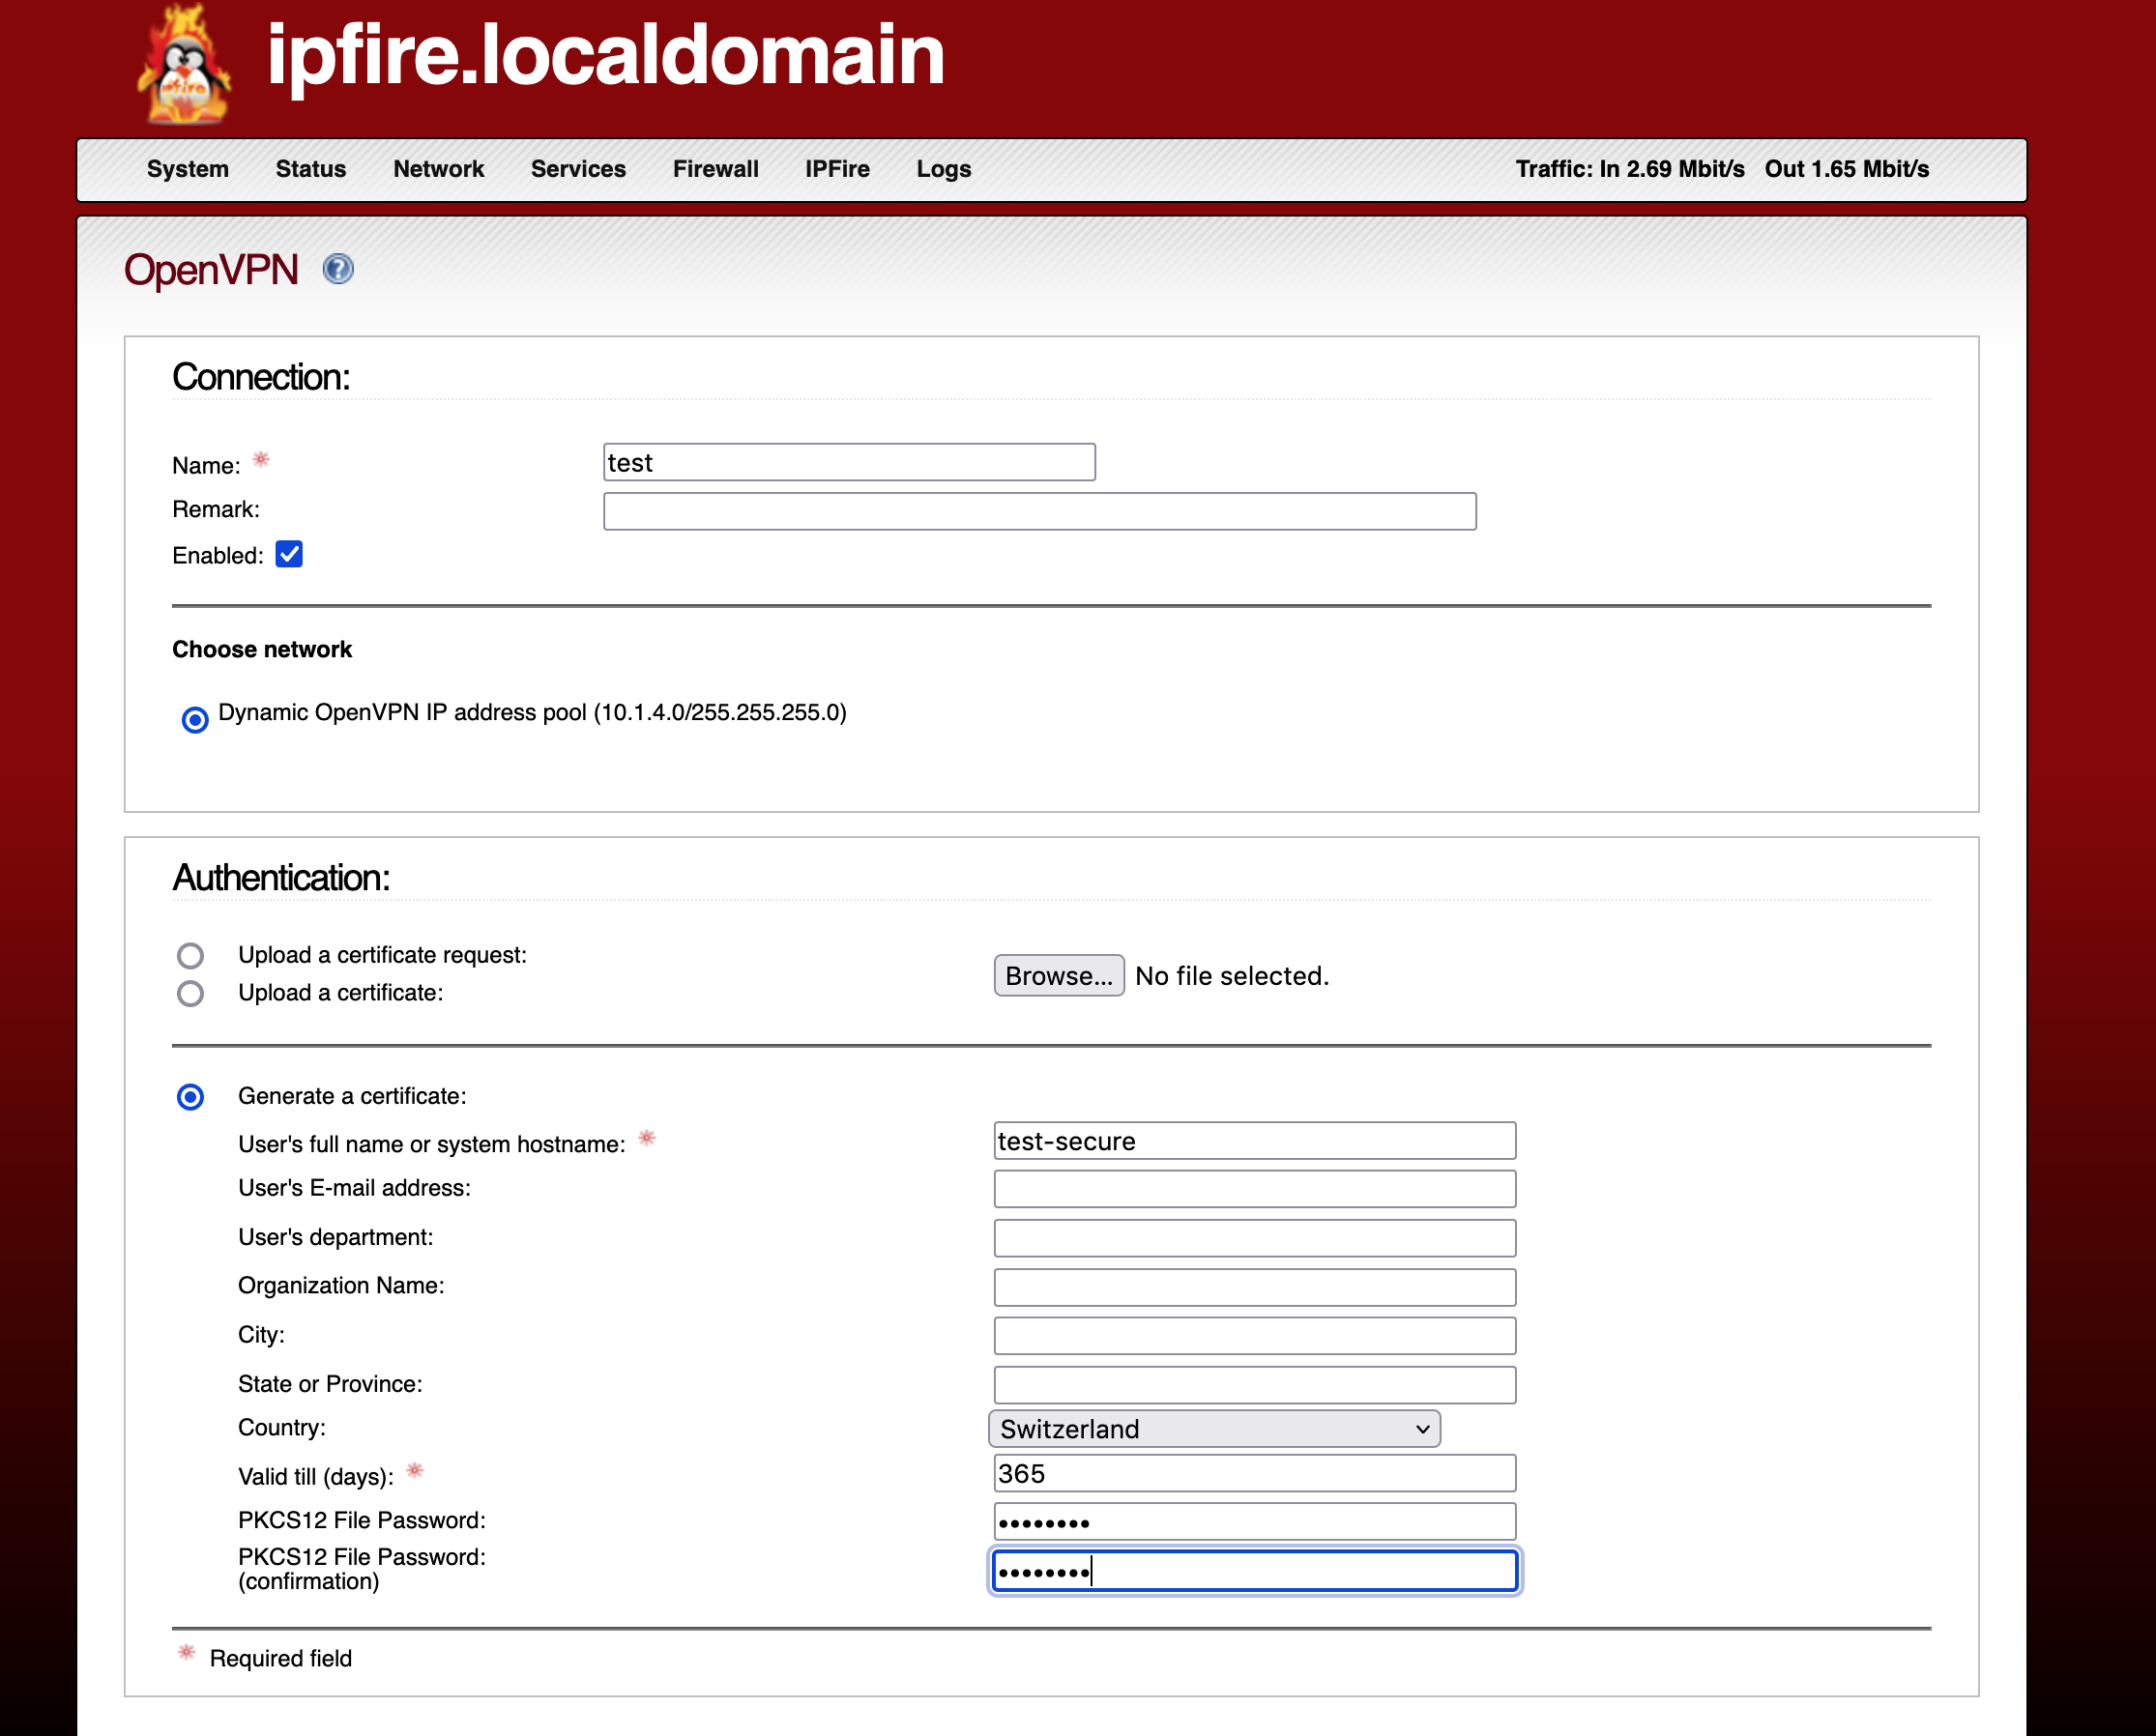
- Fill up the form, in particular the Fields with an asterisk and the
Organization Name:and save;

- Here there is a fork in the road. If you fill up the
PKCS12 File Passwordfields:
- after saving you will see that the WUI creates a zip file called
Client package
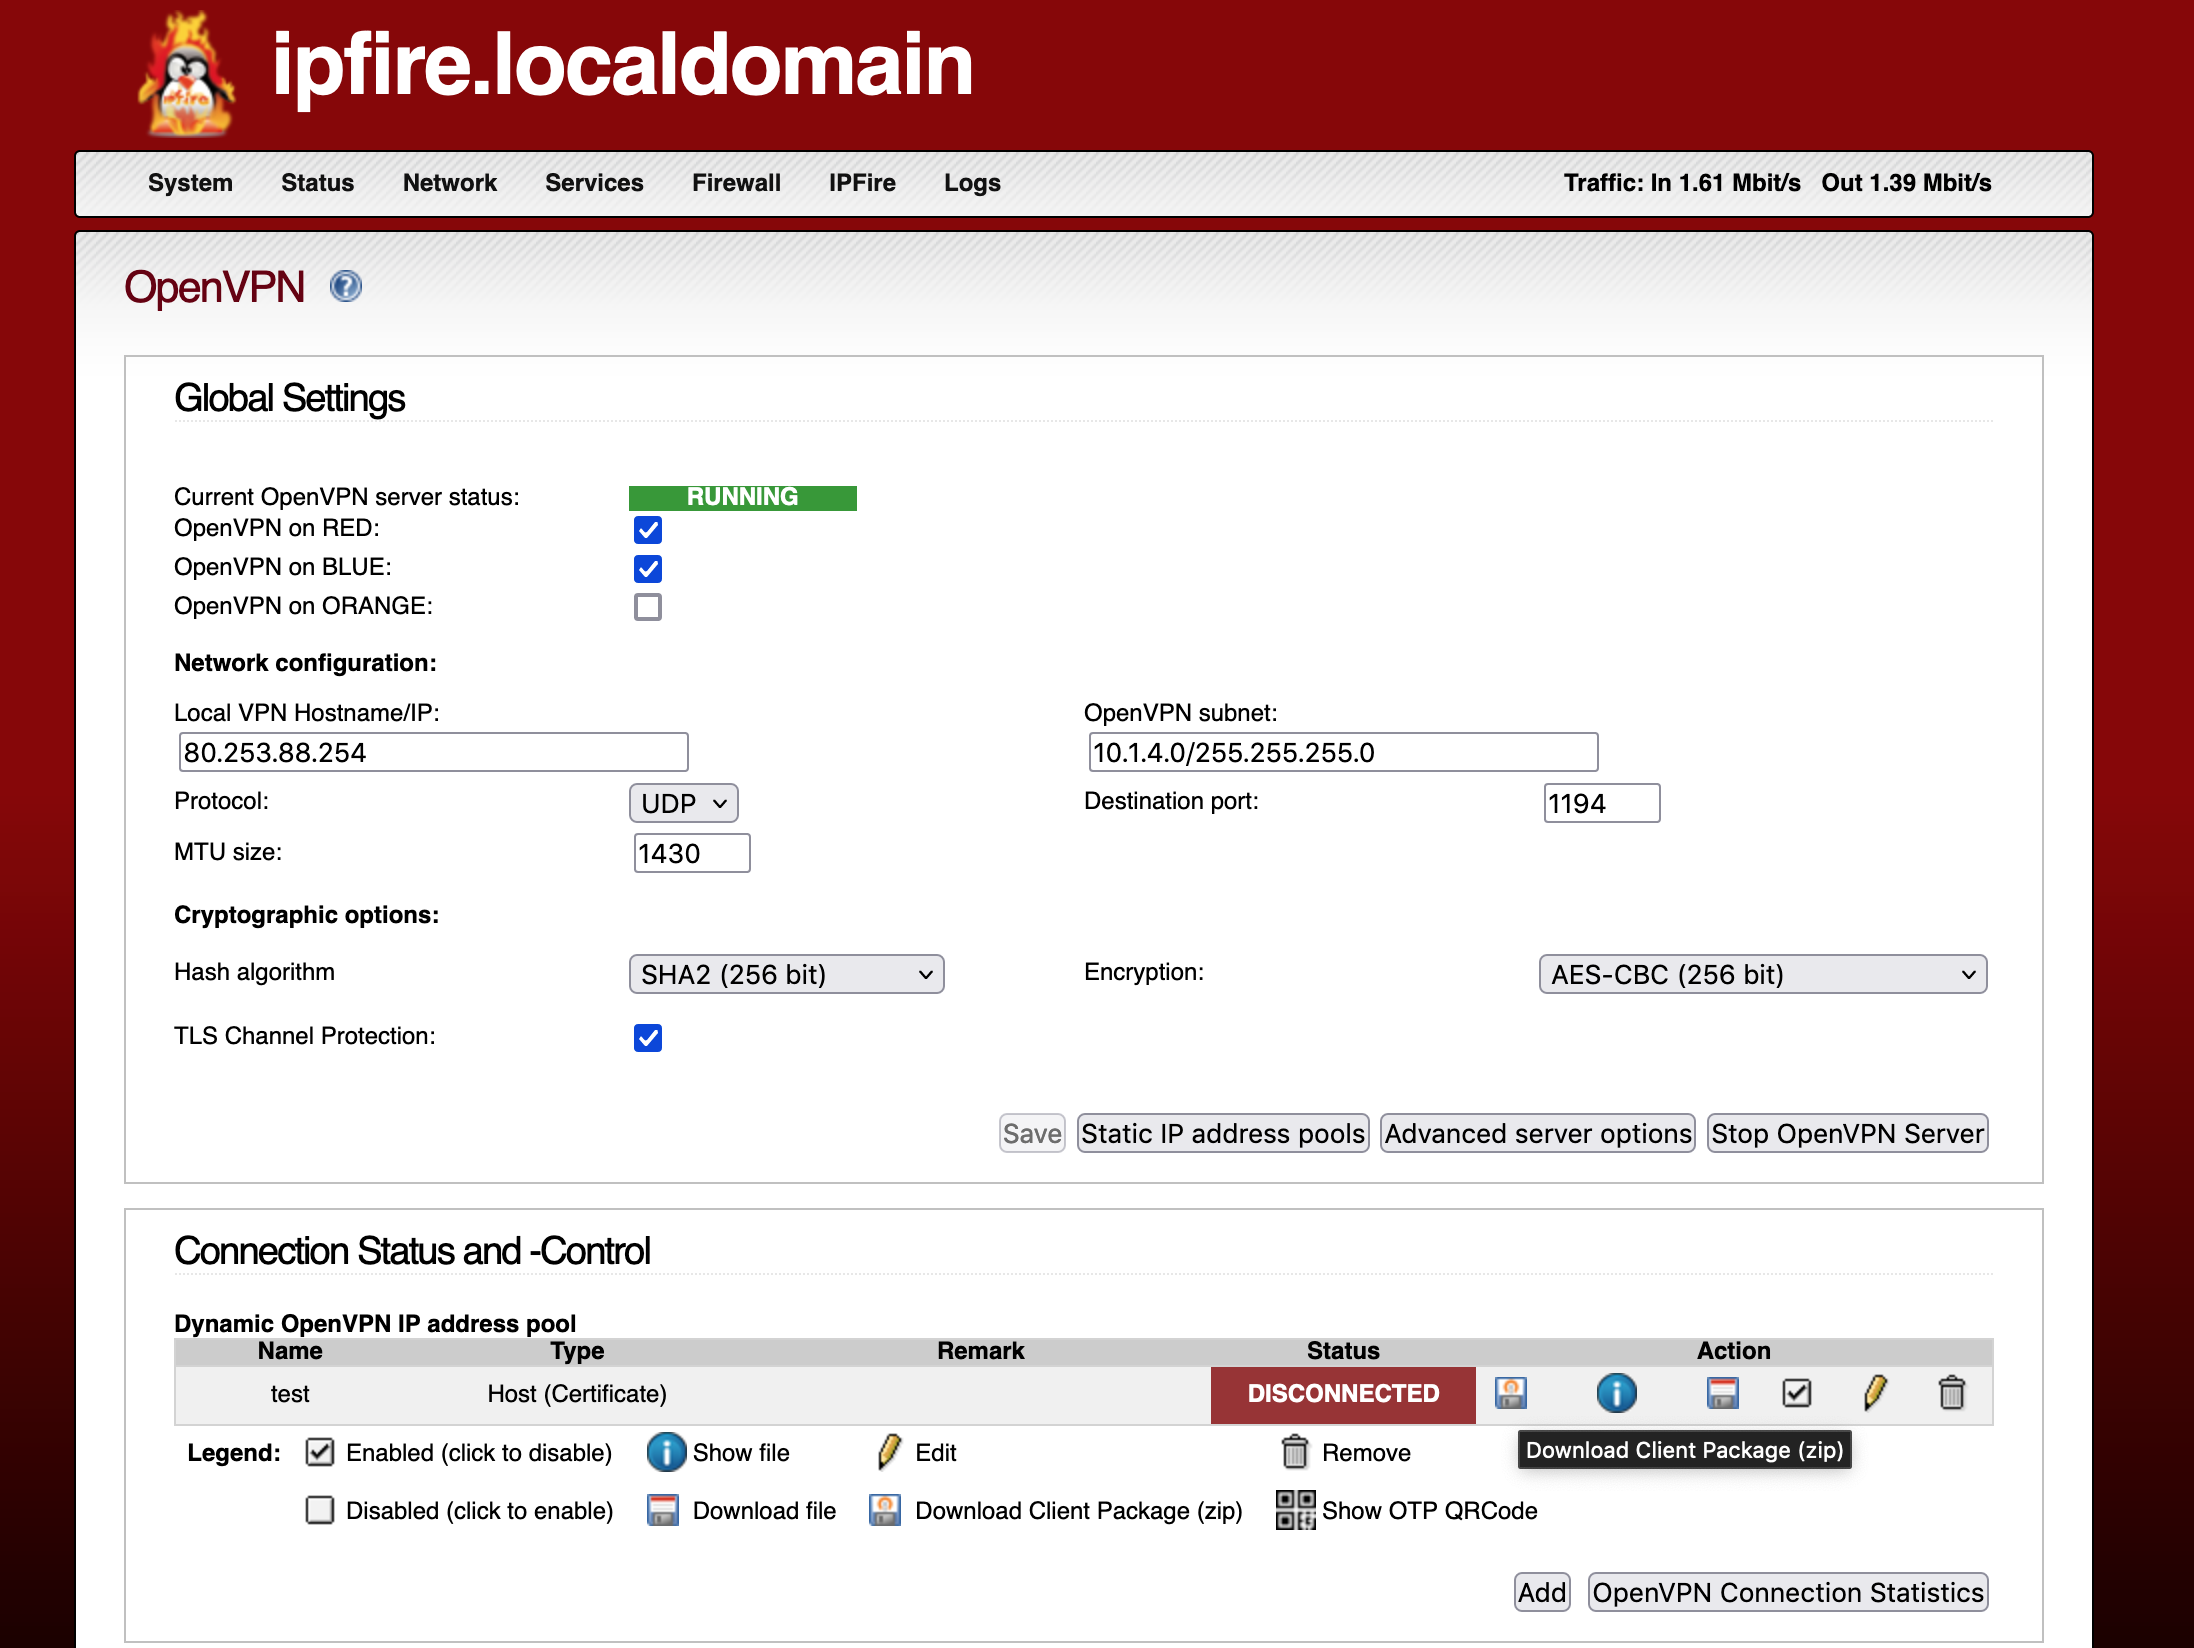
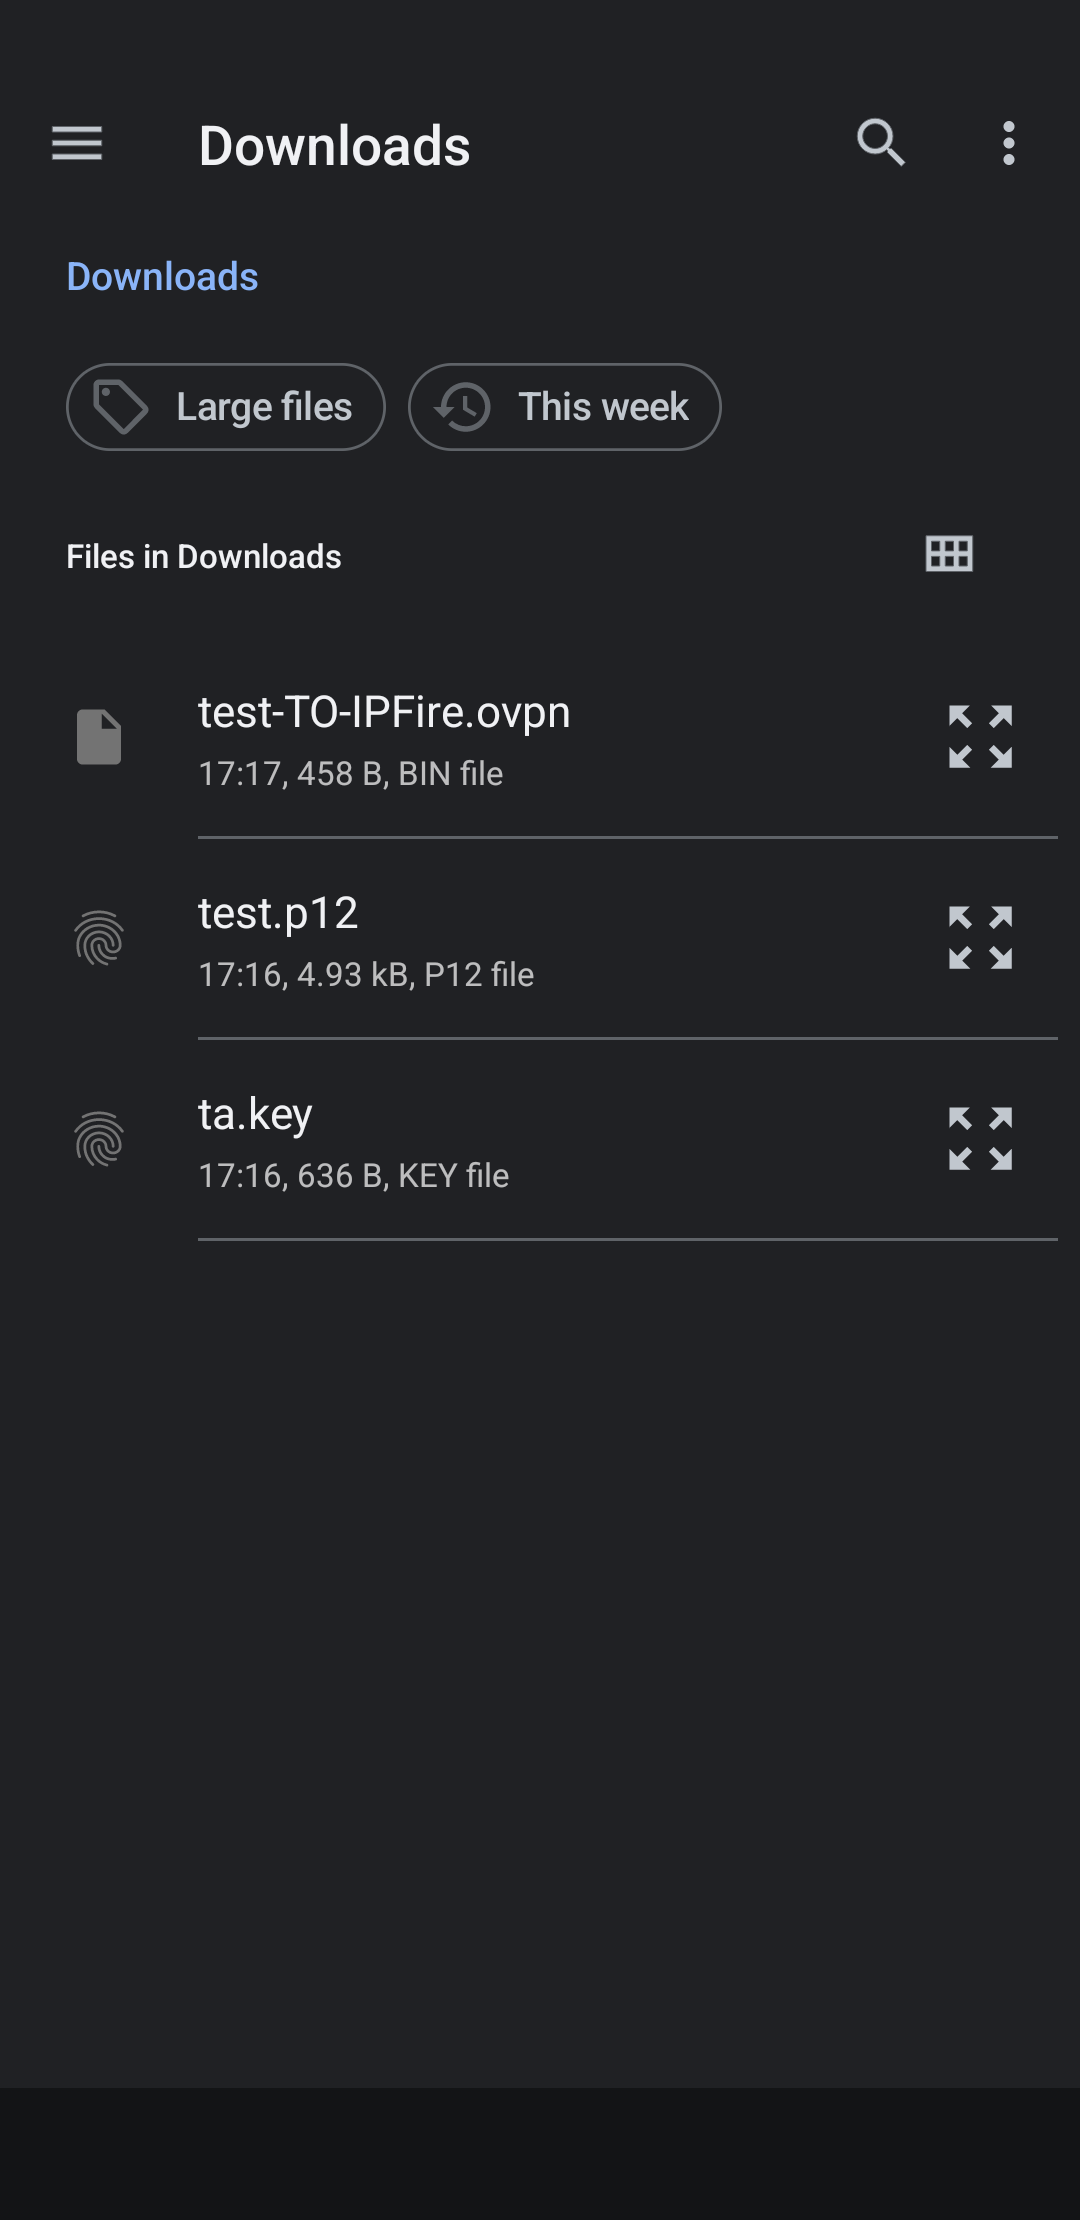
The zip archive contain the following files:
test.p12 <--- CA, private and client certificates
ta.key <--- TA certificate
test-TO-IPFire.ovpn <--- configuration file
This is the best way to communicate the 5 pieces of information to OpenVPN connect, because the sensitive parts (the private and client certificates) are encrypted and password protected. Instead:
- If
PKCS12 File Passwordfields is left empty in step 4, after saving there will be a second zip archive calledinsecure client package
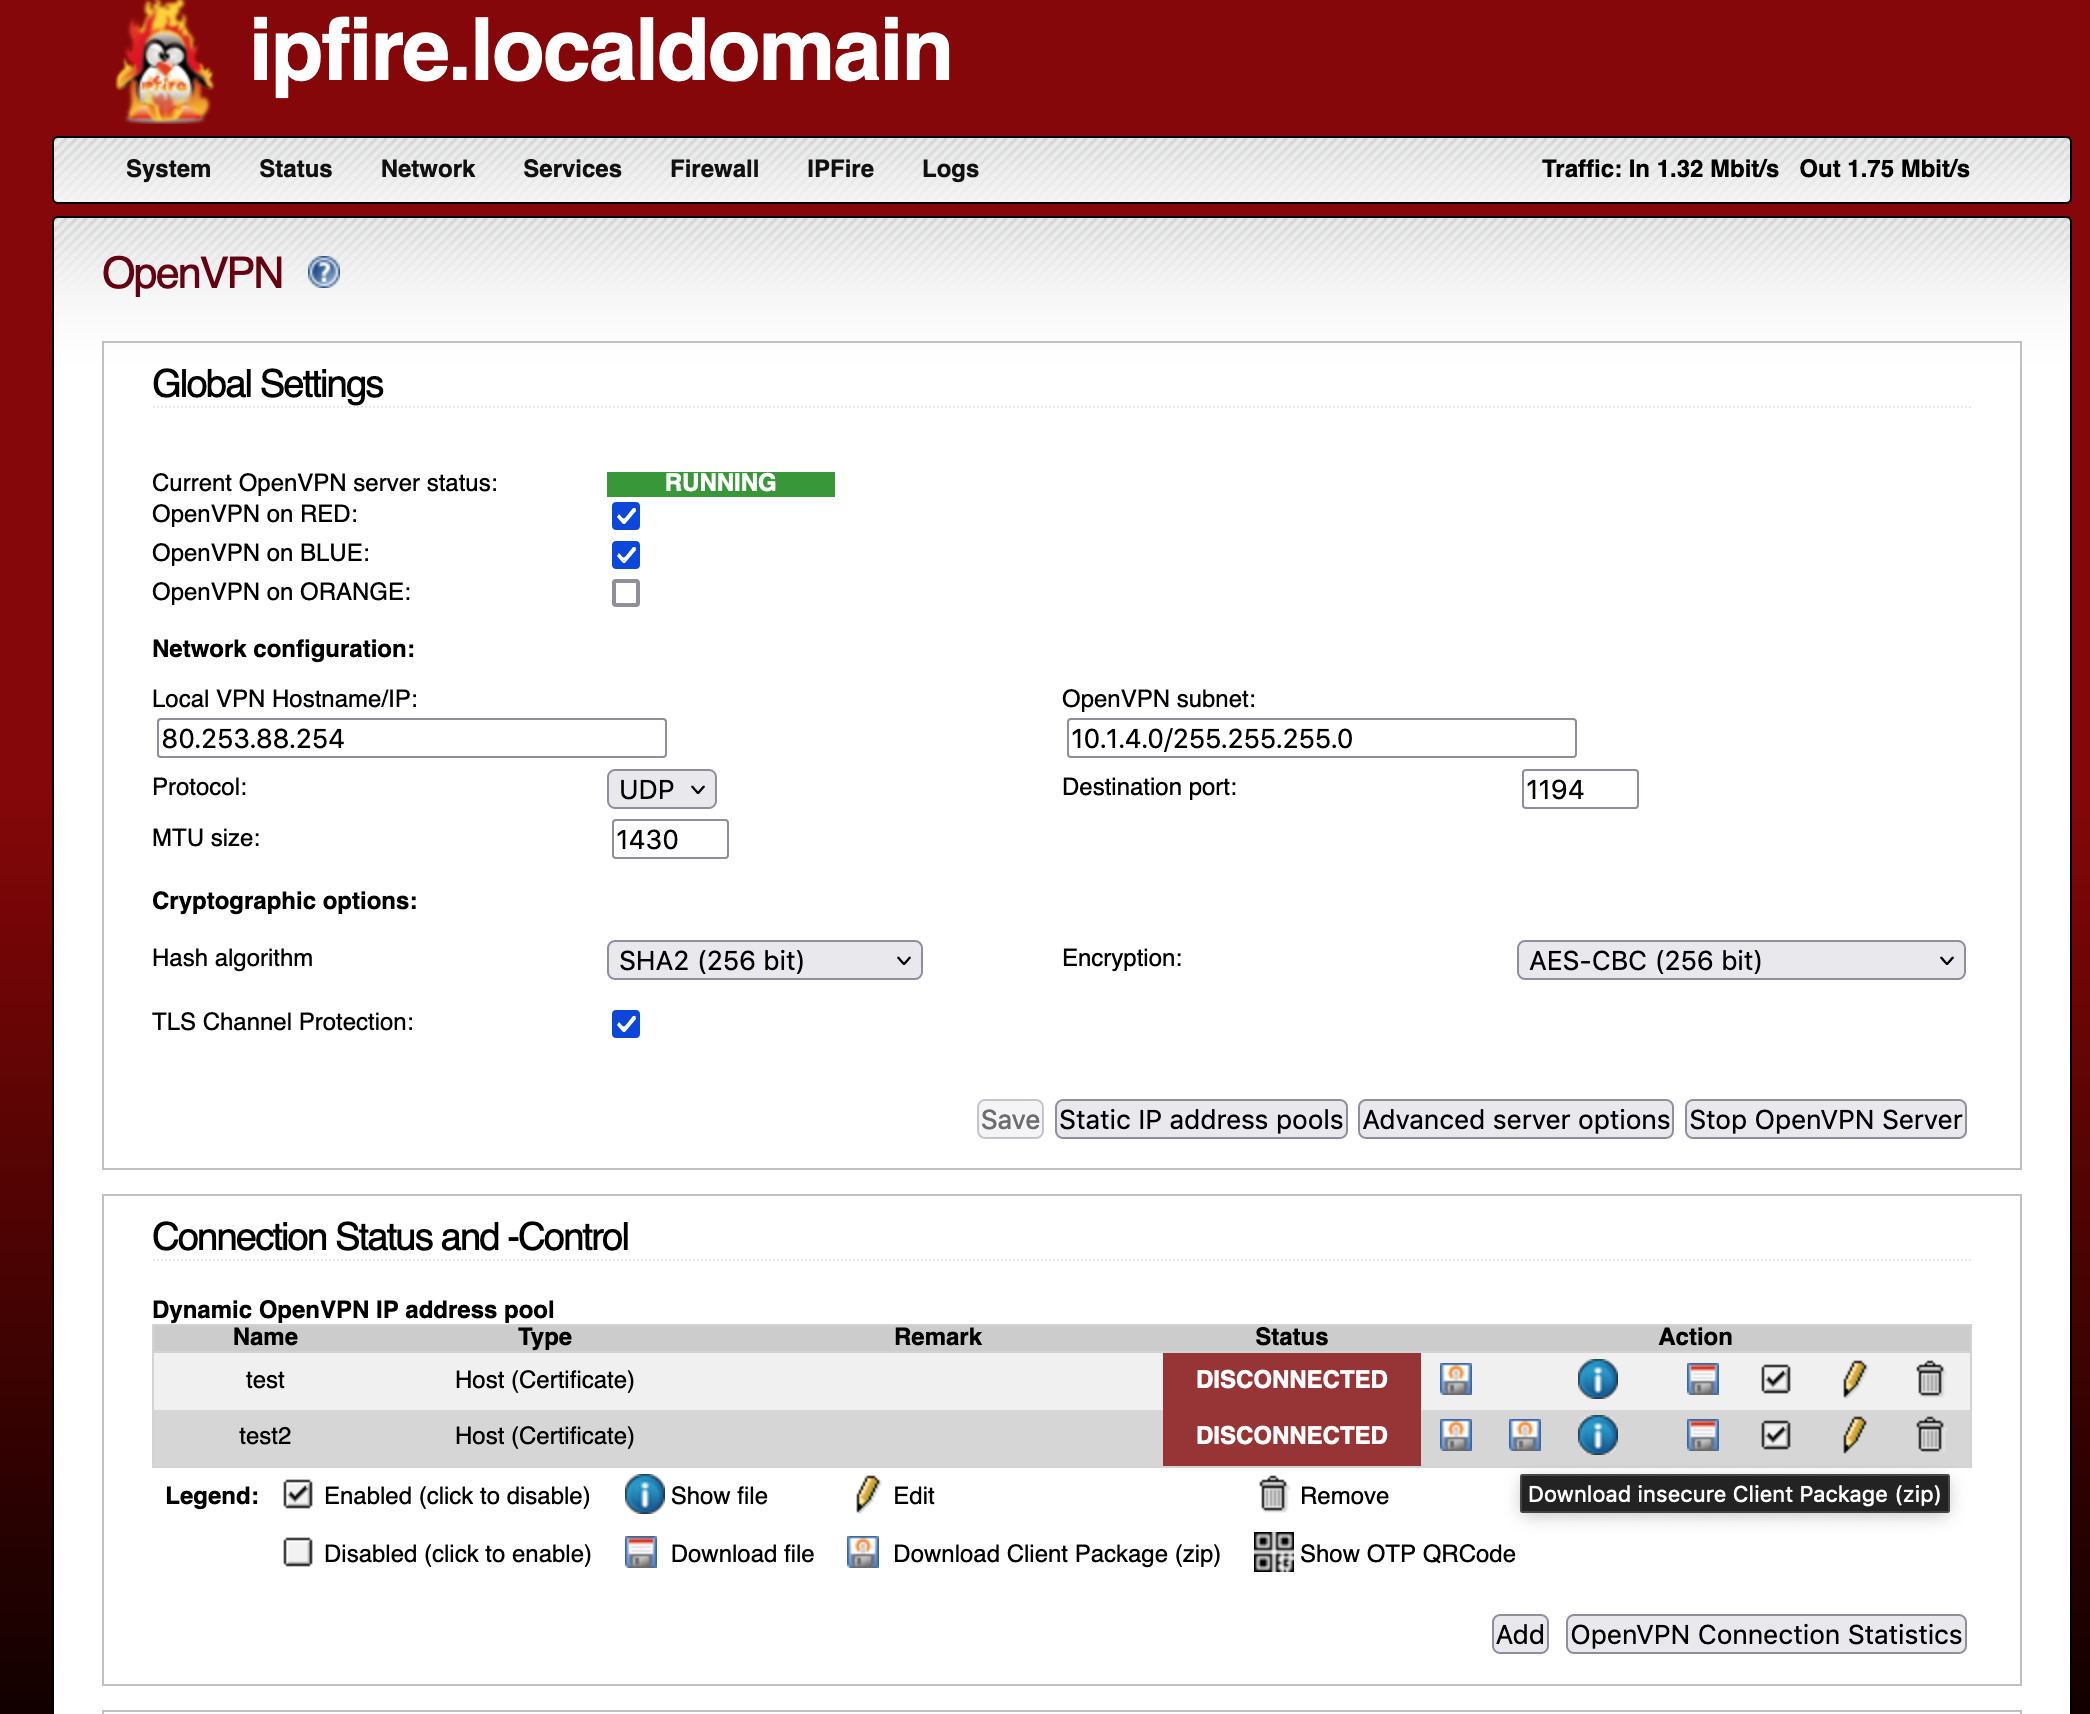
which will contain the following files:
cacert.pem <--- Certificate Autority (CA)
test2.pem <--- Client certificate
test2-TO-IPFire.ovpn <--- configuration file
ta.key <--- TA certificate
test2.key <--- Private Key
All 5 piece of information here are unencrypted and in the open. Thus, OpenVPN connect will have everything it needs just by importing the .ovpn configuration file, as all the certificates are embedded inside the file. Therefore, you could have a functional installation for Android or iOS by just delivering this insecure version of the .ovpn file. This should be avoided and therefore this tutorial will show only how to accomplish the goal of a successful roadwarrior connection in a secure way (with the certificates encrypted and protected by the OS).
Now that you have created all the configuration files, you need to deliver them to OpenVPN client. We shall see in the next sections how to do this for both Android and iOS devices.
Android How-to
The following steps are tested in a stock android but they should work for any Android variant.
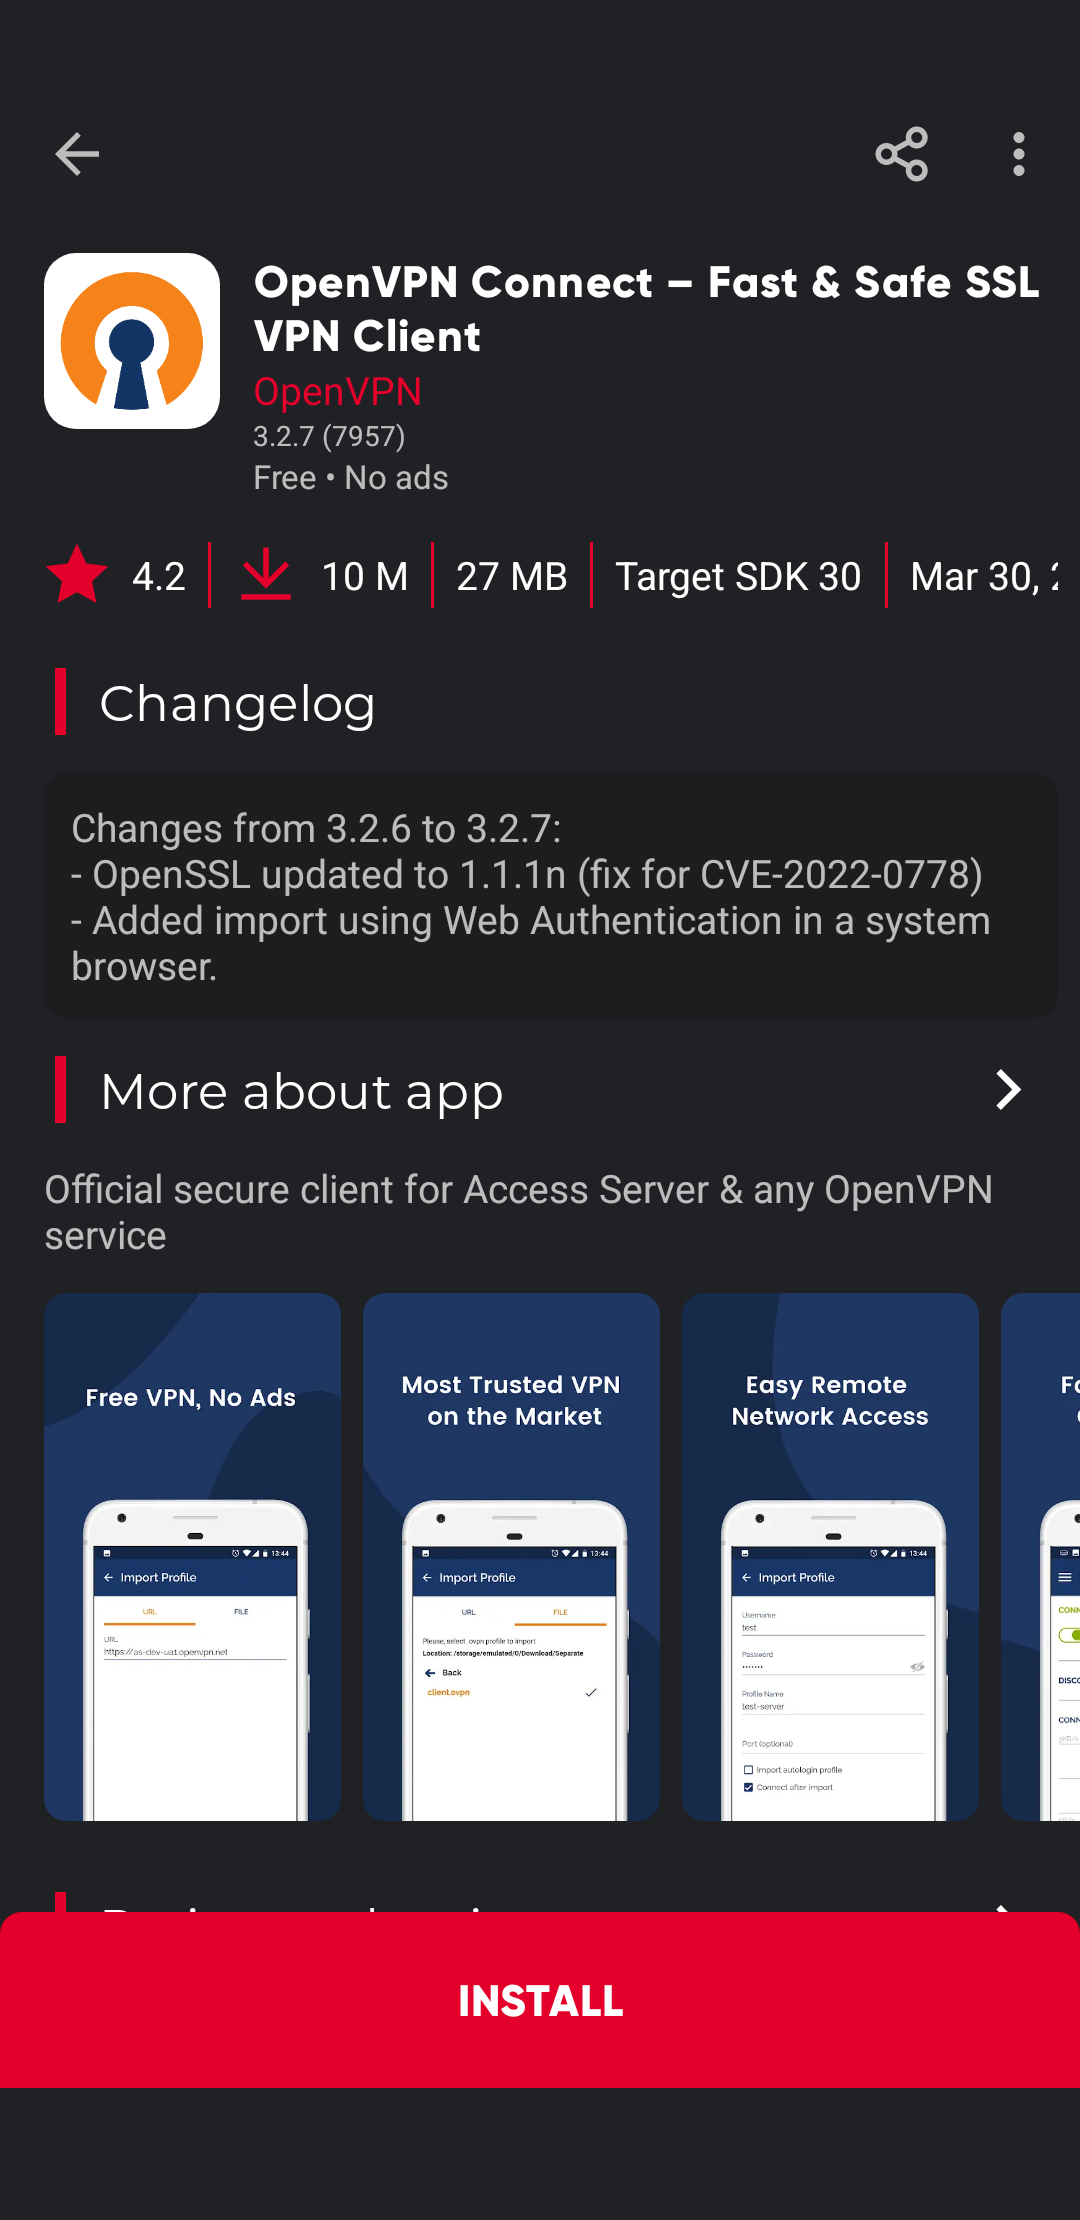
- First, Install from Google Store
OpenVPN connect
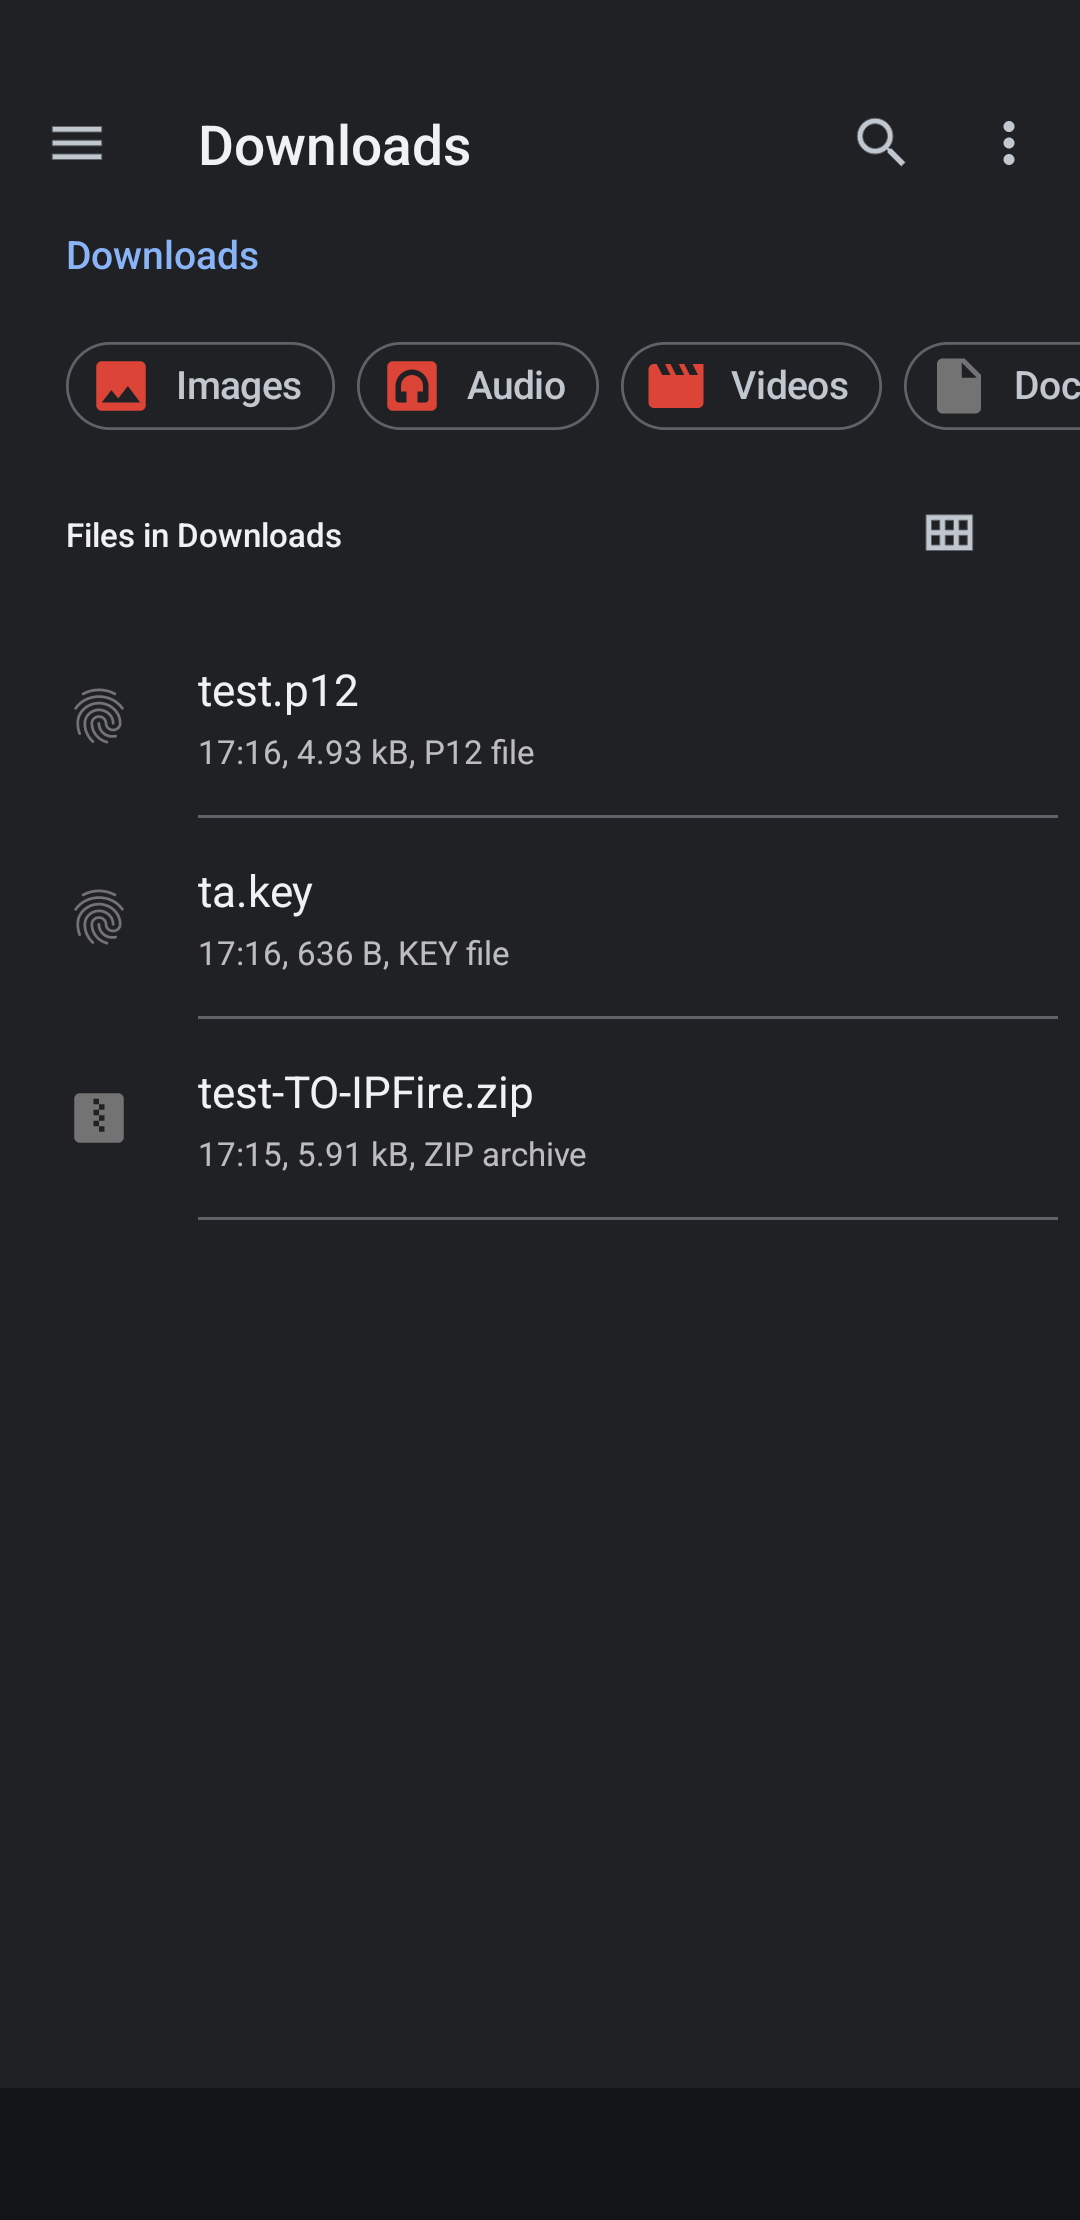
- Deliver the content of the
client packagefrom step 5 of the “Common preliminary steps” section to any folder you like in the android machine. Here I sent to myself an email with those 3 files in attachment and downloaded them in the Download folder (shown here with the stockFiles app).
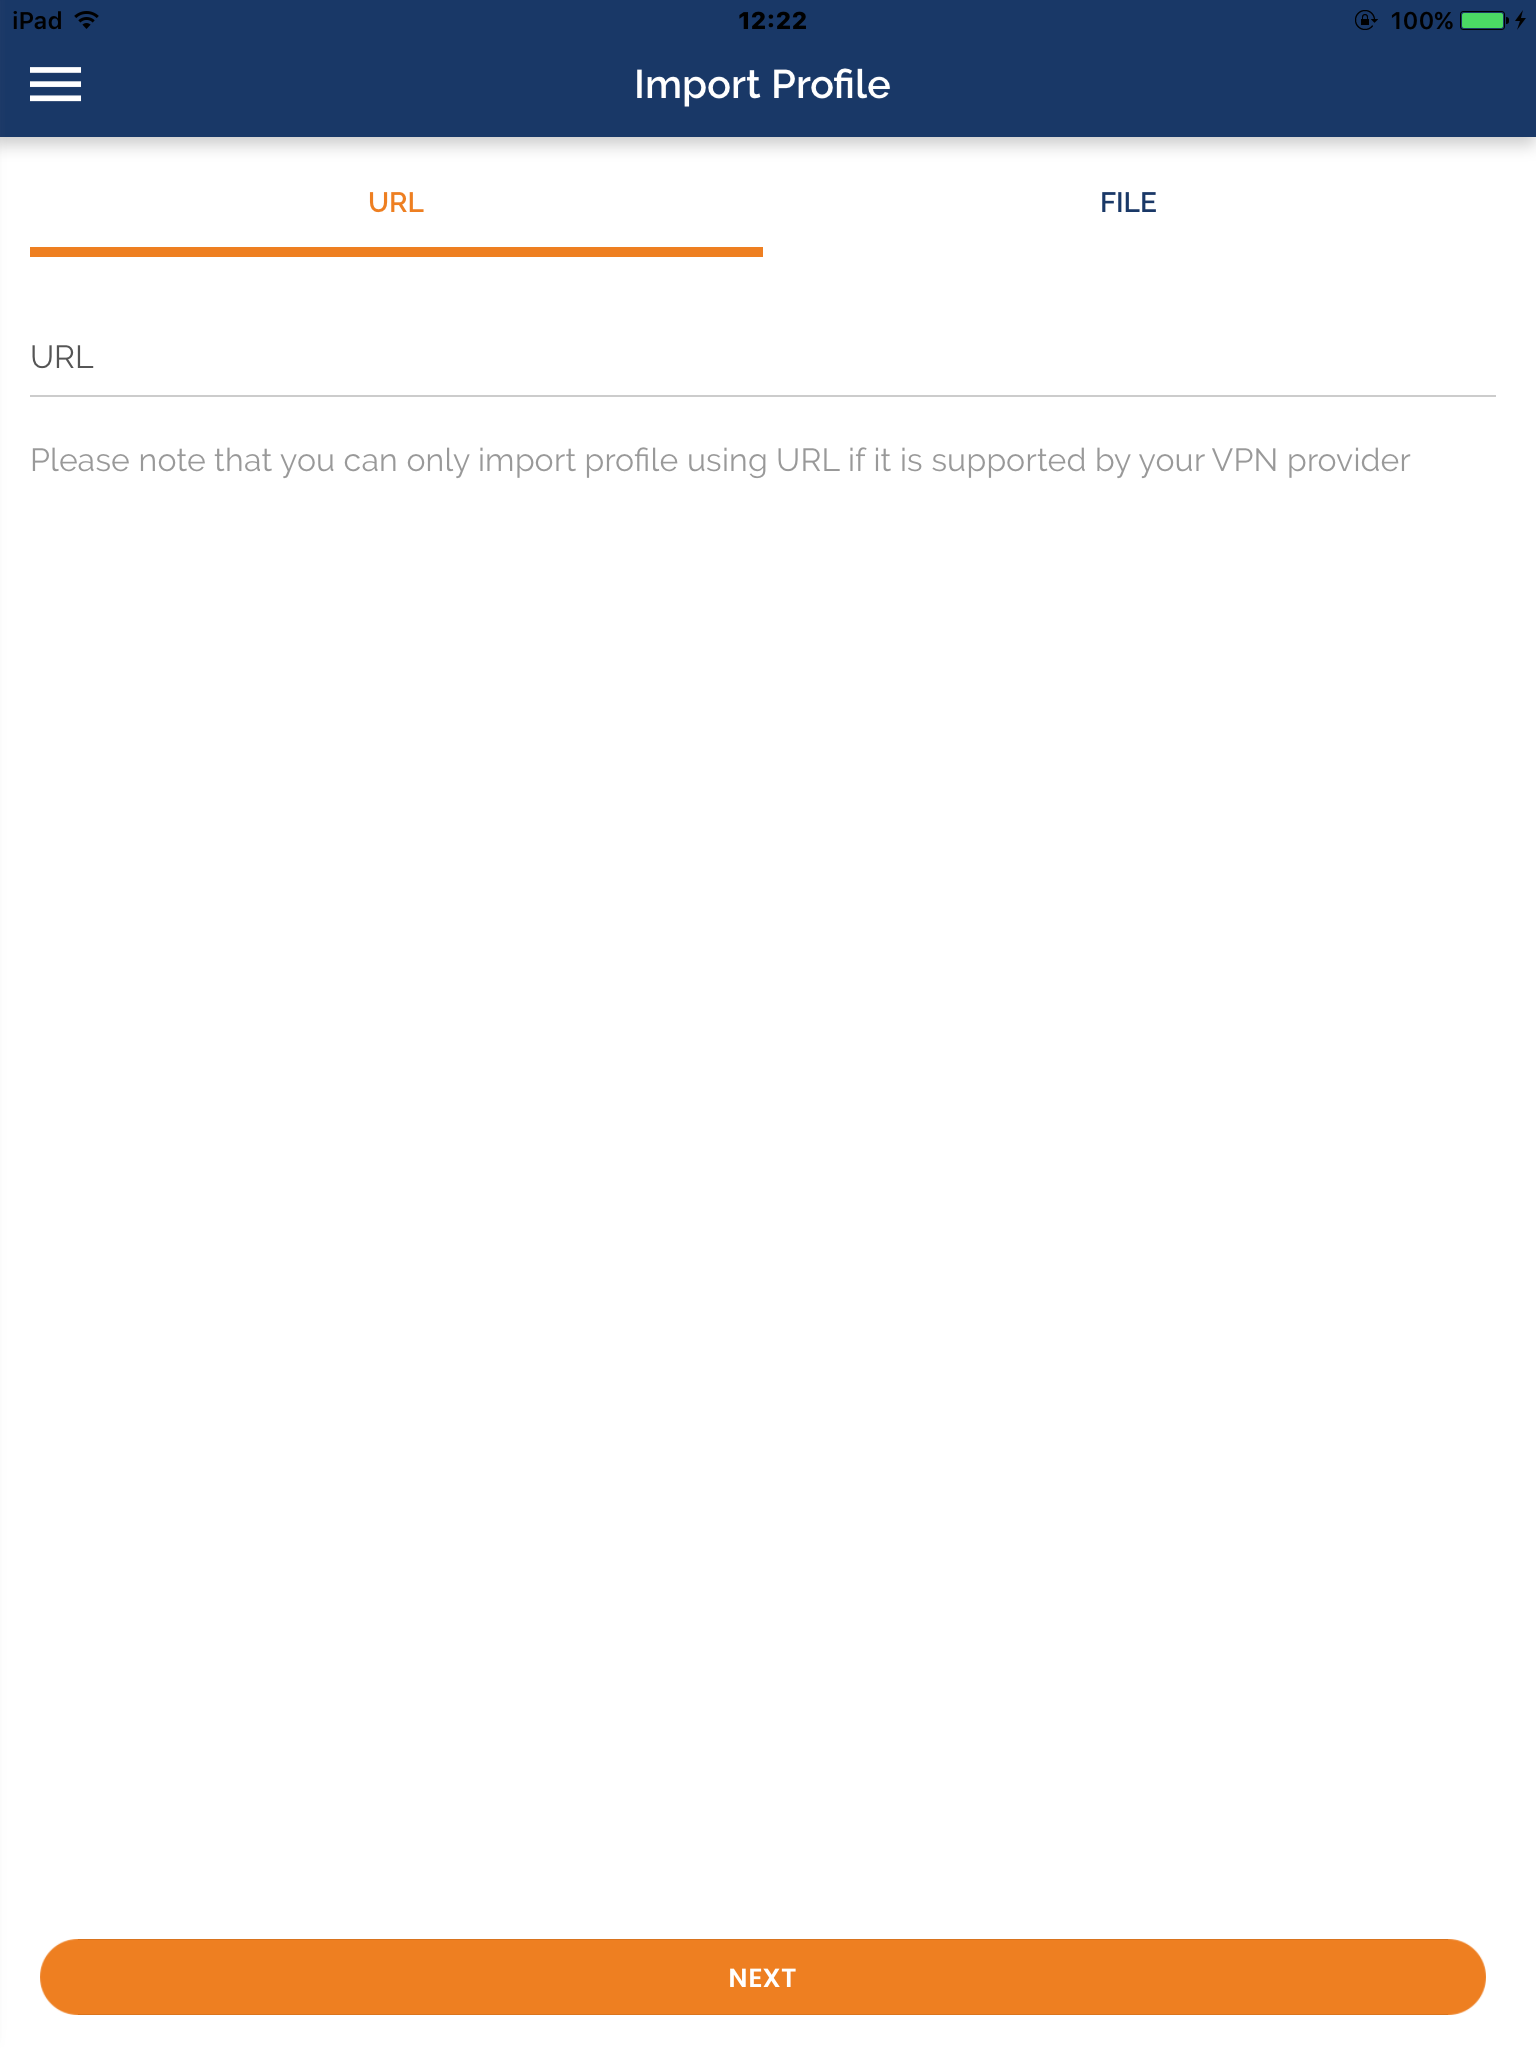
- Open
OpenVPN connectclient app and go toImport Profile/File
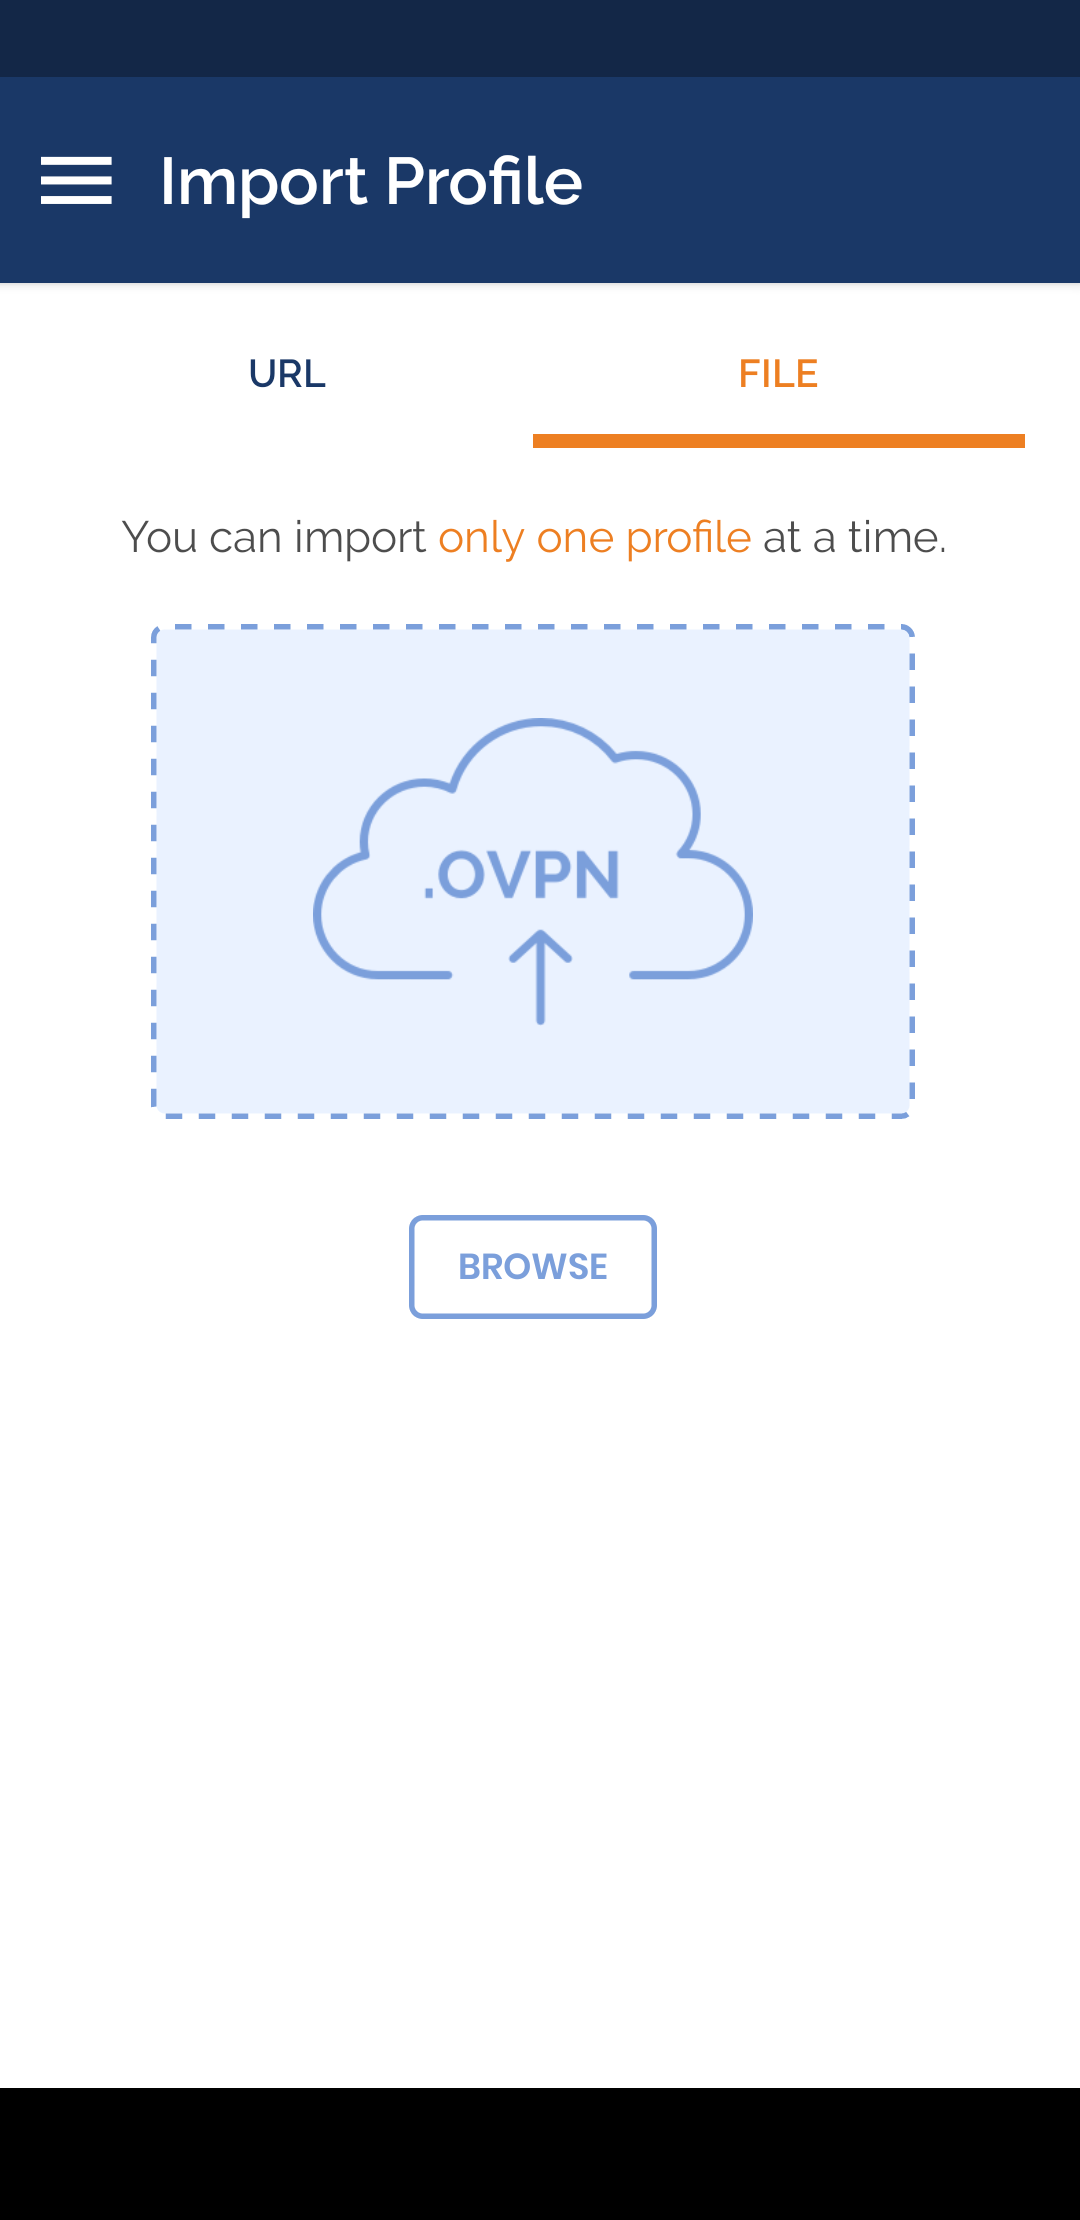
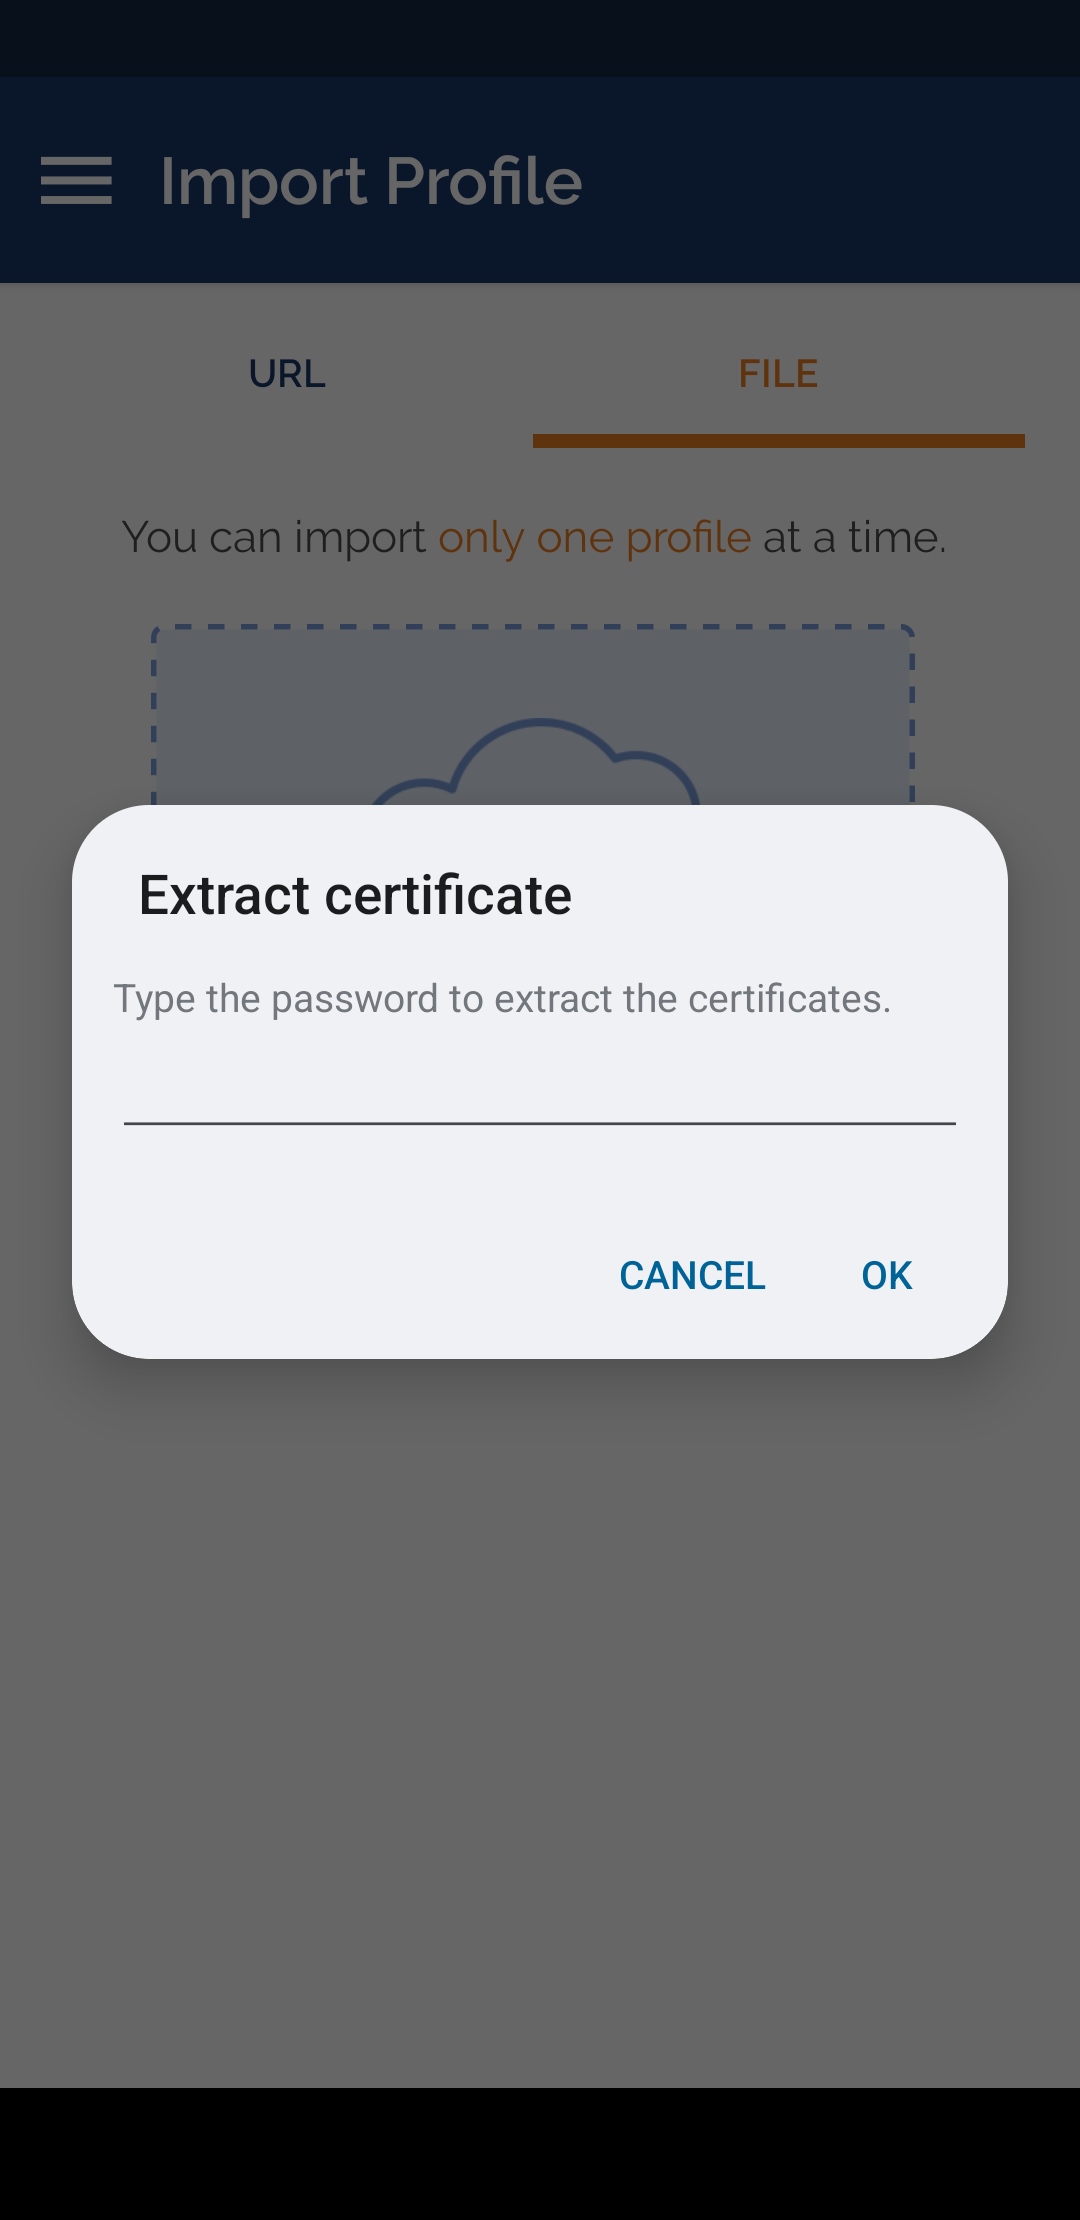
- Find the
Downloadfolder and selecttest.p12file (the main certificates, encrypted)
- Choose
VPN & app user certificate

-
Enter the password you have previously chosen
-
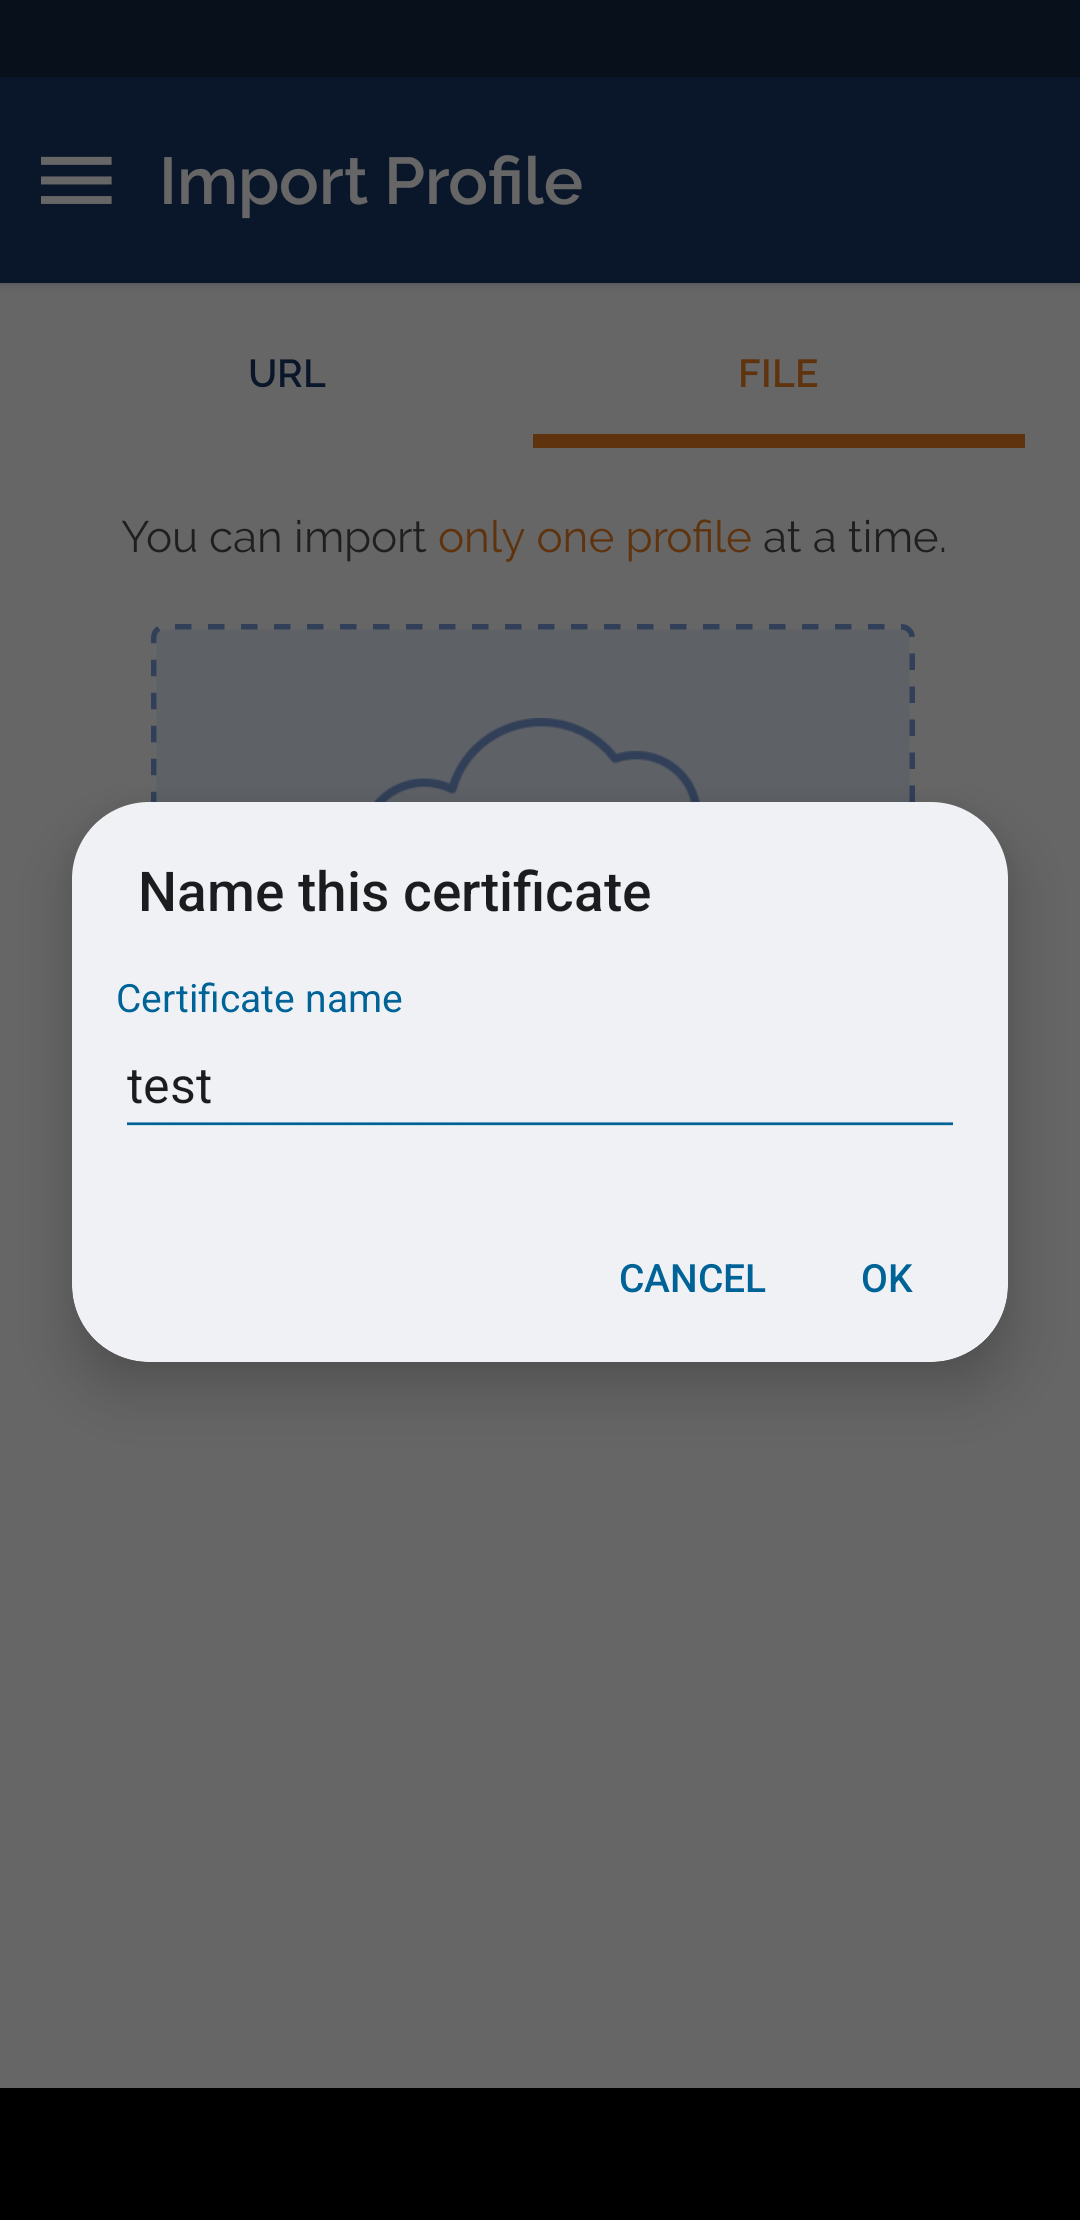
Choose a name for the certificates bundle
- Now import the
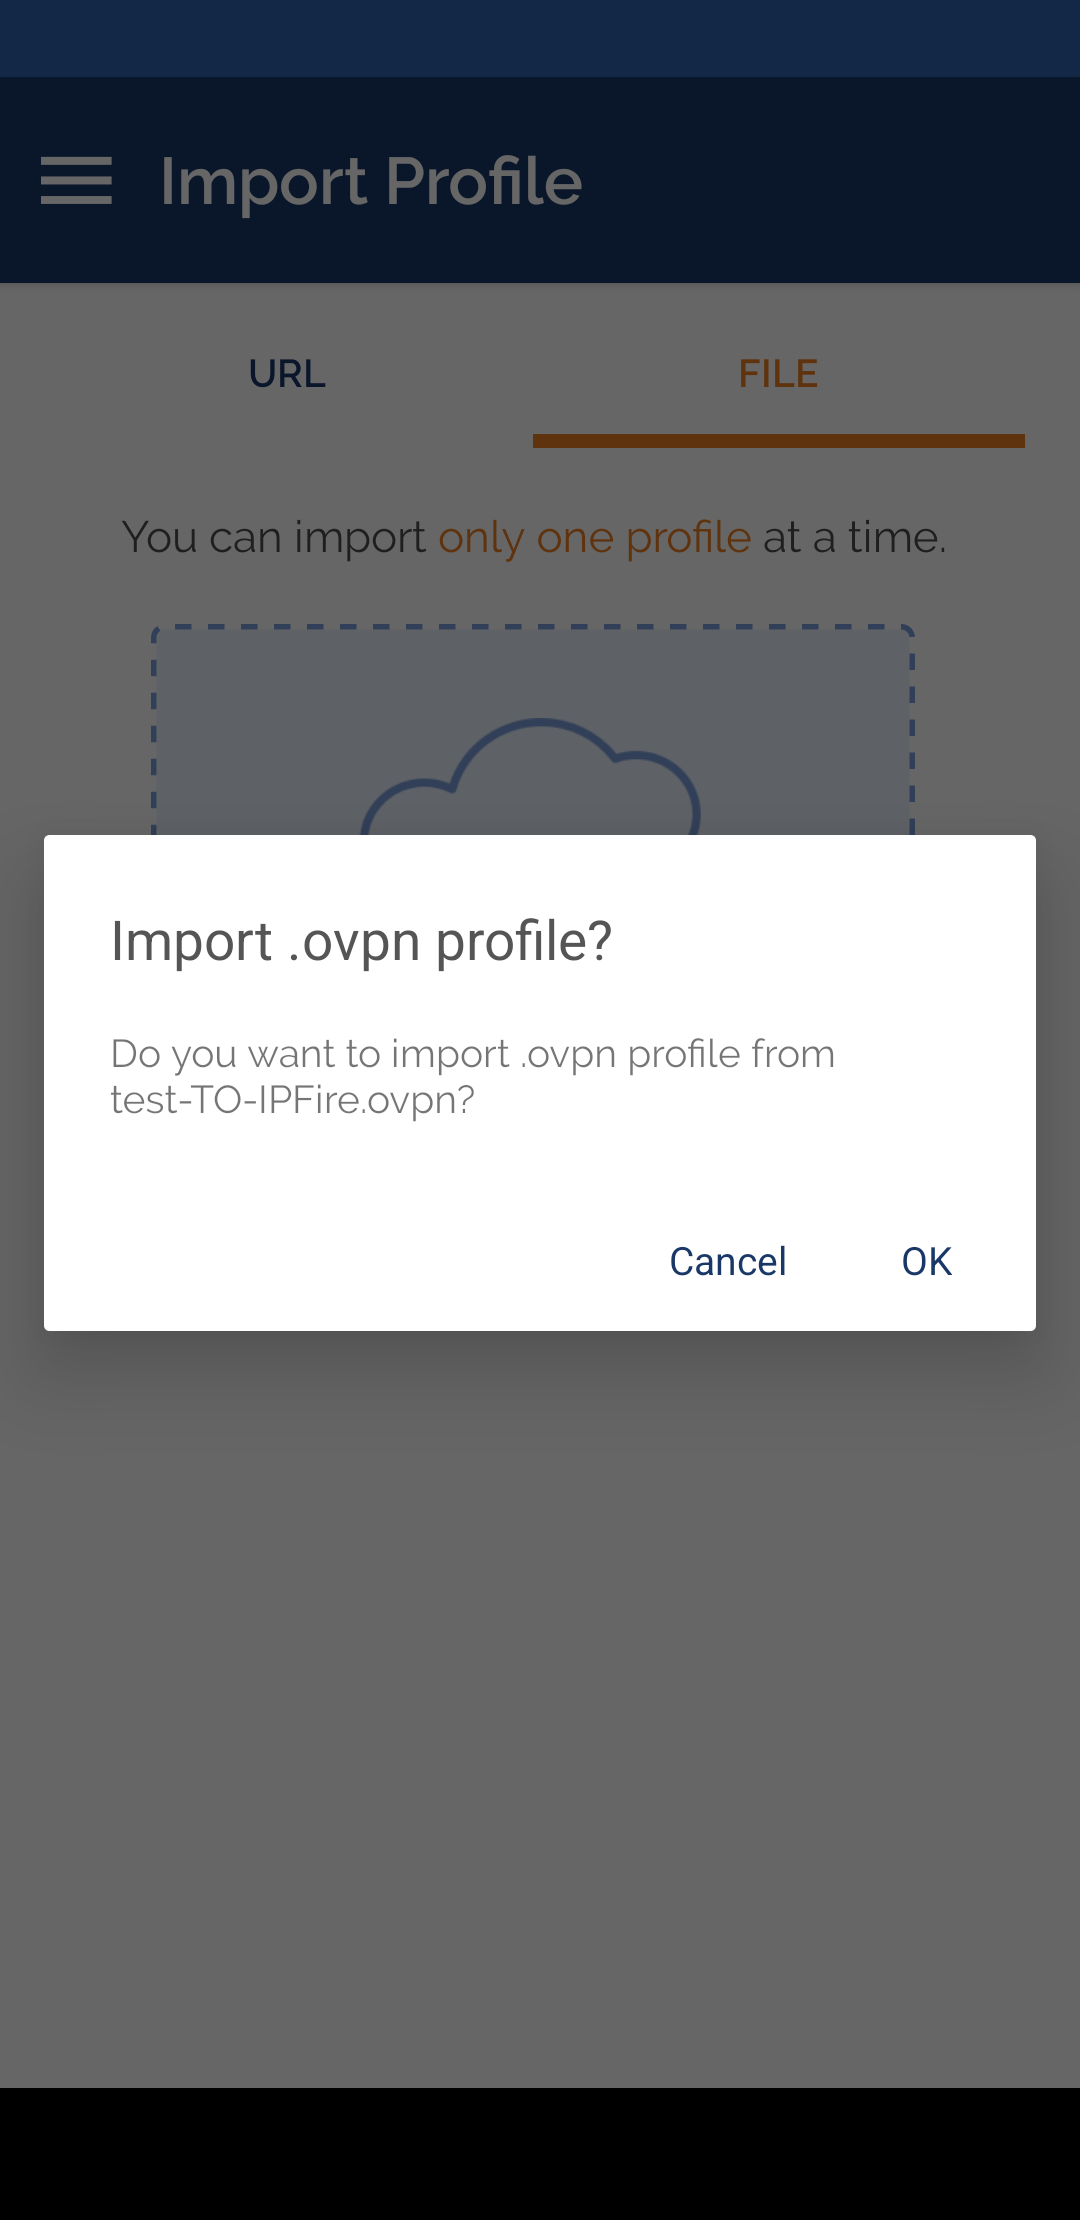
.ovpnconfiguration file and theta.keycertificate, select both at the same time, otherwise the ta.key will not be found
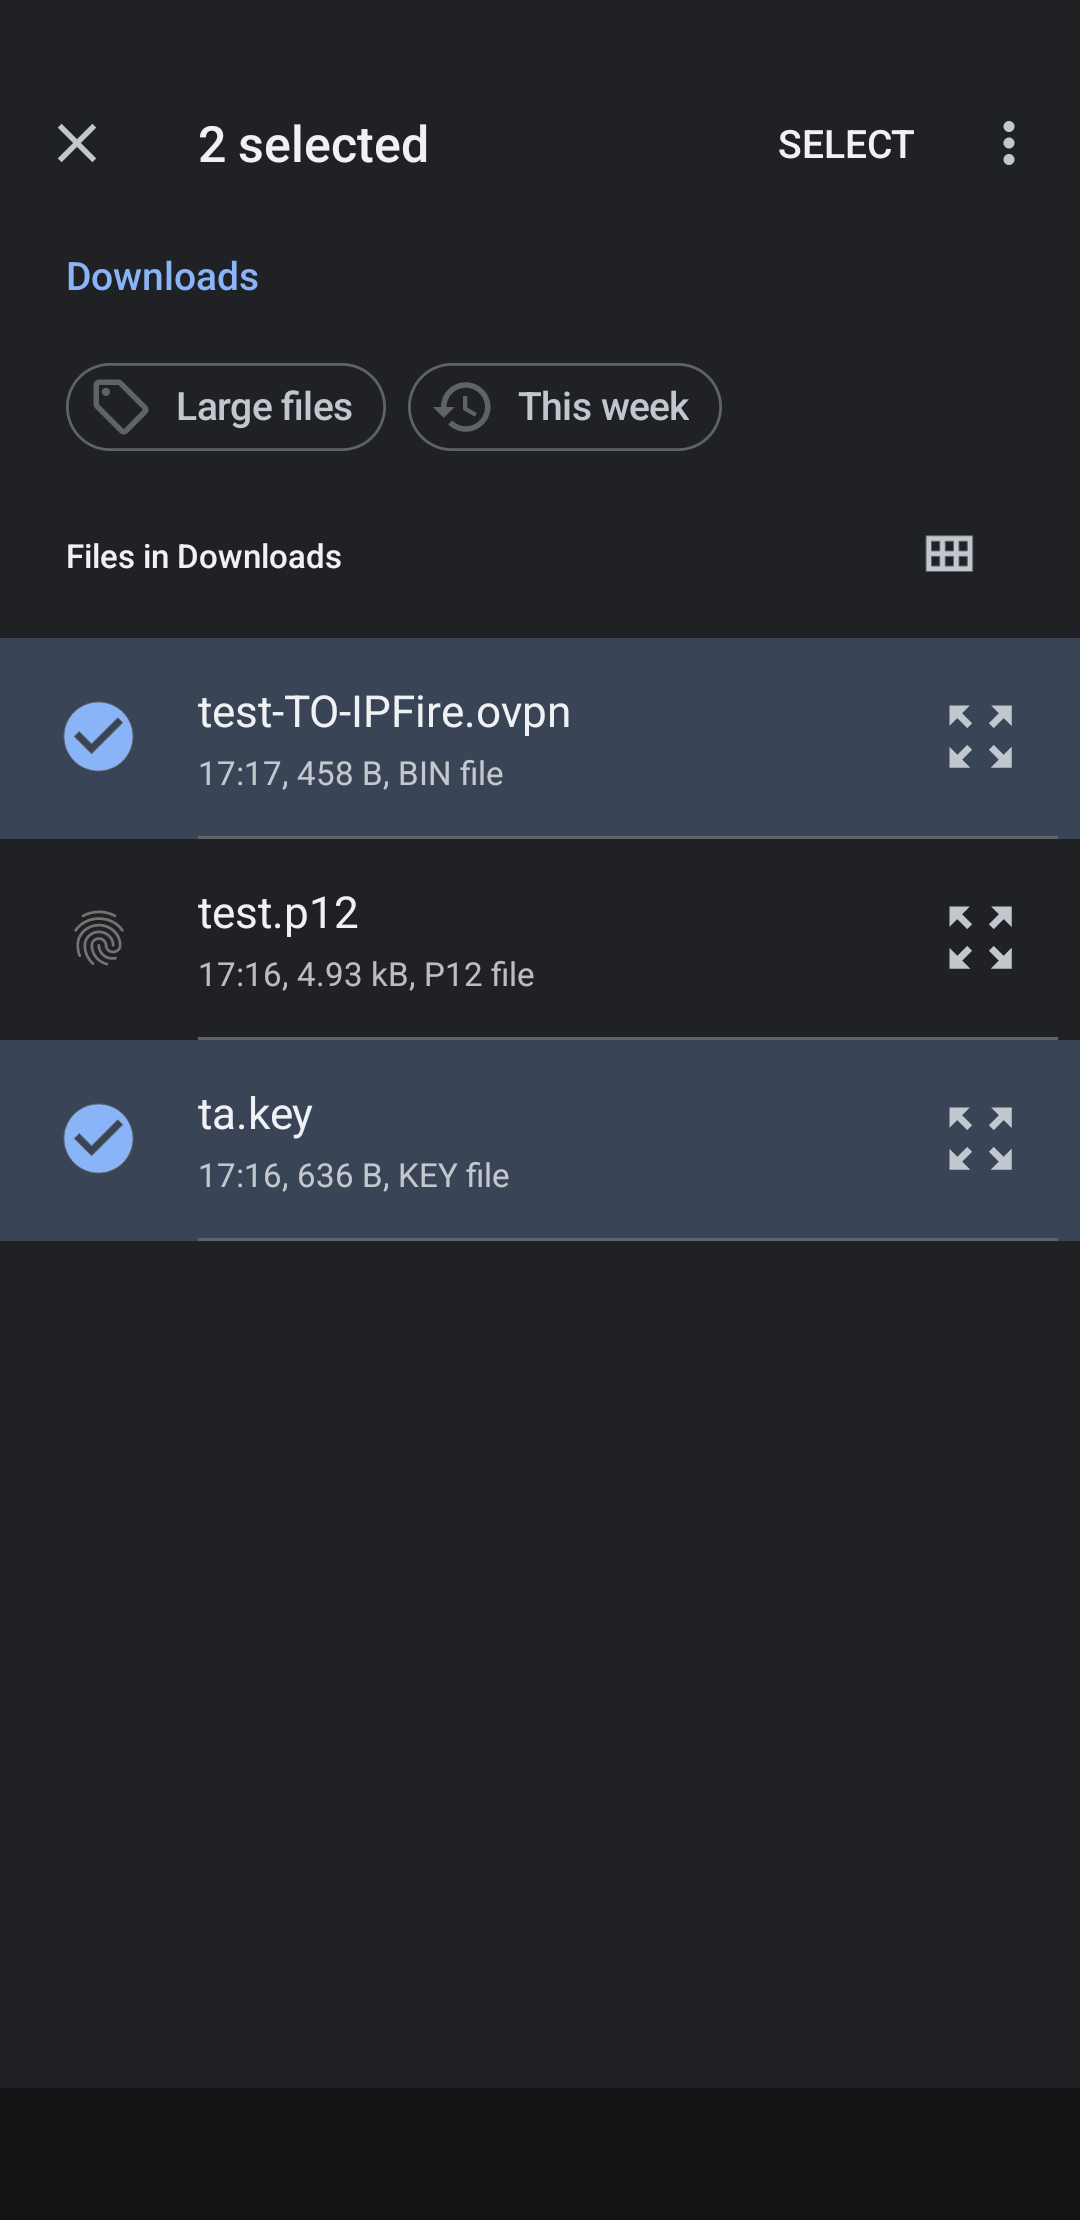
- Select
OK
- The profile now has been imported, just choose
Add

- you will see the profile ready to be activated
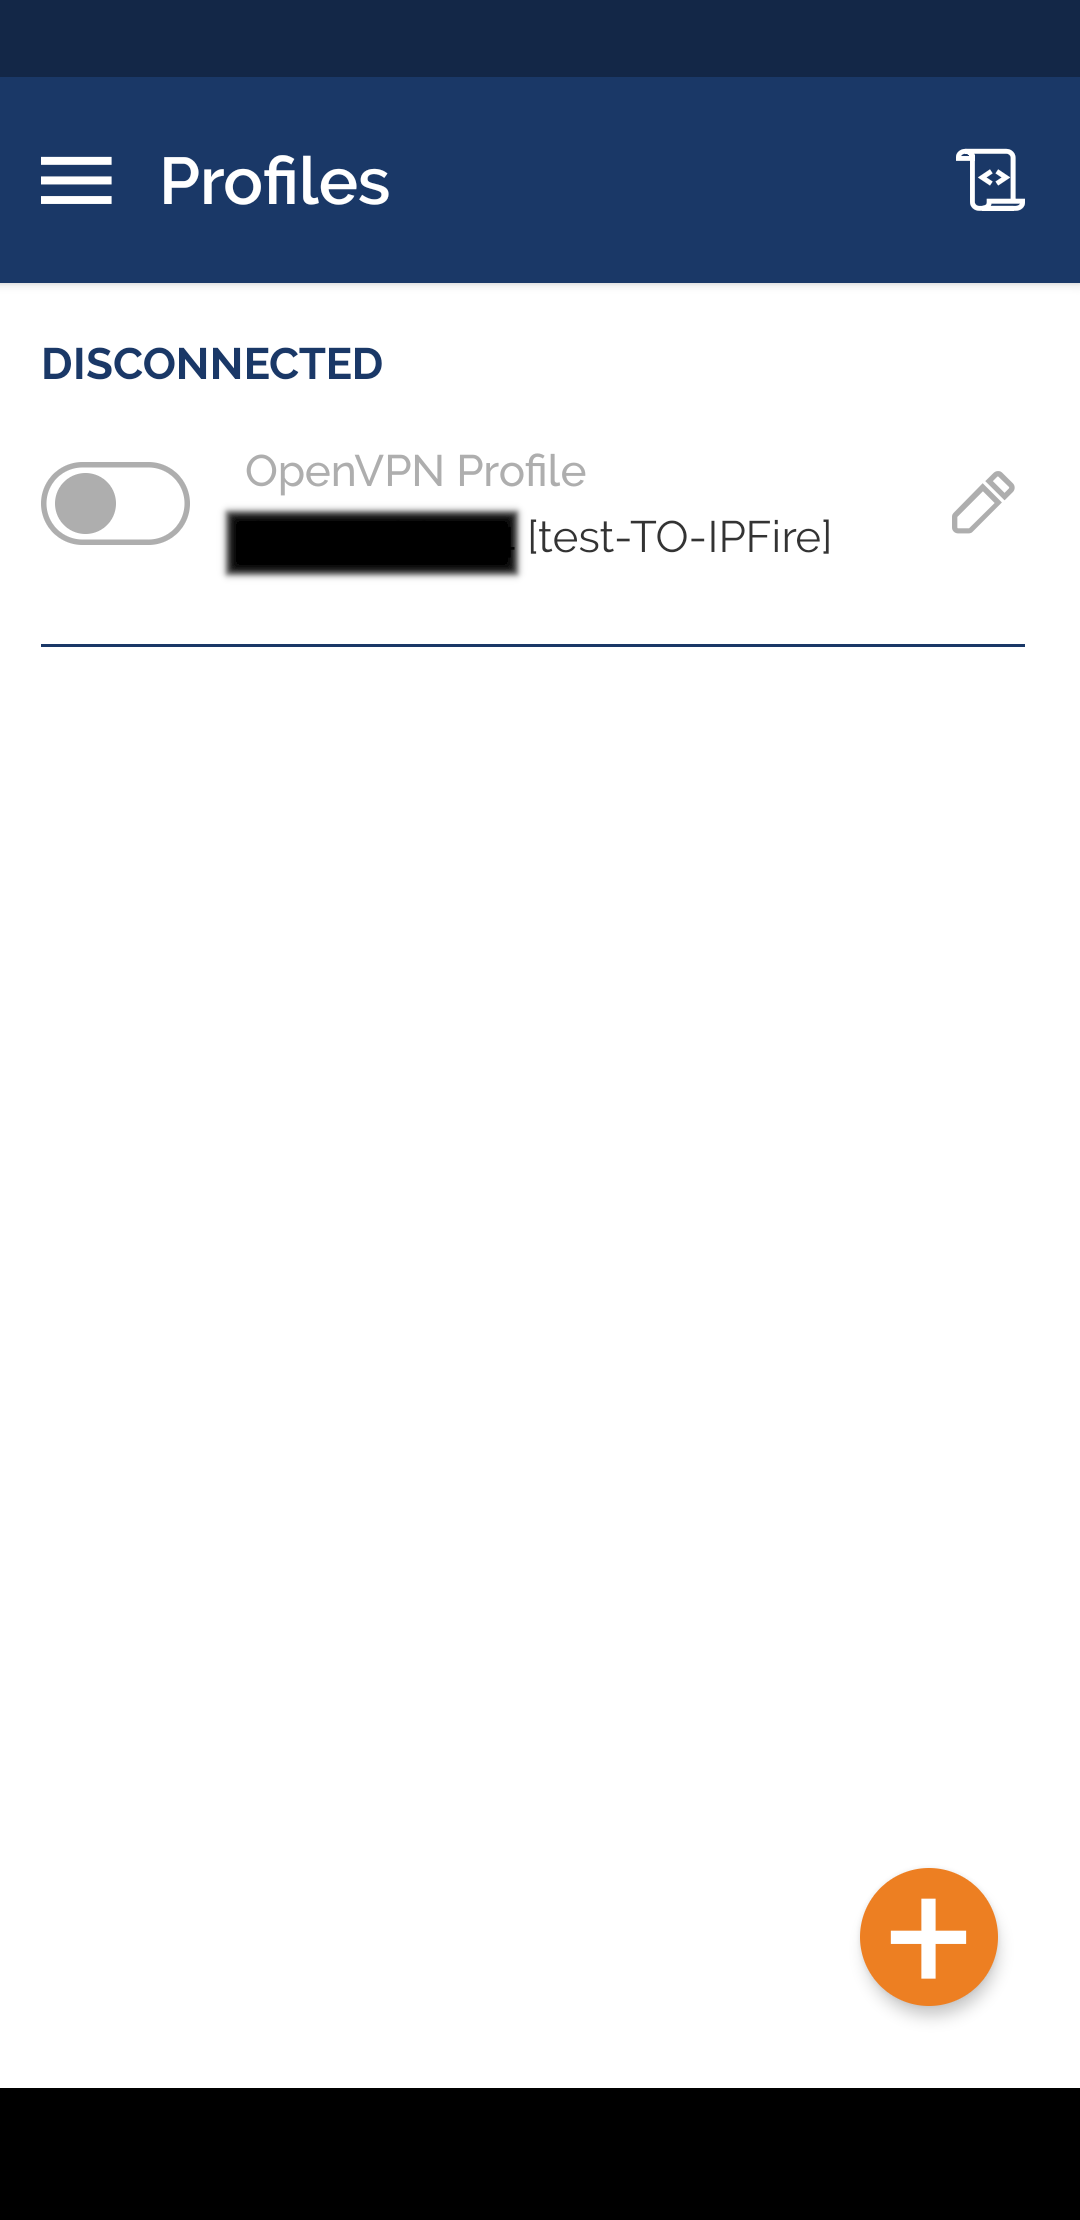
- Activate and choose
SELECT CERTIFICATE
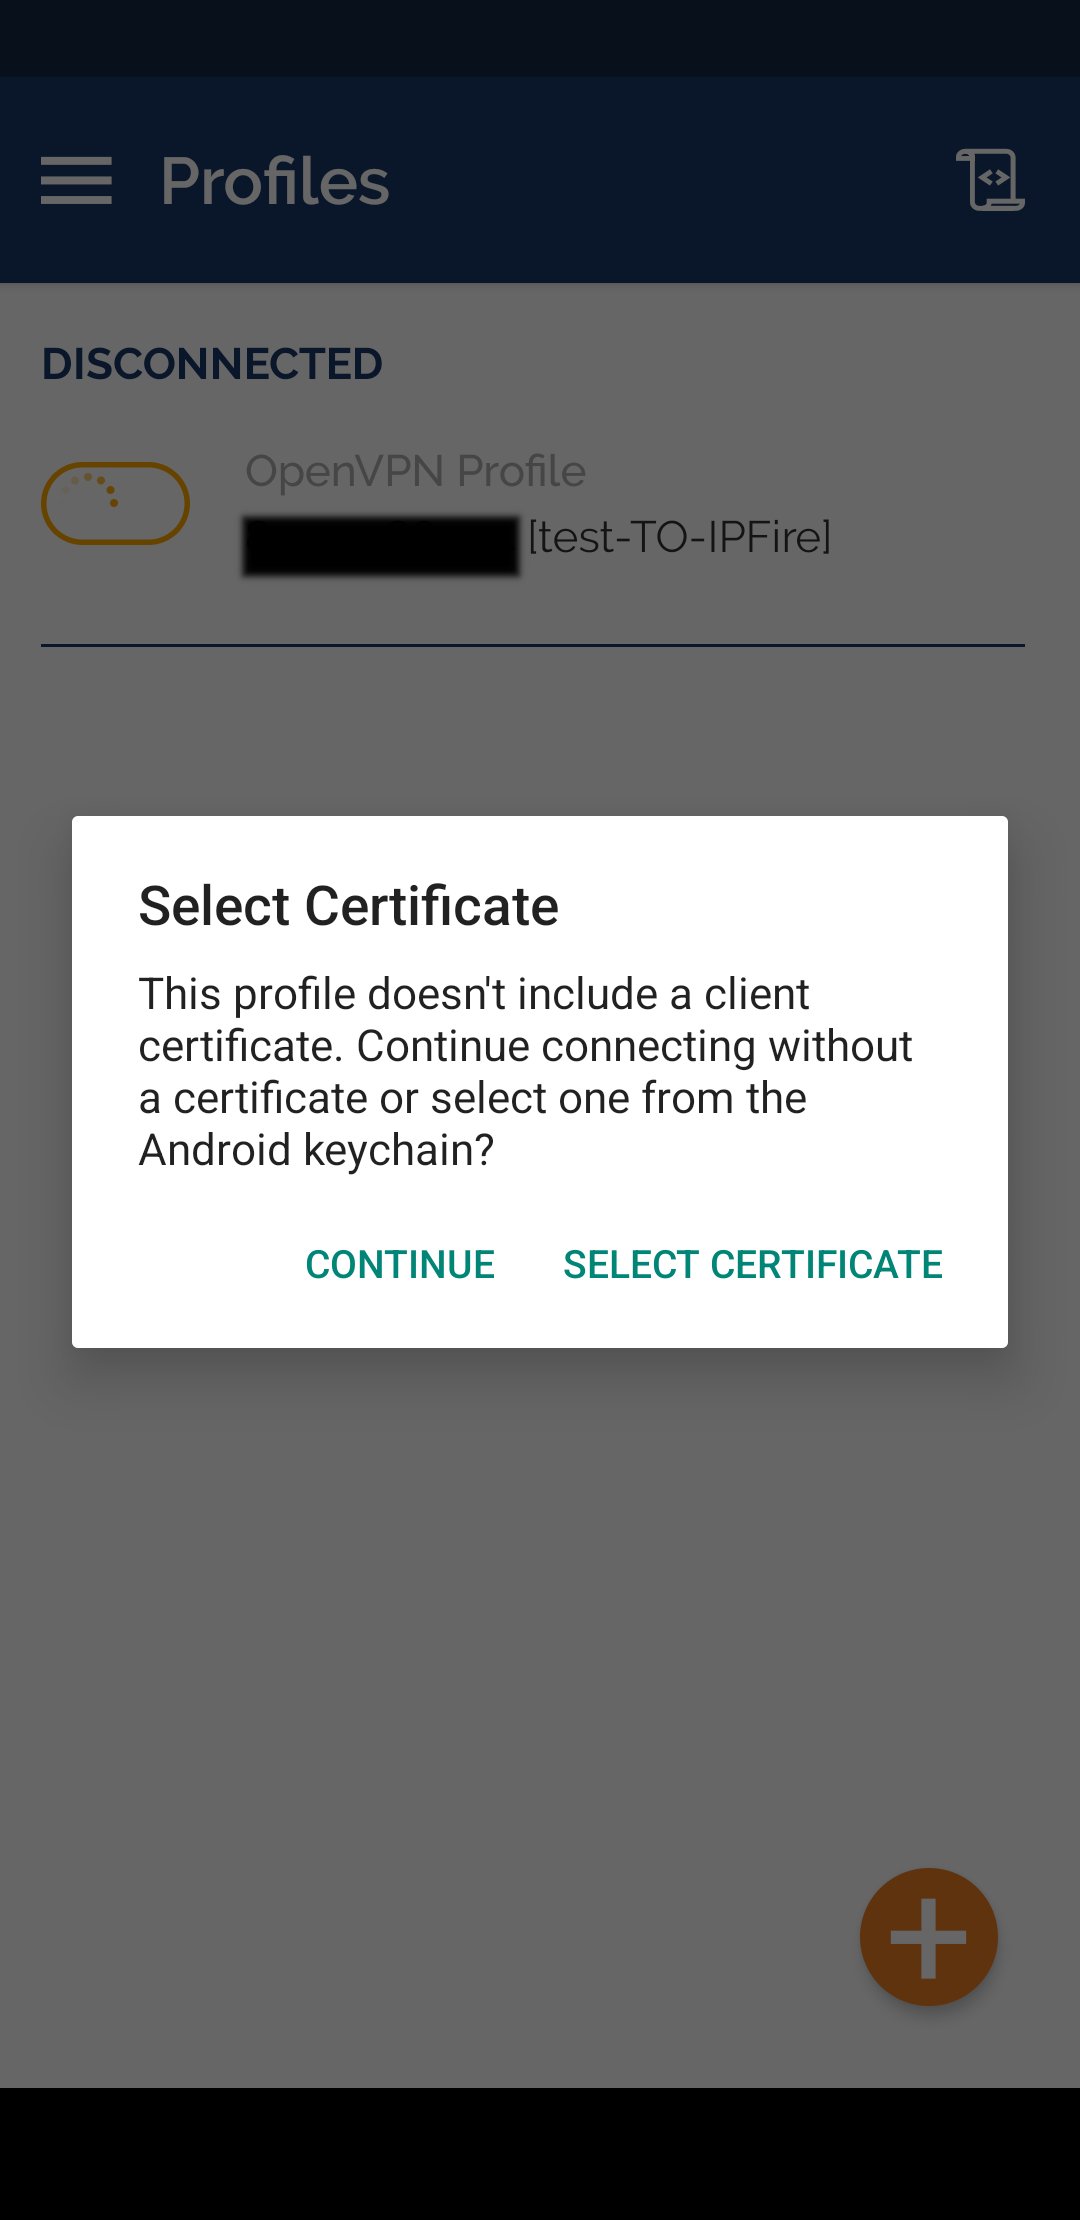
- Now
OpenVPN connectwill ask you which certificate you want to associate to this profile. You will see the one you have previously imported.
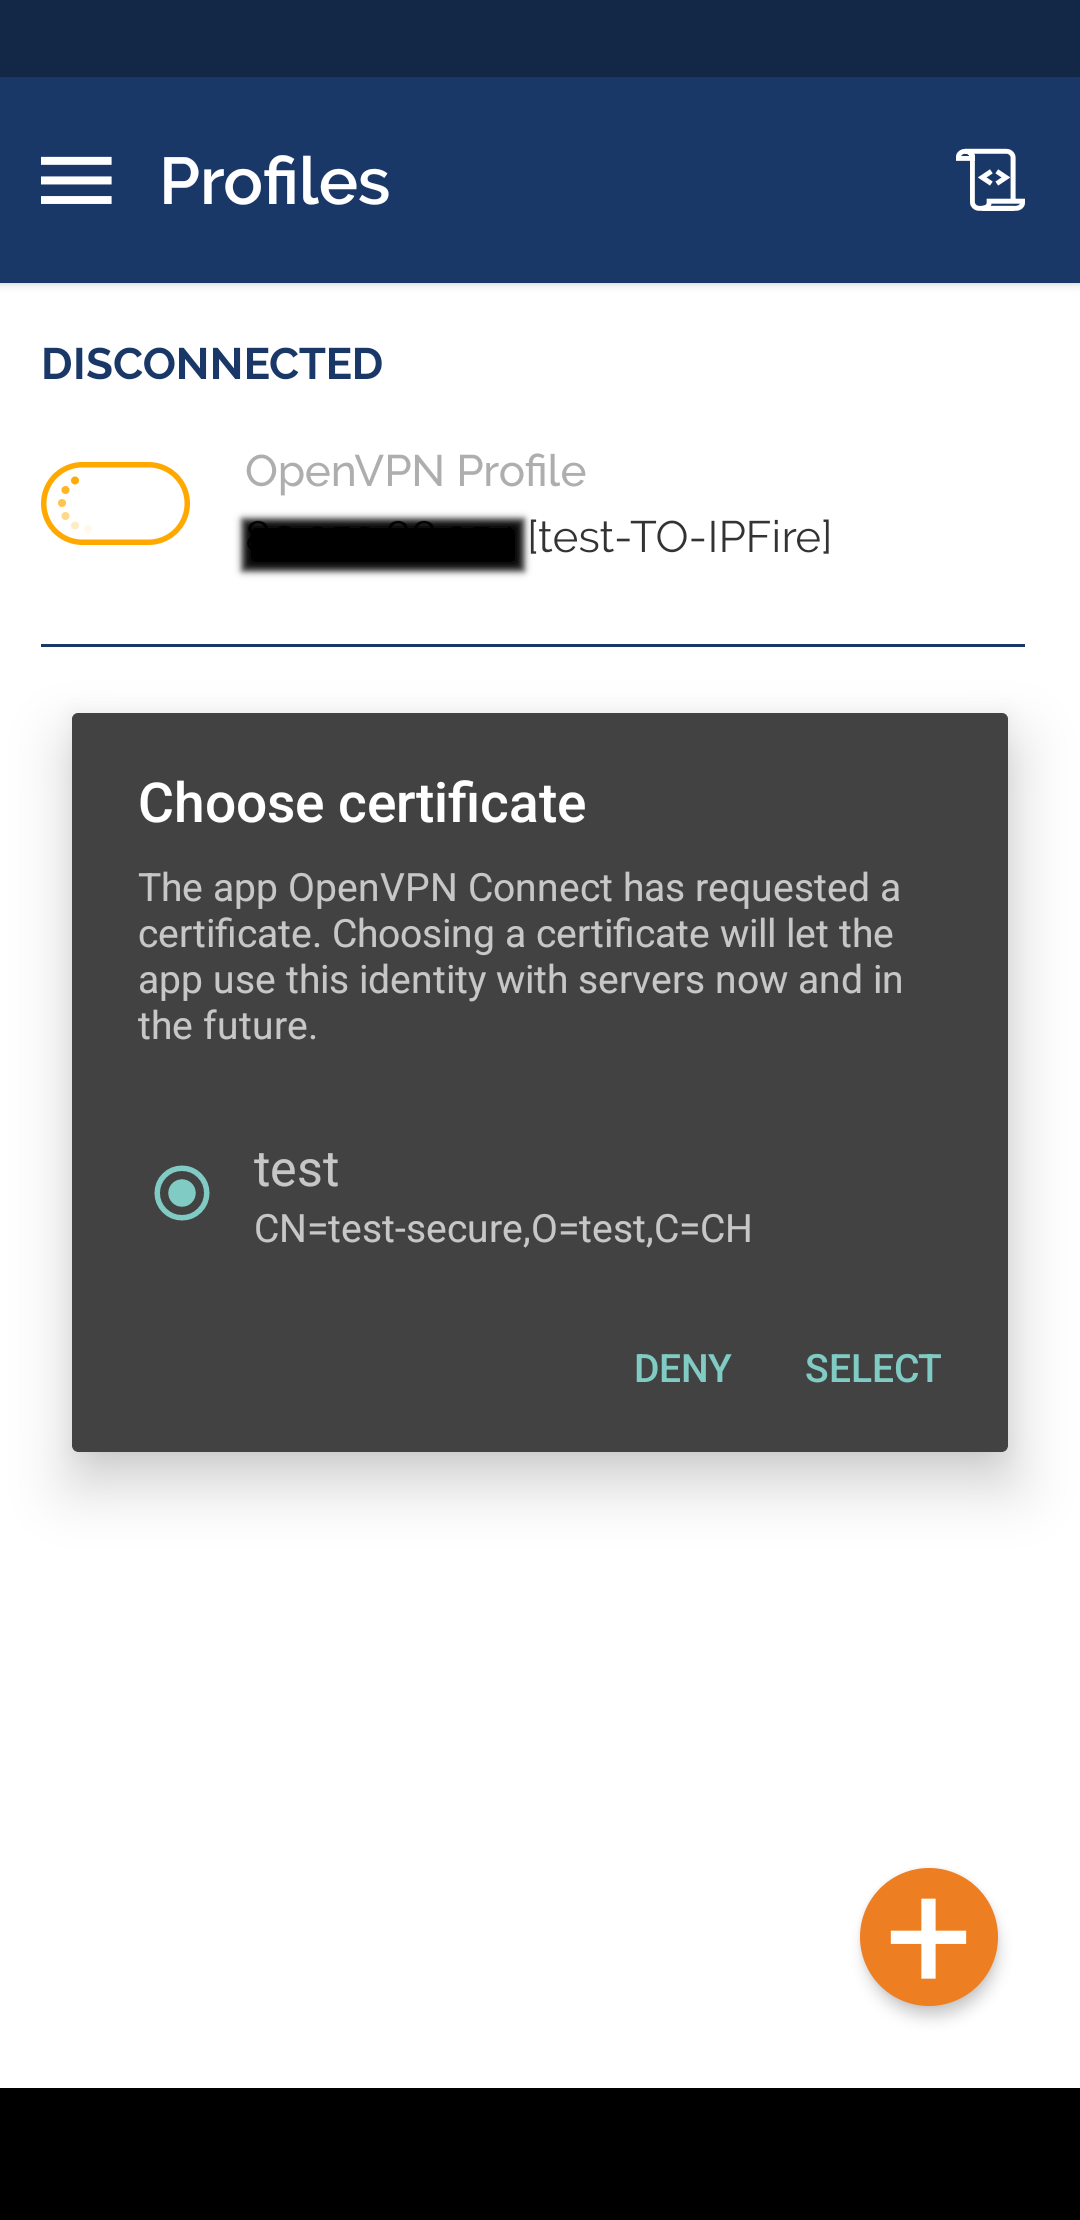
- Select, and success!!!

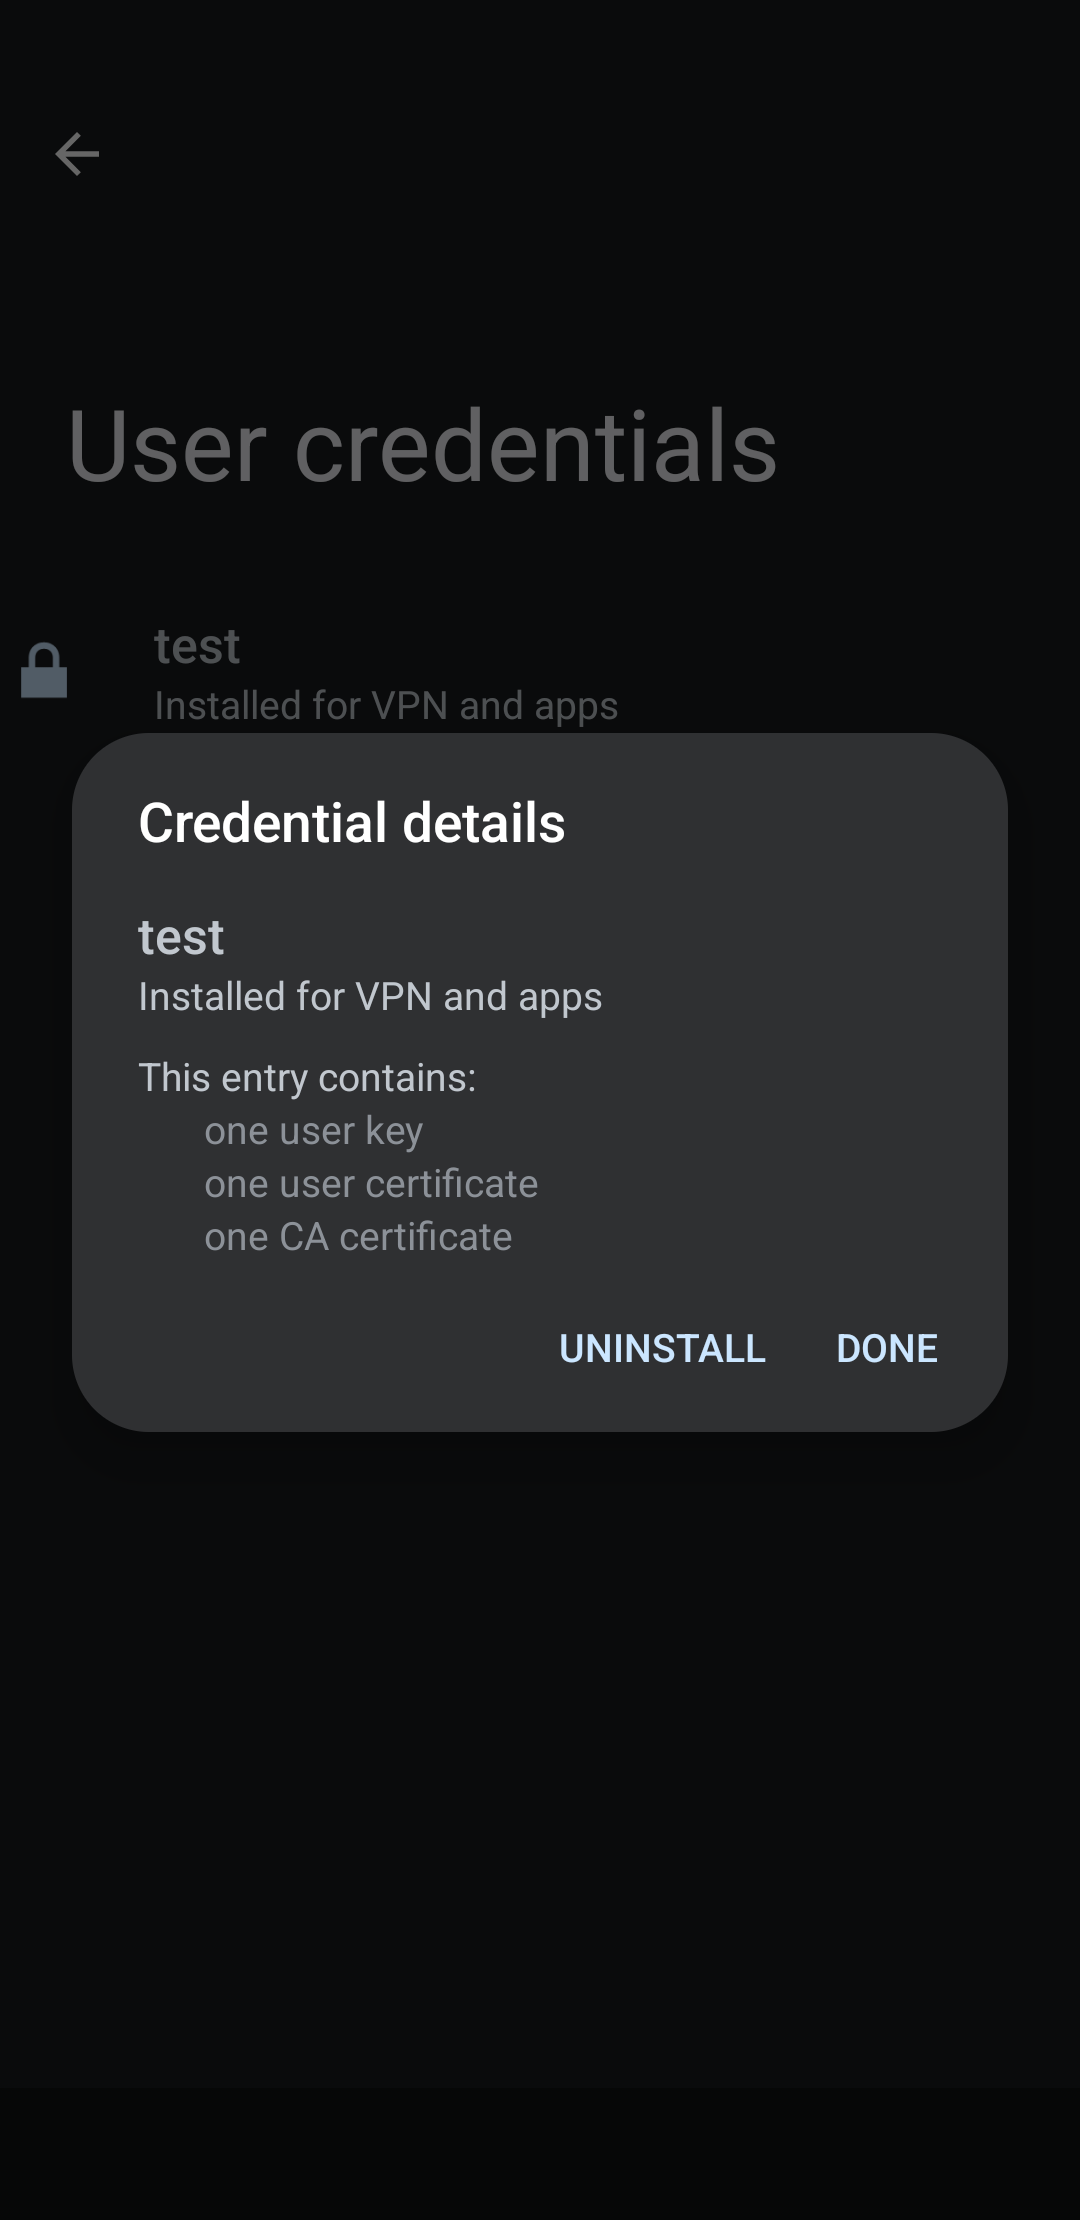
If you decide to delete the profile, the certificate will not be removed as it is protected by the Operating System. To remove it you need to go to Options\Security\Encryption & Credentials\User Credentials, there you can remove the certificate:
There is no mechanism for OpenVPN connect to communicate to any other App the use of a proxy server. For this you need to input the information in the WiFi or APN configuration file. You can find many tutorials online to accomplish this task. This is not true for iOS, which can be easily configured to relay this information to other apps, as we shall see in the next section.
The two factor authentication scheme is not supported at the moment for mobile devices.
iOS How-to
This tutorial has been tested with iOS 10.3.3 (ancient history), however it should work well also in modern versions. For iOS the setting is complicated by the fact that the OS does not make available the certificate authority (CA) from the .p12 bundle, therefore we need to extract the CA certificate and modify the .ovpn file to add a pointer to it.
-
First, Install from Apple Store
OpenVPN connecton your iOS machine; -
Deliver the content of the
client packagefrom step 5 of the “Common preliminary steps” section to any folder of your desktop or laptop where you also have installedopenssl; after unzipping the package and changing directory to the unzipped folder, issue the following openssl command from the console:
openssl pkcs12 -in ios.p12 -cacerts -nokeys -out cacert.pem
It does not matter how you call the certificate, as long as you correctly point to it in the next step.
- edit with a text editor the
.ovpnfile. You need to introduce a link to the cacert file (here I put it below the tls-auth directive, but it should not matter where you place it):
tls-auth ta.key # <--- already present
ca cacert.pem # <--- add this, pointing to the cacert as you called it in the opnessl command
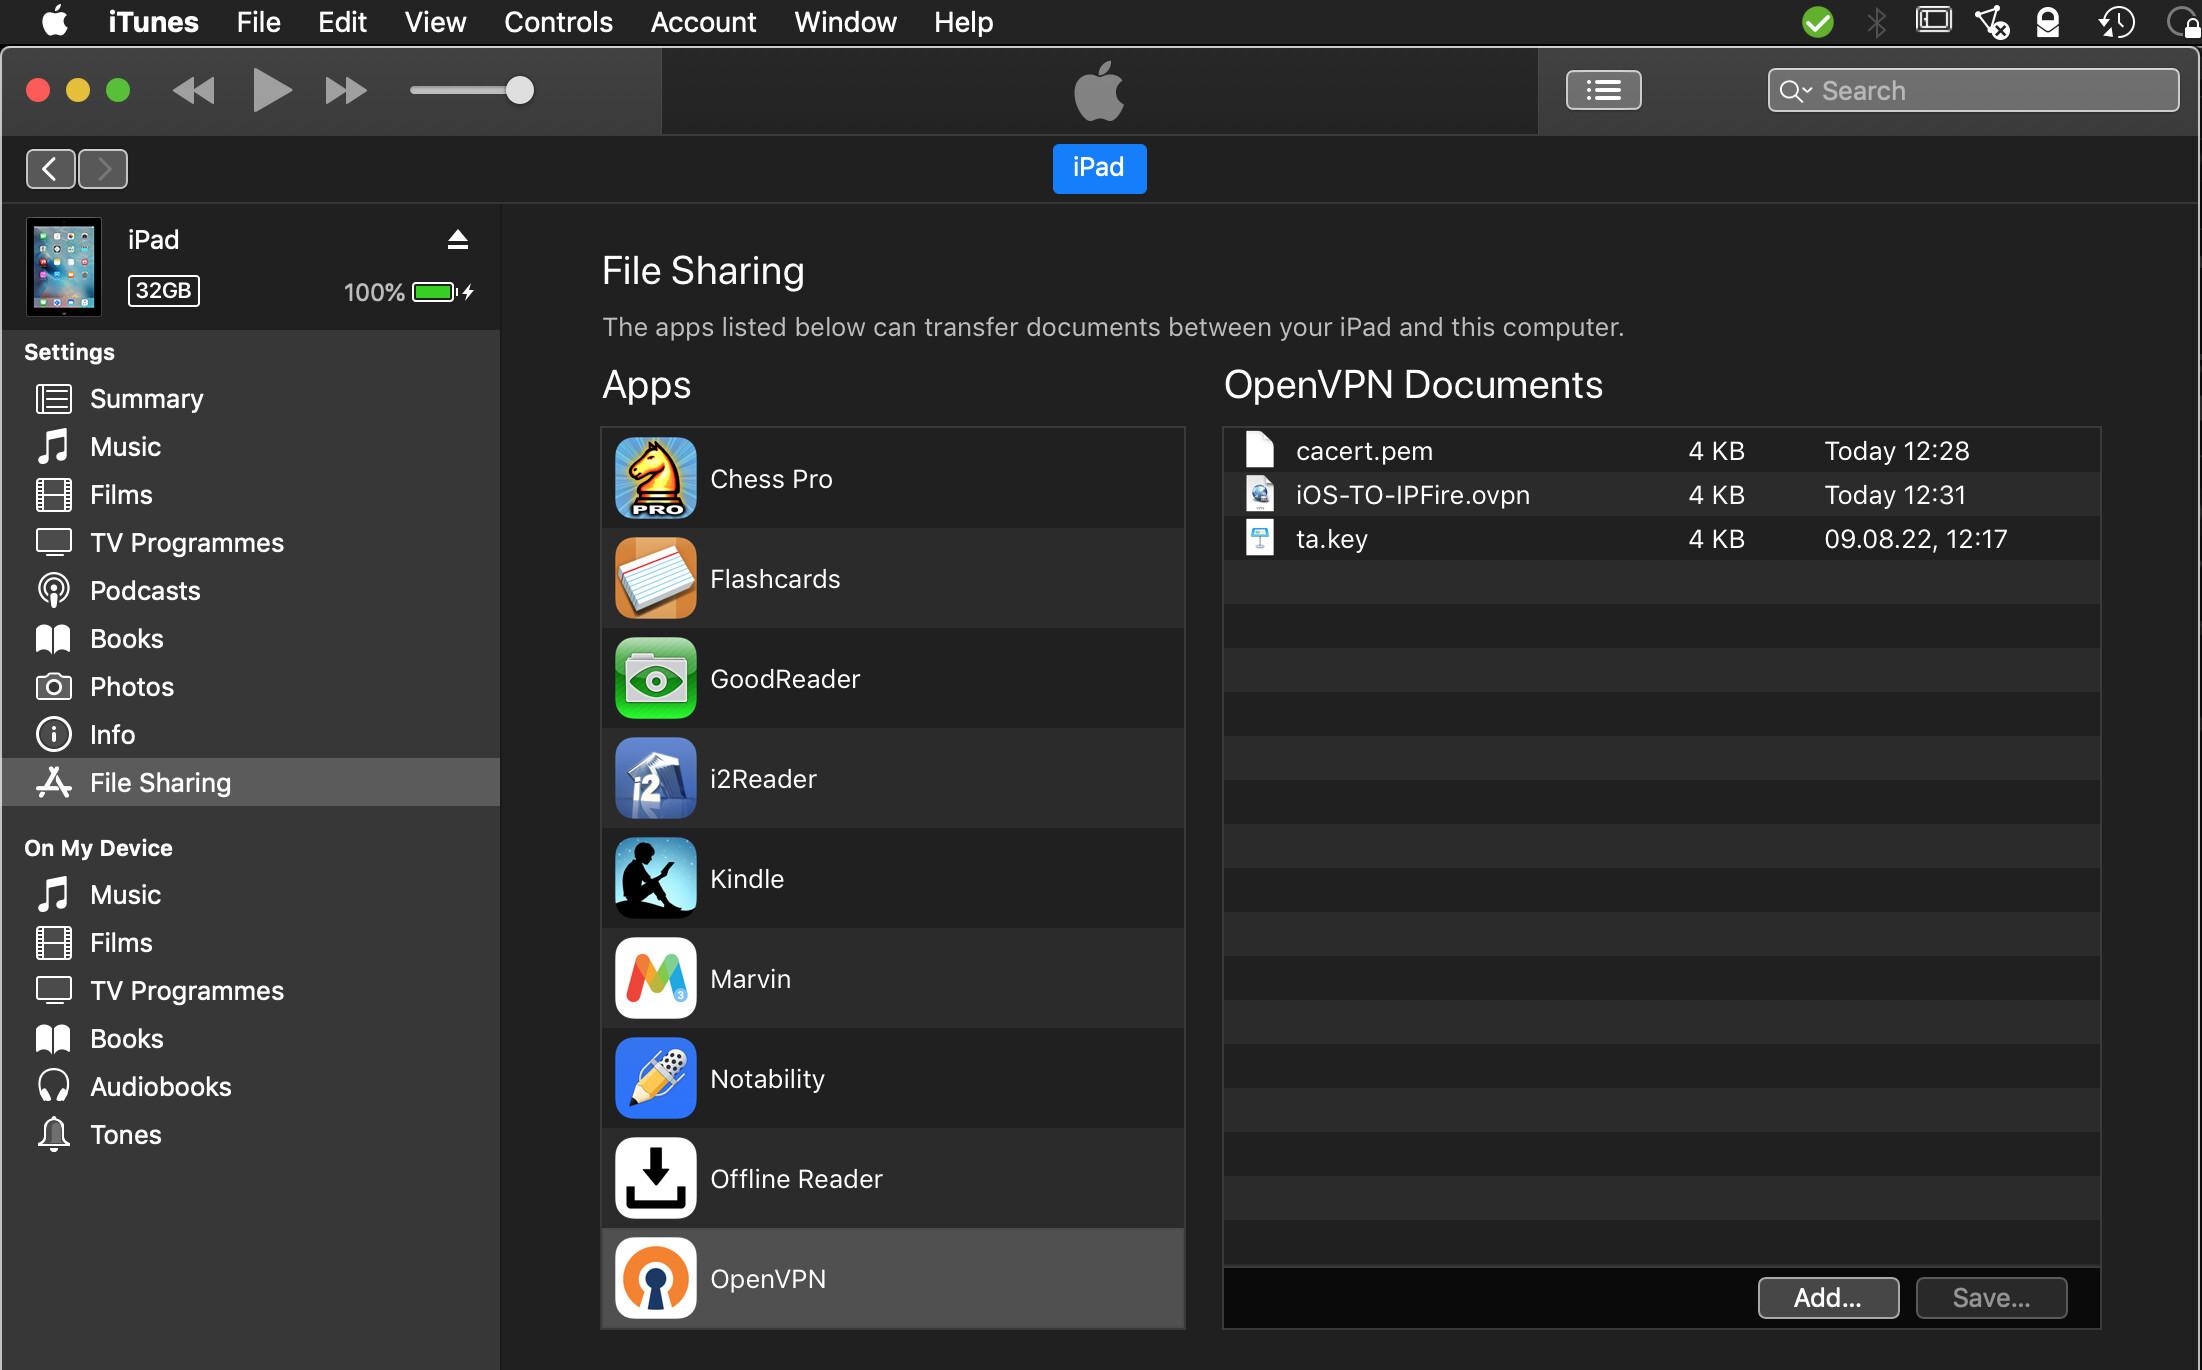
- Connect the iOS machine with a USB cable to your desktop/laptop and start iTunes. Using the file sharing section of iTunes, deliver into the
OpenVPN connectfolder the client package content, including the CA certificate and the modified.ovpnconfiguration file from previous steps:

- From the iOS machine, start
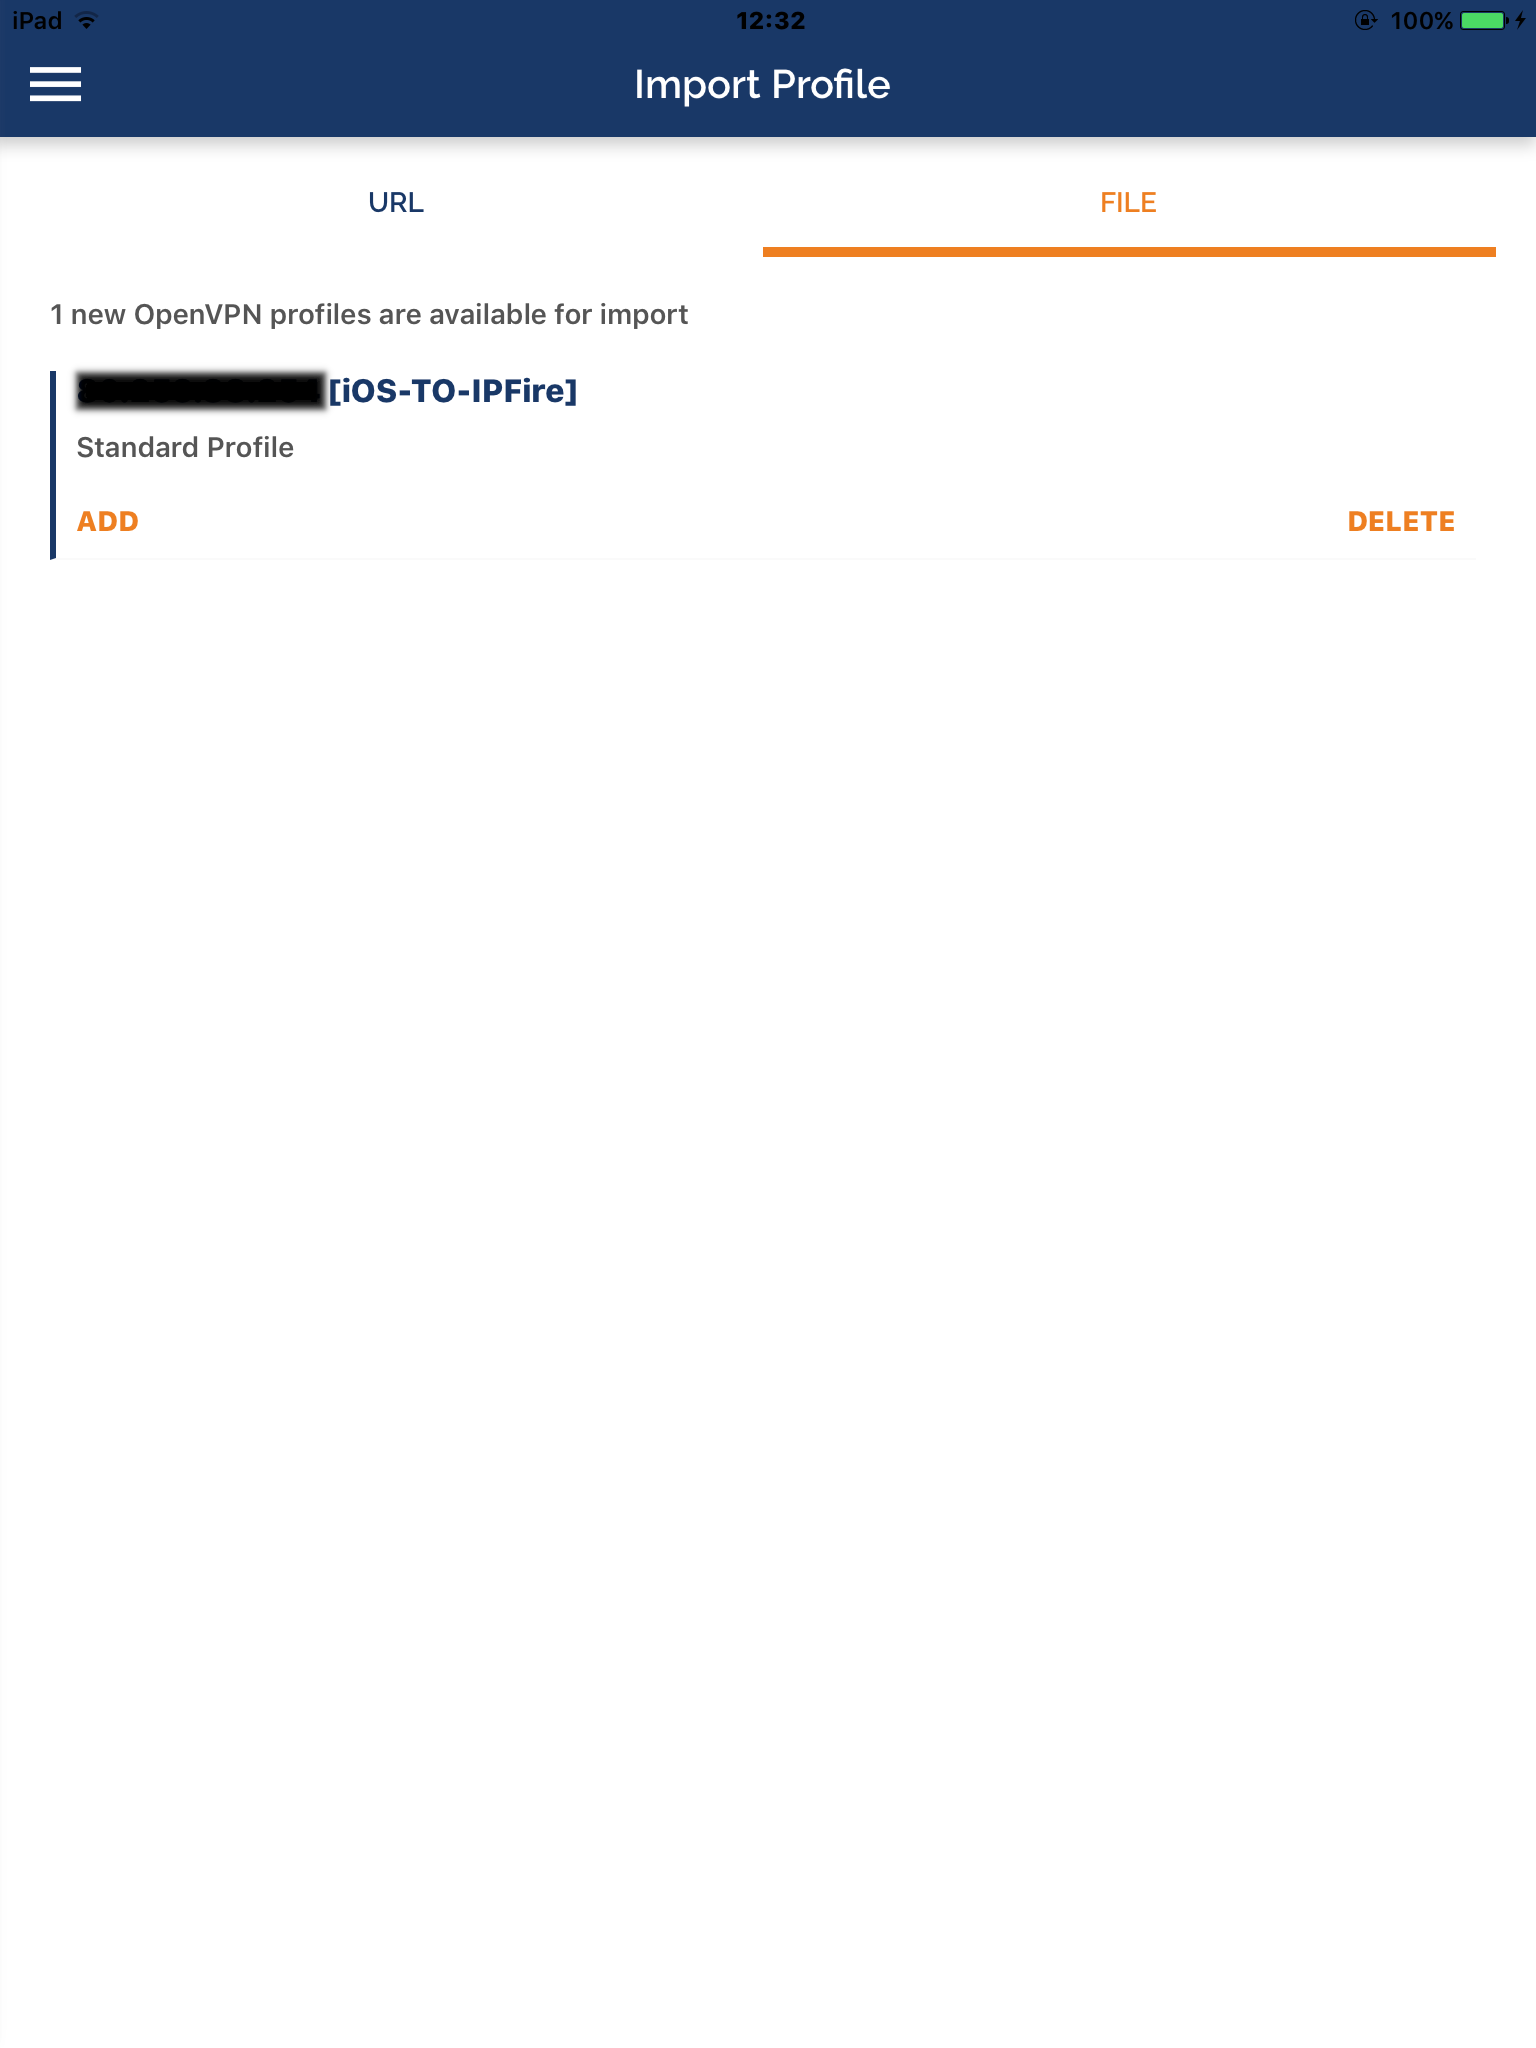
OpenVPN connect
- Automatically the app will offer the possibility to import the configuration file and the
.p12certificates bundle:

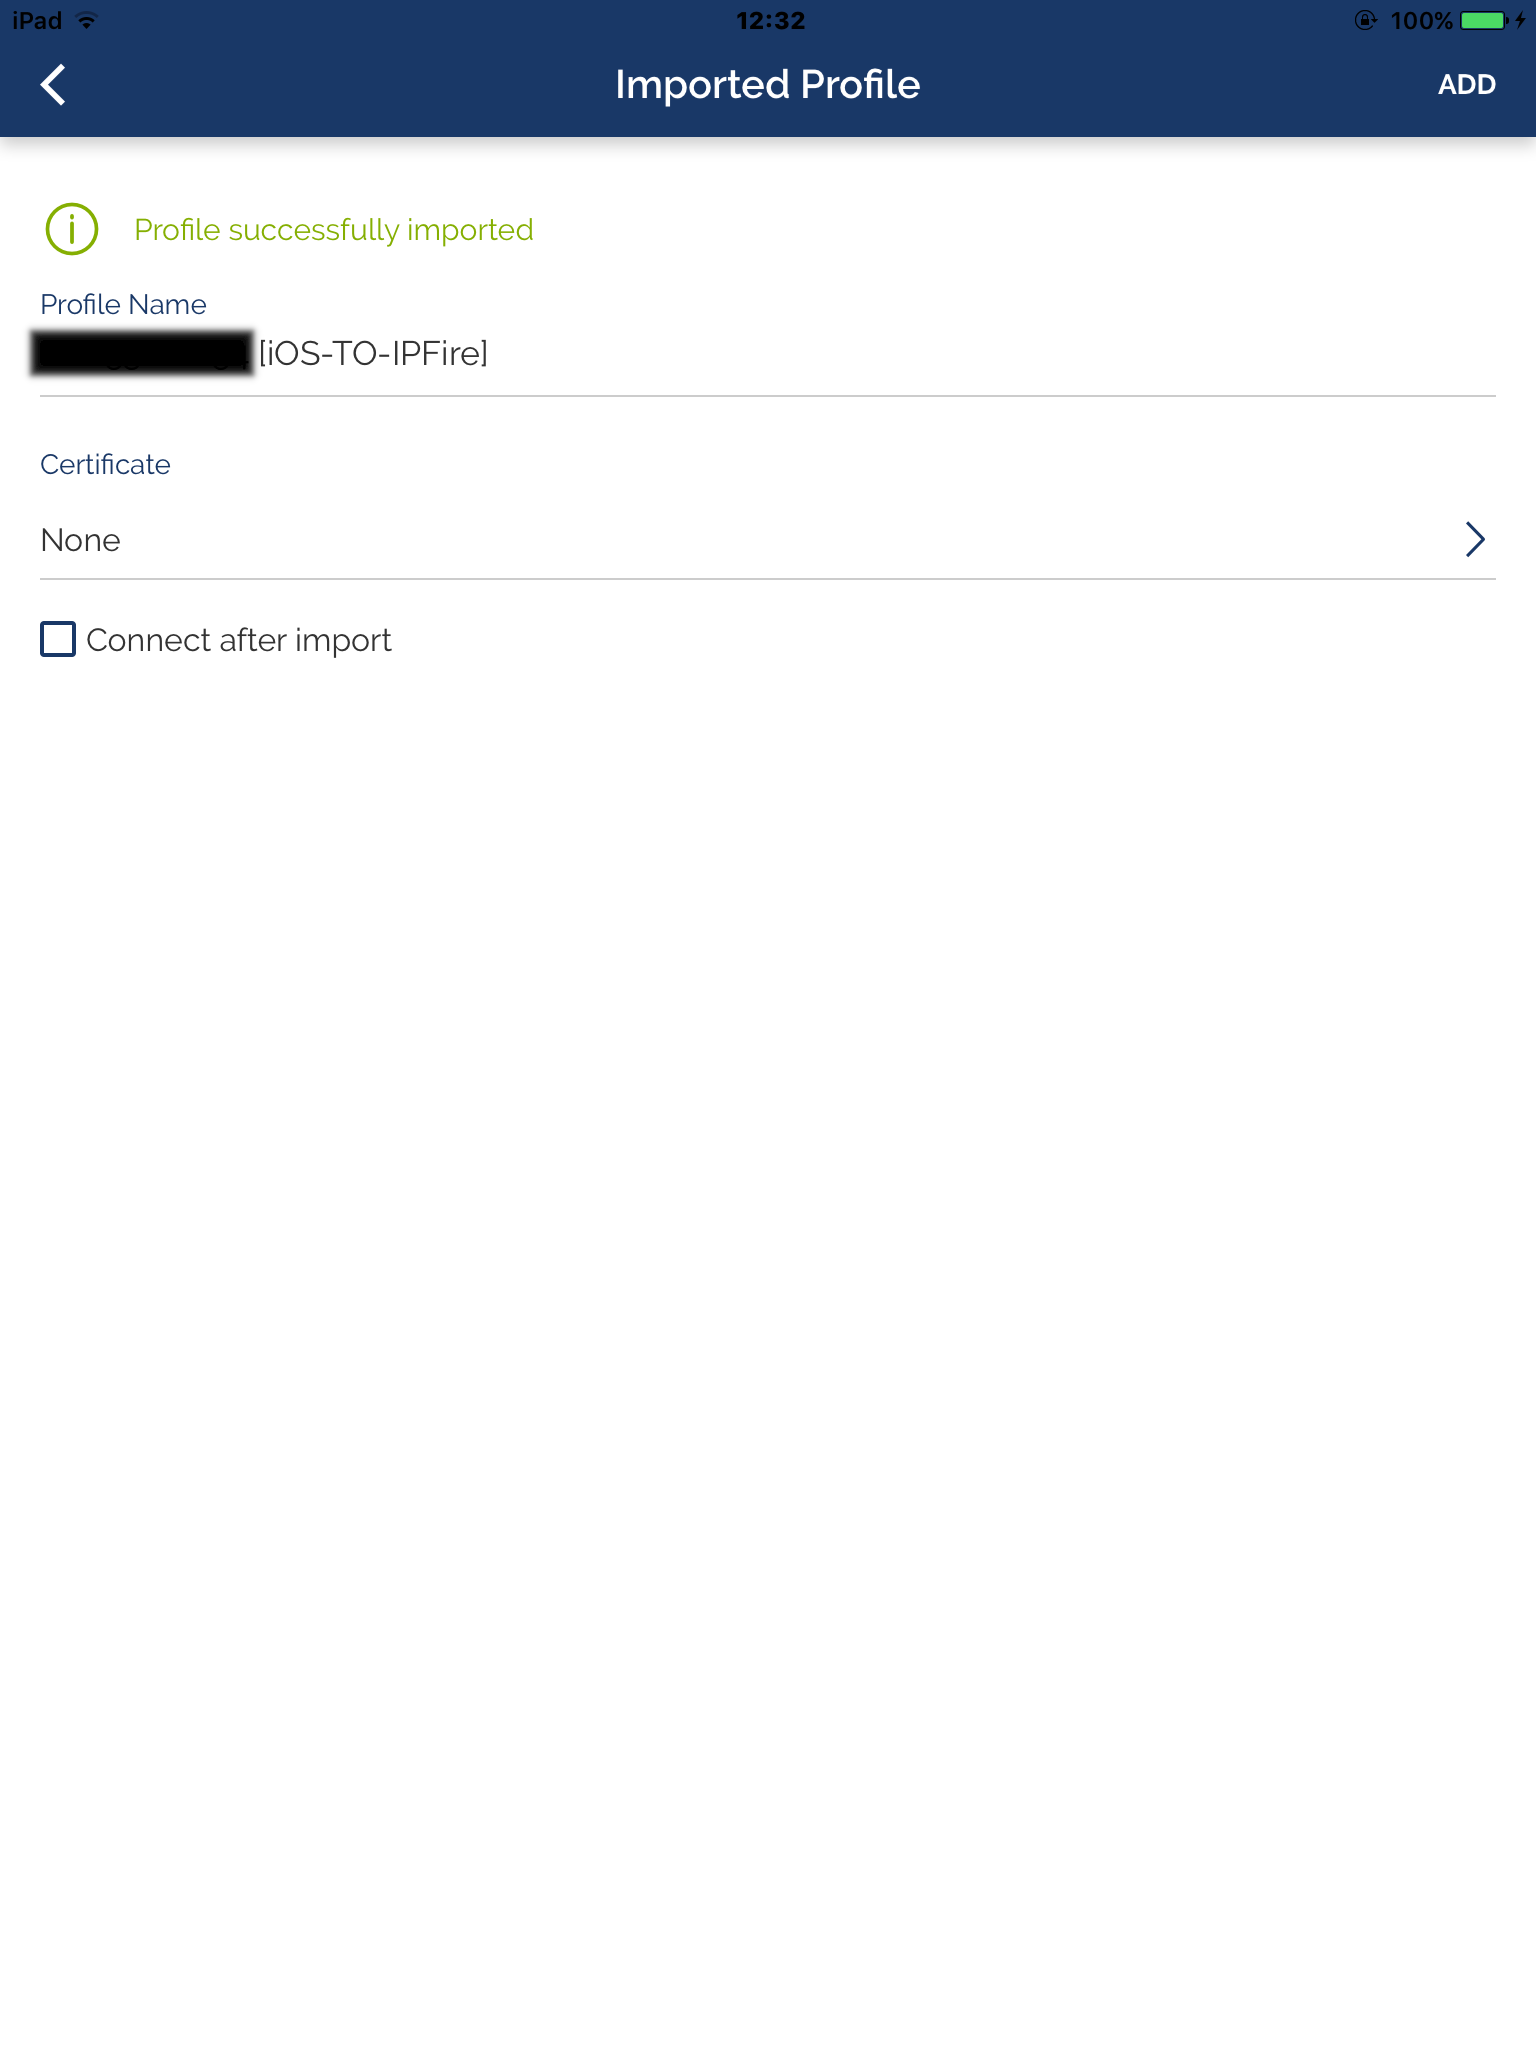
- First, import the certificates:
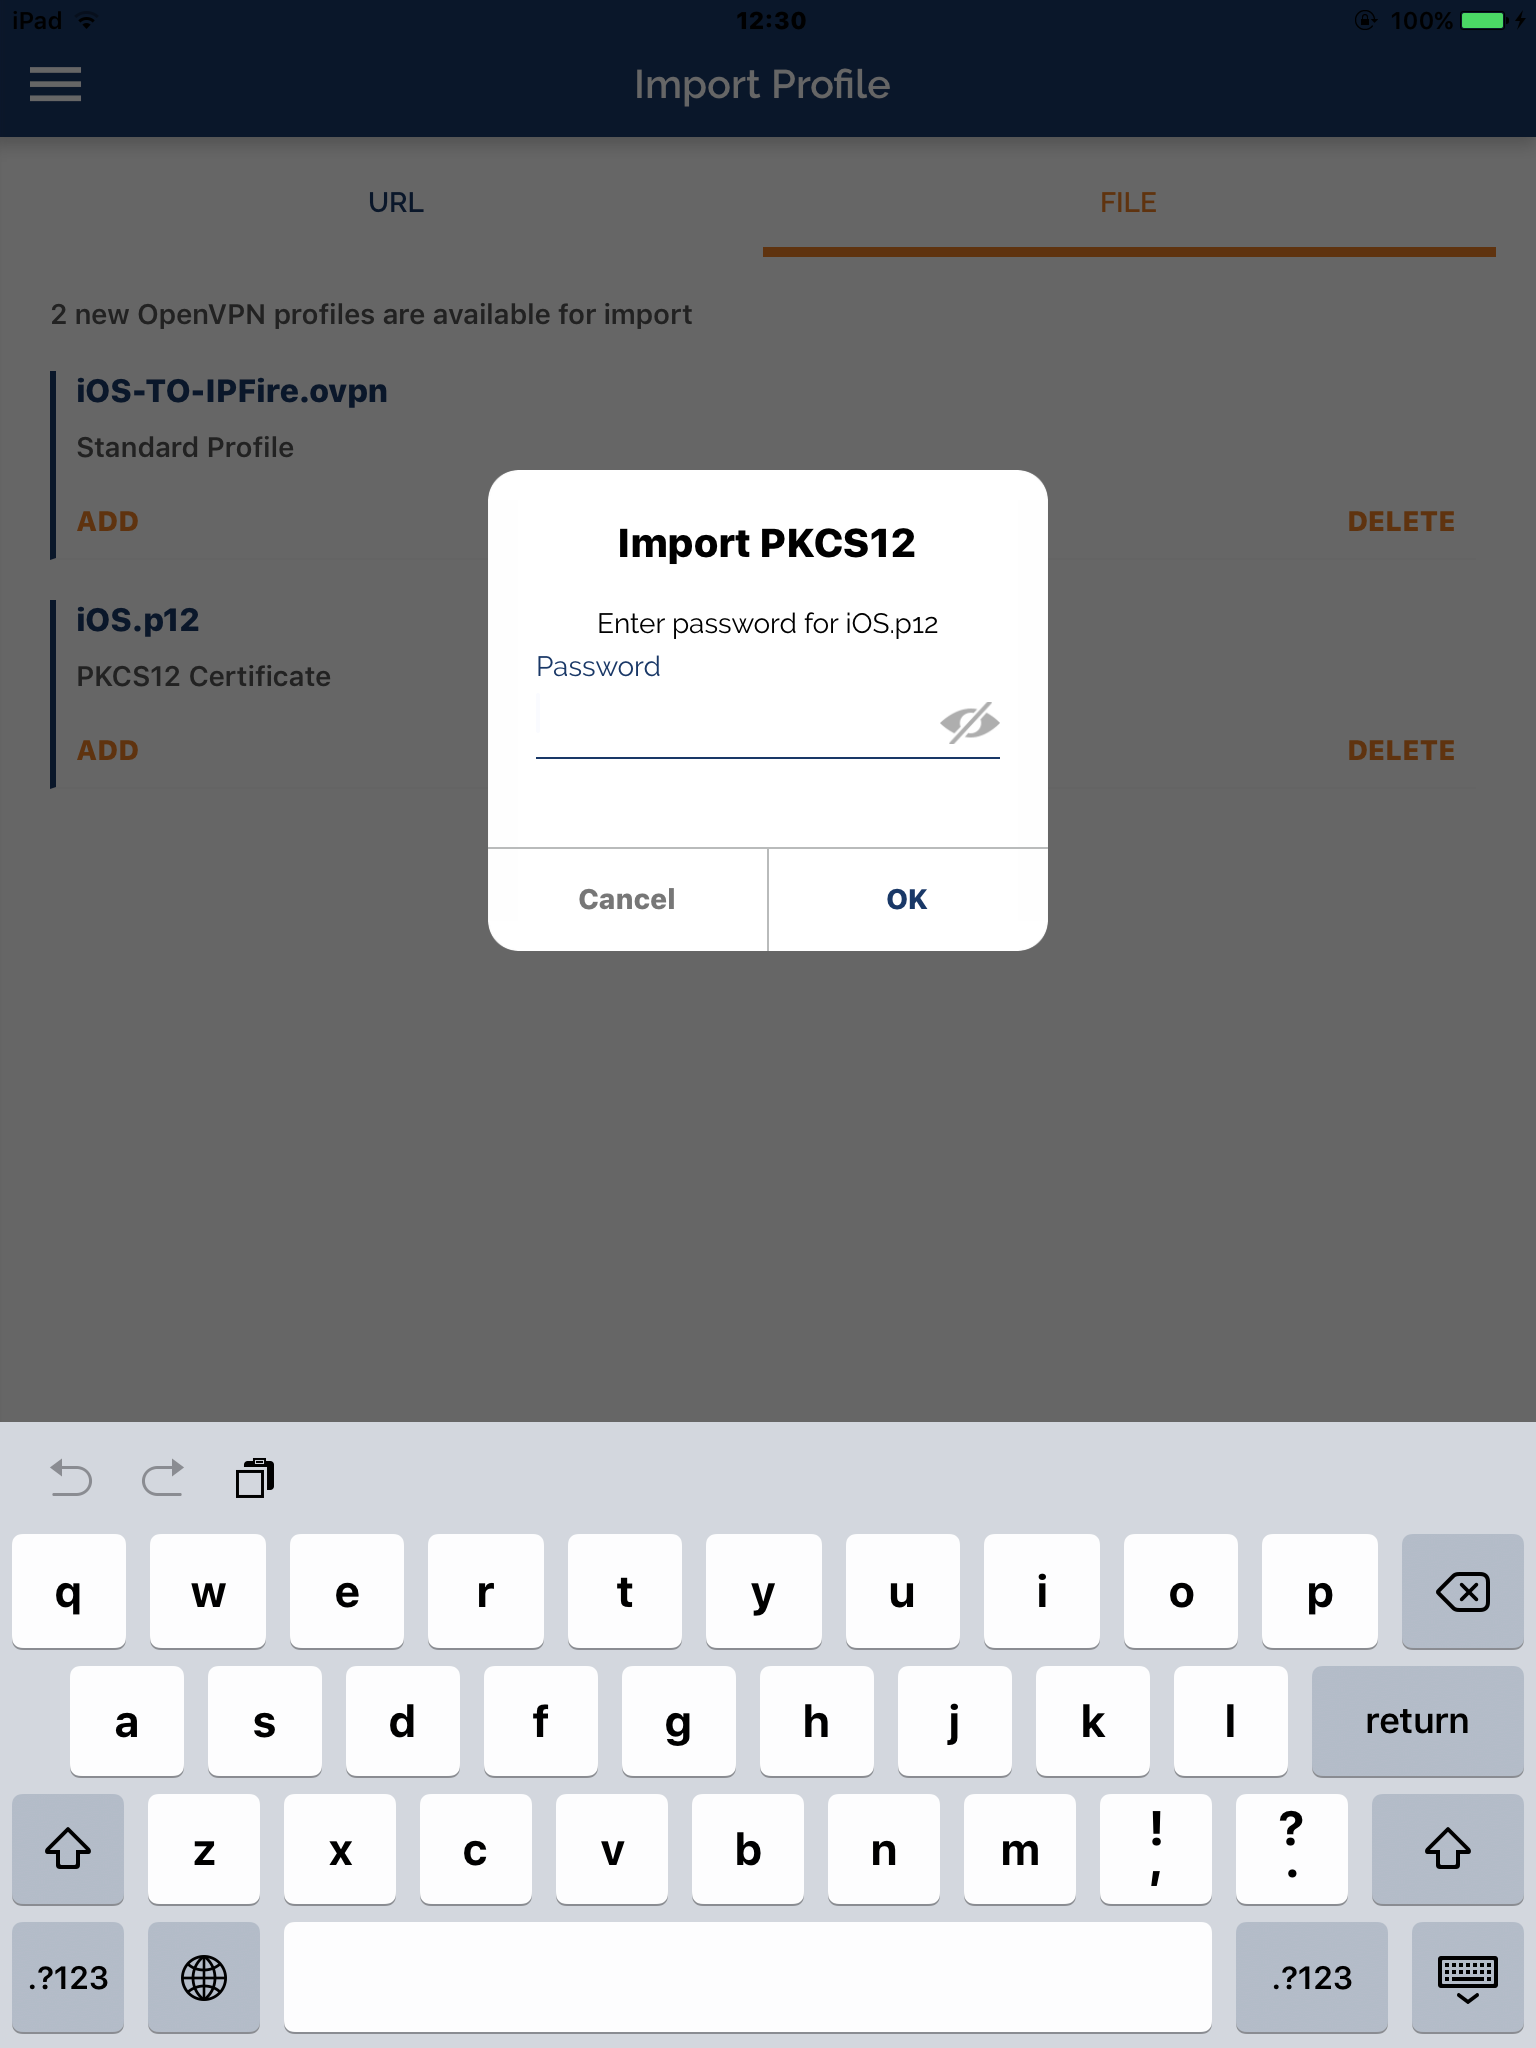
The app will ask for the password protecting the certificates you have entered in step 4 of the “Common preliminary steps” section; after you will be asked to save the certificate in the secure enclave of iOS:

You will be asked the pin protecting the iOS machine;
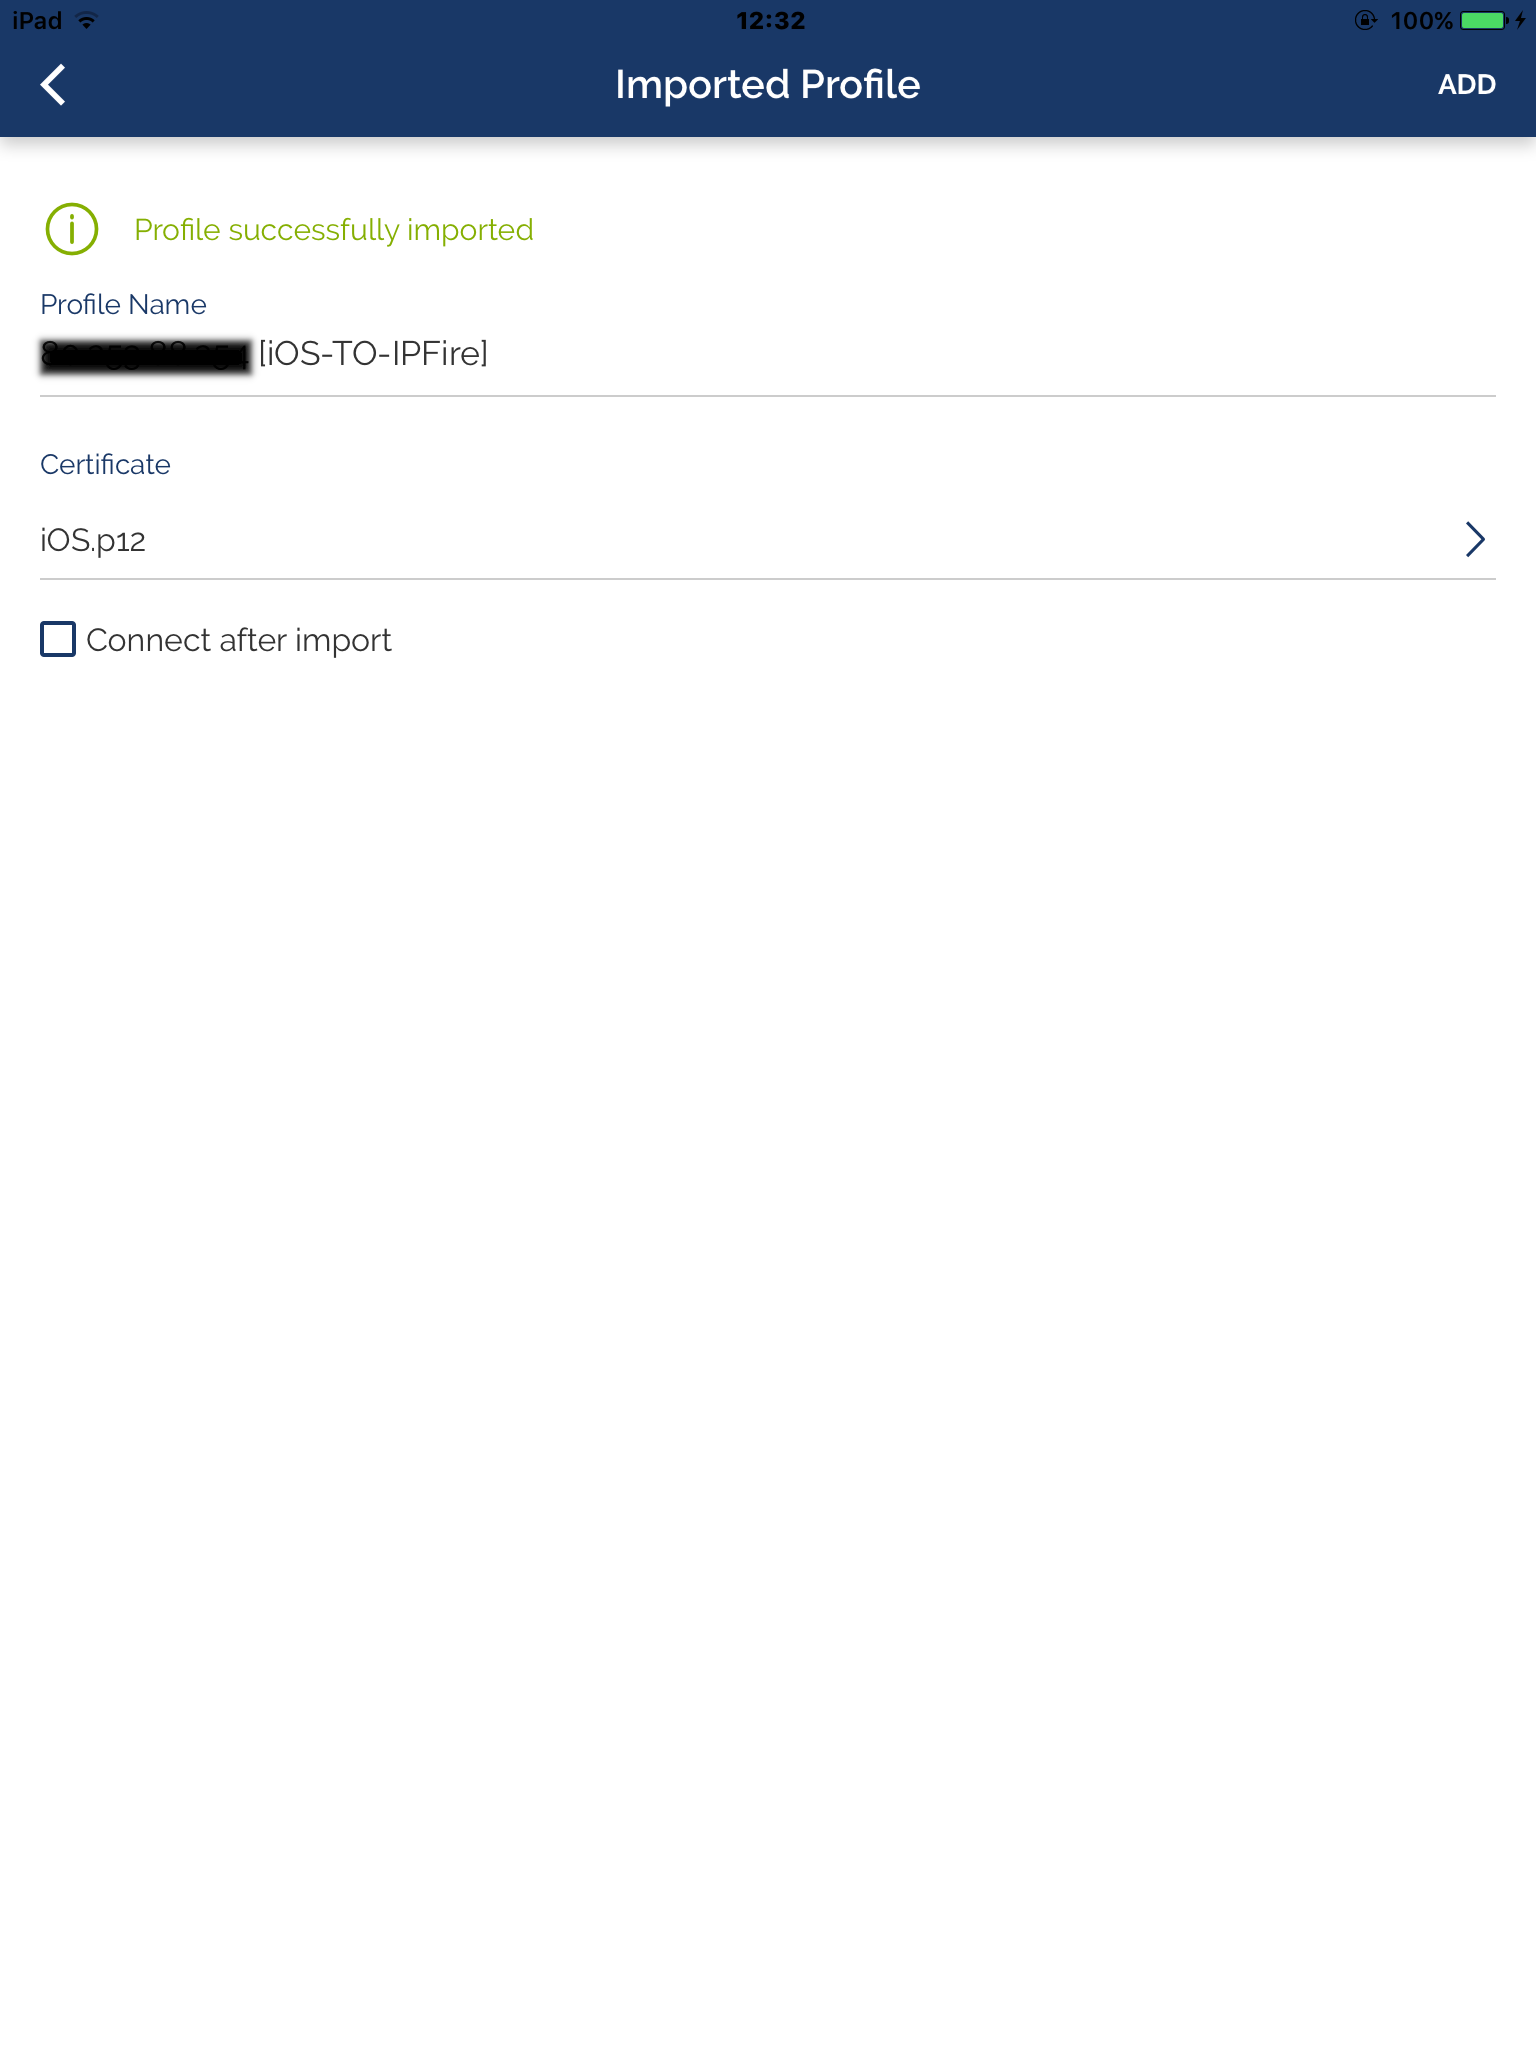
- Now the certificate has been imported and you will notice how the
.p12file has disappeared from iTunes window:
-
Click
ADDto import the.ovpnfile
-
Now you have to link to the profile the certificate previously imported:
You will find it listed in the Certificate section (select the symbol >) and click ADD:
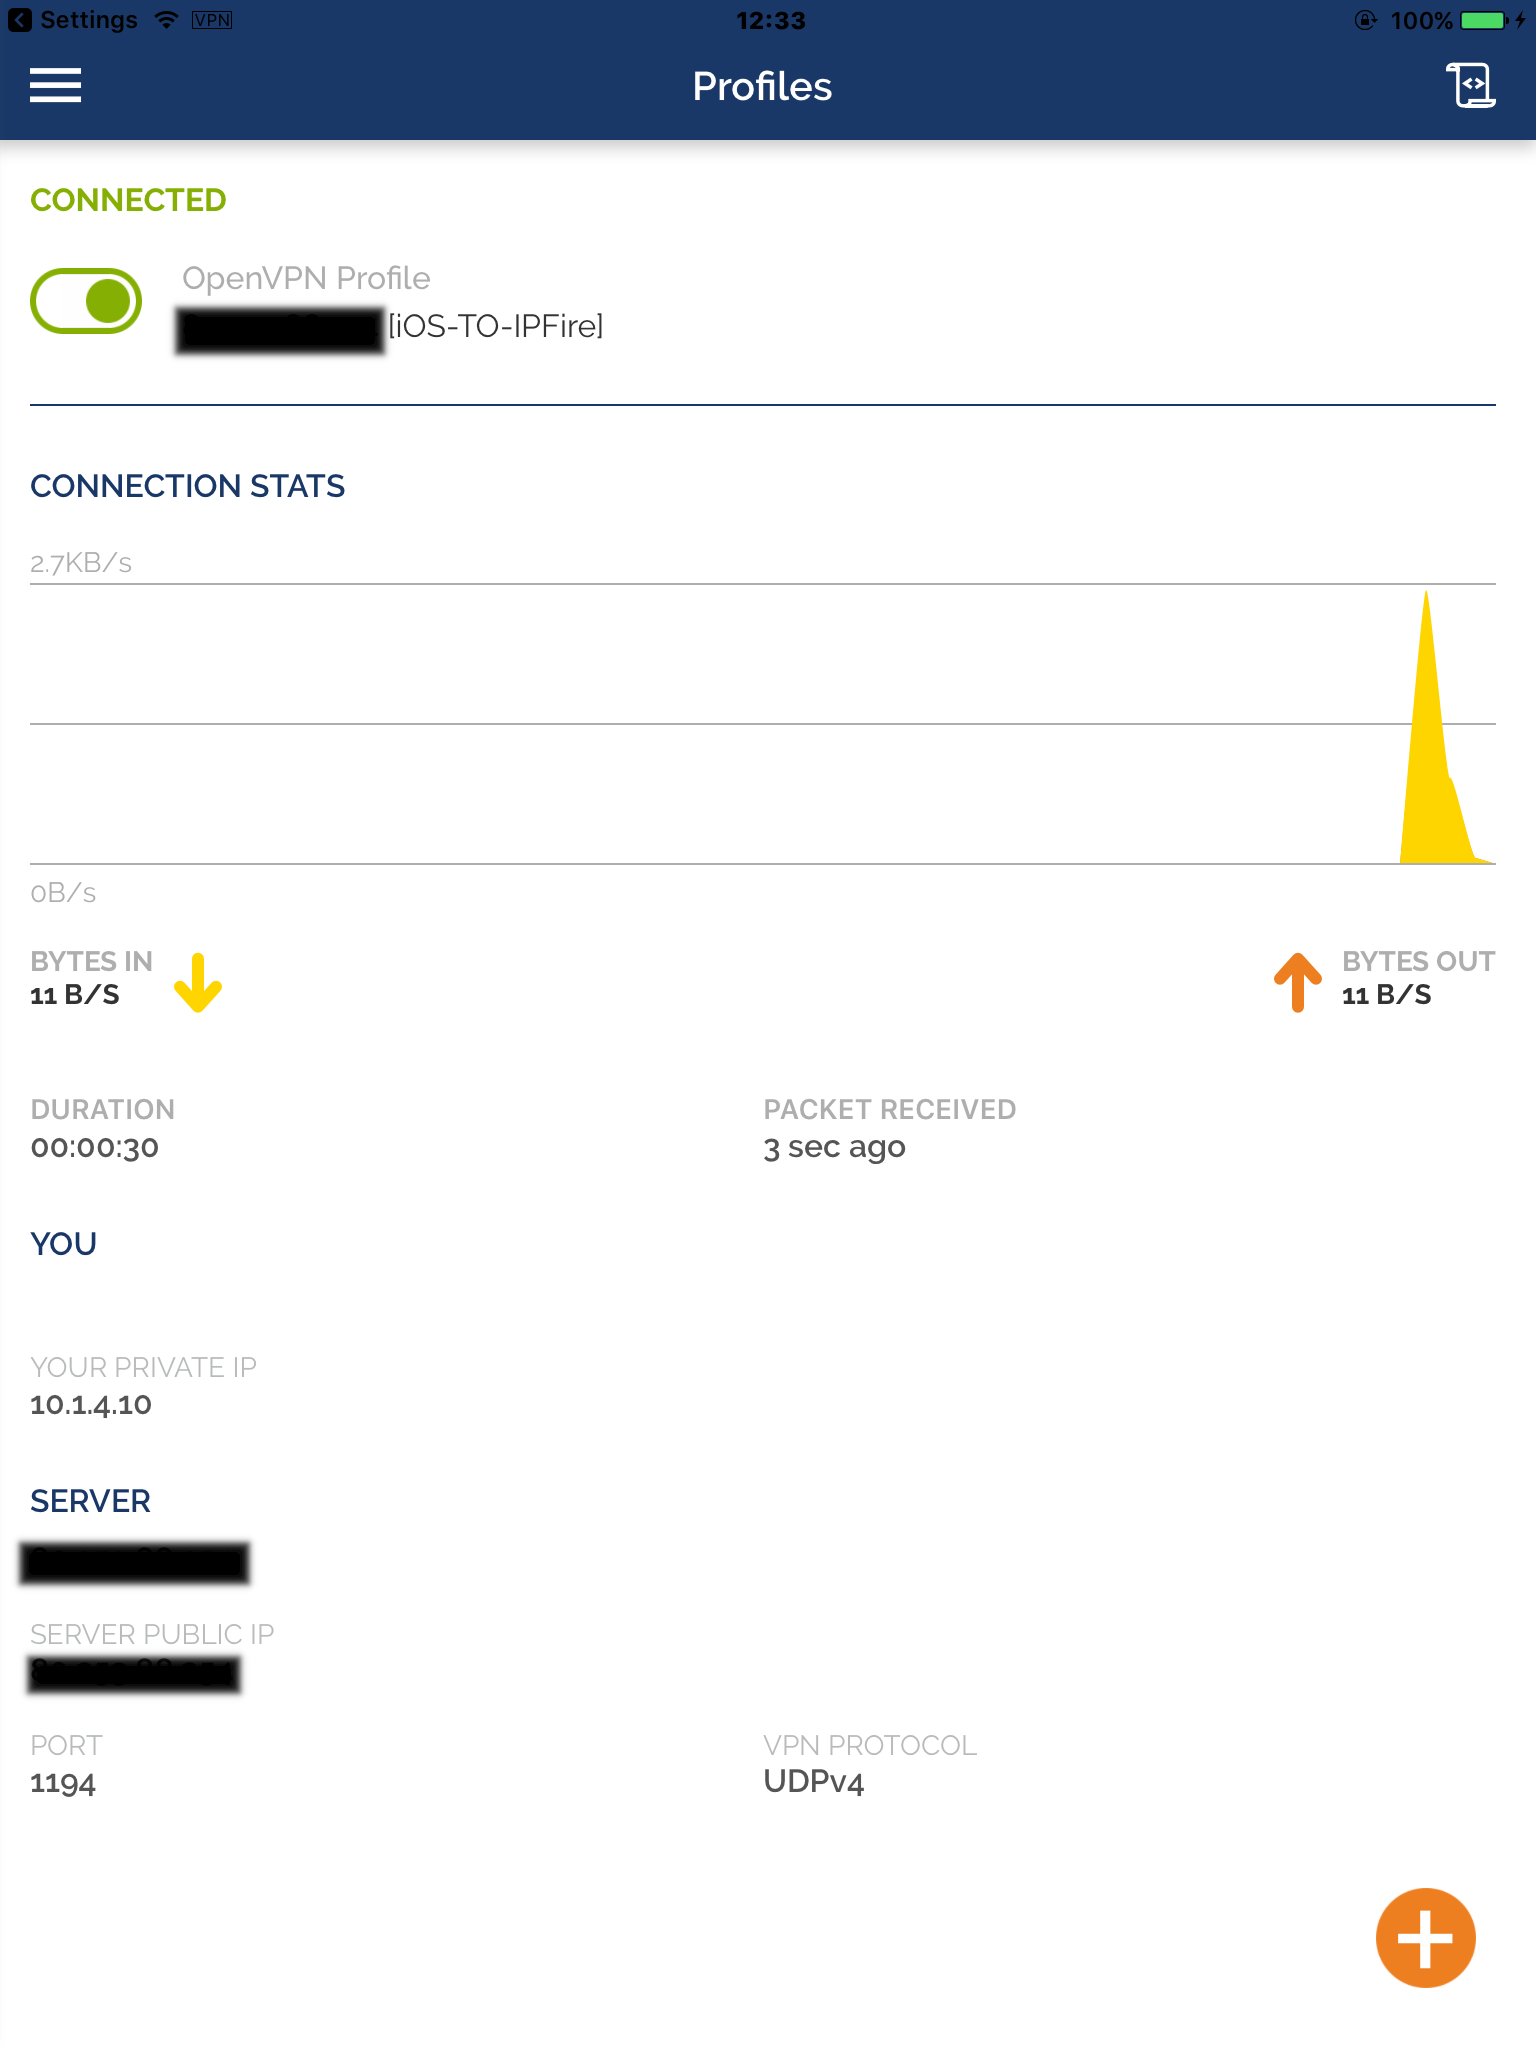
- Ready to connect:

- Success!
To have an automatic configuration for a proxy server in the OpenVPN tunnels, add the following directives to the .ovpn file before importing it:
dhcp-option PROXY_HTTP proxy_ip 800
dhcp-option PROXY_HTTPS proxy_ip 800
where proxy_ip is the IPFire local IP where squid is running.
In alternative, you can push this directive to any client adding the following directive to /var/ipfire/ovpn/scripts/server.conf.local, assuming you have selected Additional configuration from the Web User Interface Services/OpenVPN/Advanced server options
push "dhcp-option PROXY_HTTP proxy_ip 800"
push "dhcp-option PROXY_HTTPS proxy_ip 800"
Contrary to android, you can delete the certificates (if you so desire) from inside OpenVPN connect app, in the certificates section of the app.