Hi please i need for help… i want to To configure authentication with a local username and password database in Squid proxy server on IPFire and i found this answer on CHAT-GPT … but it don’t work for me …
This is answer of CHAT-GPT…
you can use the built-in “Basic Authentication” method. Here are step-by-step instructions:
Step 1: Access the IPFire Command Line Interface (CLI)
You can access the IPFire CLI through SSH or directly from the console of the IPFire server. Make sure you have the necessary access credentials.
Step 2: Install the Squid Package (if not already installed)
Check if Squid is installed by running:
------- pakfire list | grep squid -------
If it’s not installed, install it using:
------- pakfire install squid -------
Step 3: Configure Squid for Local Authentication
Edit the Squid configuration file using the nano text editor:
------- nano /etc/squid/squid.conf -------
Inside the squid.conf file, add the following lines to configure local authentication:
auth_param basic program /usr/lib/squid/basic_ncsa_auth /etc/squid/passwd
auth_param basic children 5
auth_param basic realm Squid proxy-caching web server
auth_param basic credentialsttl 2 hours
acl auth_users proxy_auth REQUIRED
http_access allow auth_users
/etc/squid/passwd is the file that will store the username and password pairs for authentication. You’ll create this file shortly.
auth_param basic realm is the message displayed to users when prompted for authentication. You can customize it.
auth_param basic credentialsttl defines how long an authentication credential is valid (in this example, 2 hours).
Step 4: Create User Accounts and Passwords
Create user accounts and set passwords by using the htpasswd utility. Replace <username> with the desired username:
------- htpasswd -c /etc/squid/passwd -------
Step 5: Save and Exit
Save the changes you made to the squid.conf file and exit the text editor.
Step 6: Restart Squid
Restart the Squid service to apply the configuration changes:
------- systemctl restart squid -------
Step 7: Test the Configuration
To test the configuration, try accessing a website through the proxy server. You should be prompted for a username and password. Enter the credentials of one of the user accounts you created in step 4 to access the internet through the proxy.
Step 8: Monitor and Maintain
Regularly monitor the Squid logs (/var/log/squid/access.log and /var/log/squid/cache.log) to ensure that the authentication and proxy server are working as expected.
CHAT-GPT and other AI tools can be useful but as with all tools you have to understand enough to know when the tool is telling you something incorrect.
In this case it is directing you to the command line for your task, which is not required. Everything can be done via the Web User Interface (WUI)
Then it says to install squid but squid comes with IPFire as a core program.
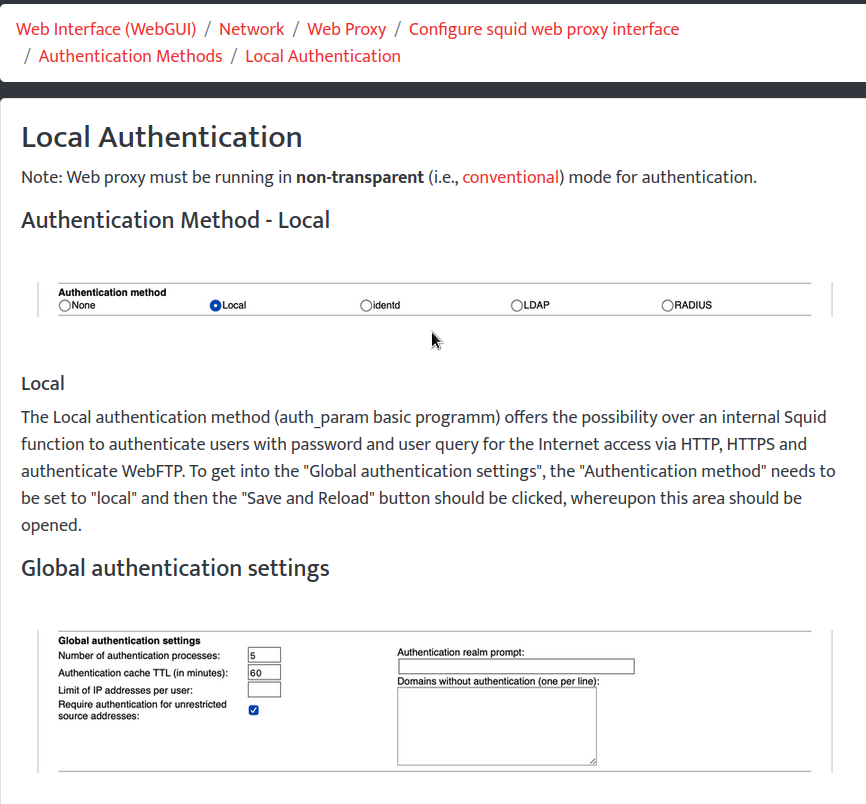
Ignore your chat-gpt screed and read through the section on Local Authentication in the IPFire wiki and use that for setting up your authentication.
If you experience any problems when following the wiki then come back here with your questions.
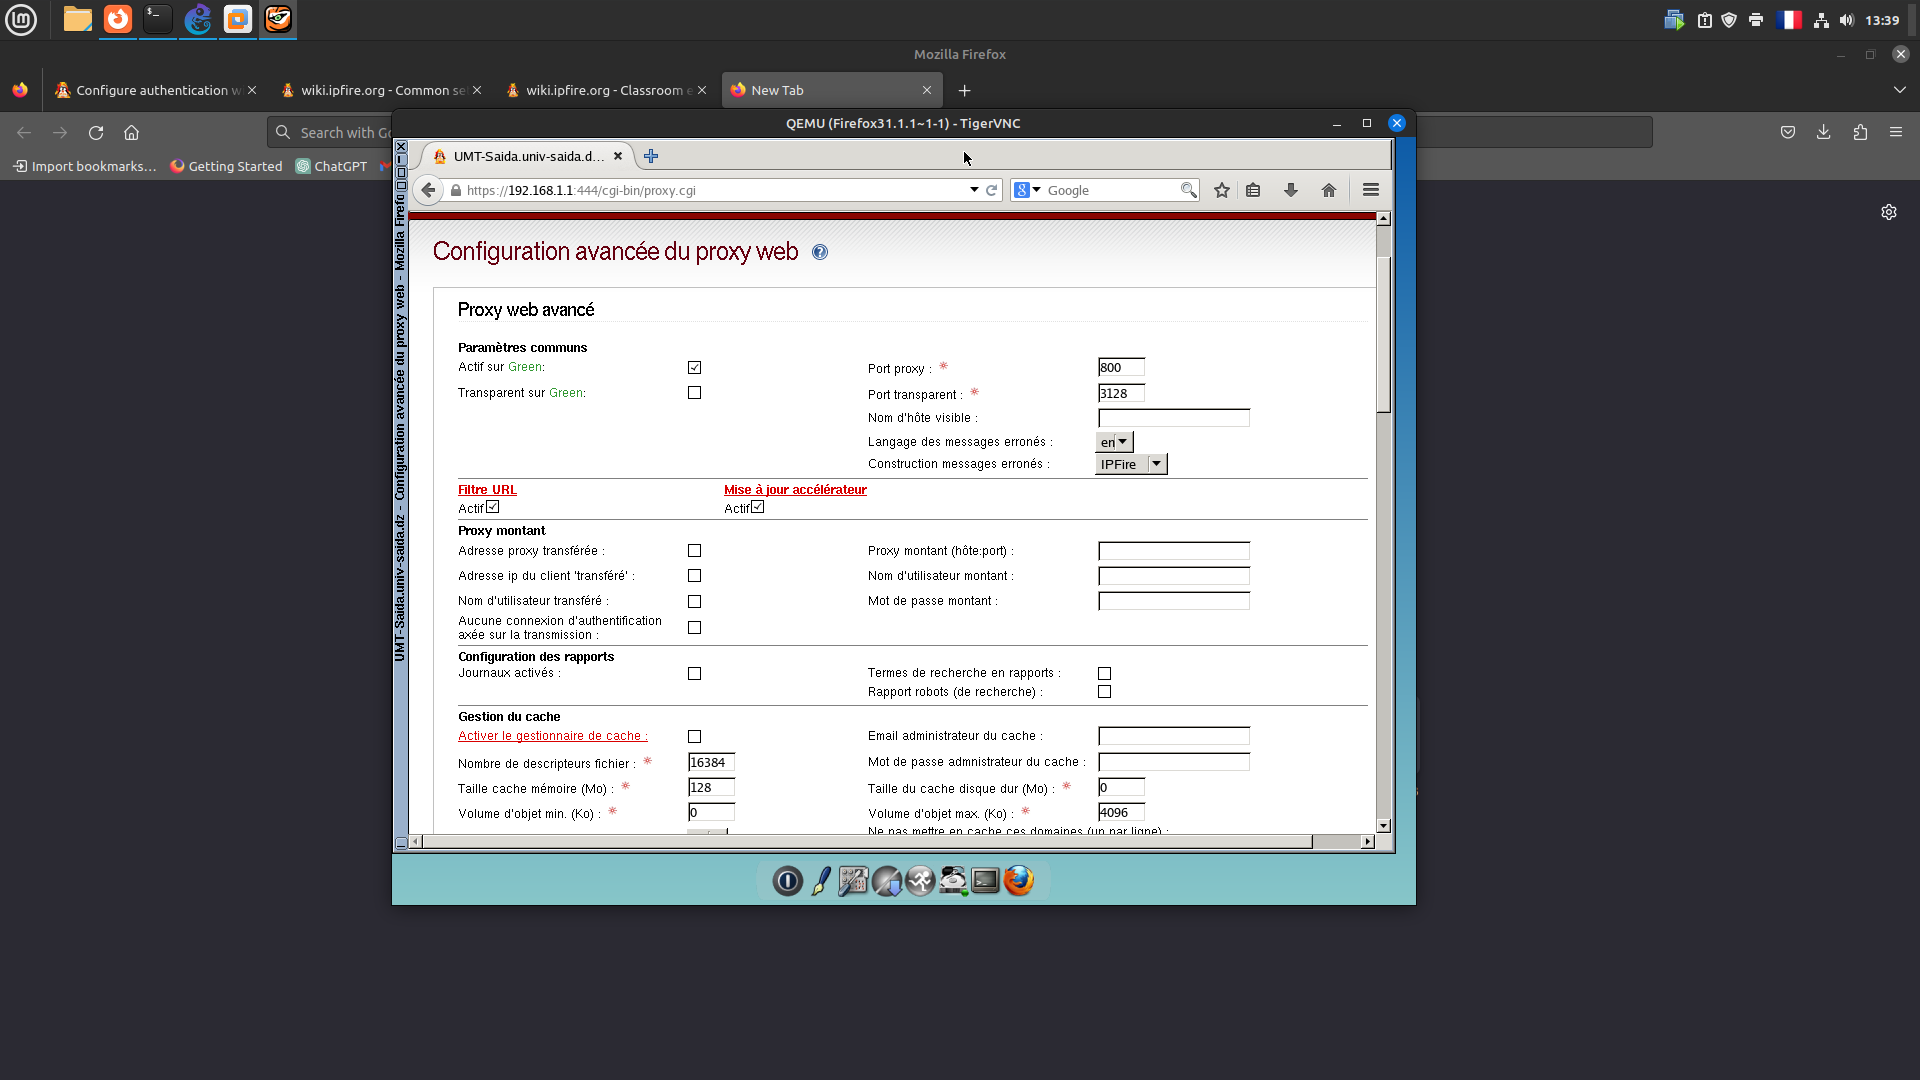
I just followed the wiki myself and successfully added Local Authentication to access web pages for a user.
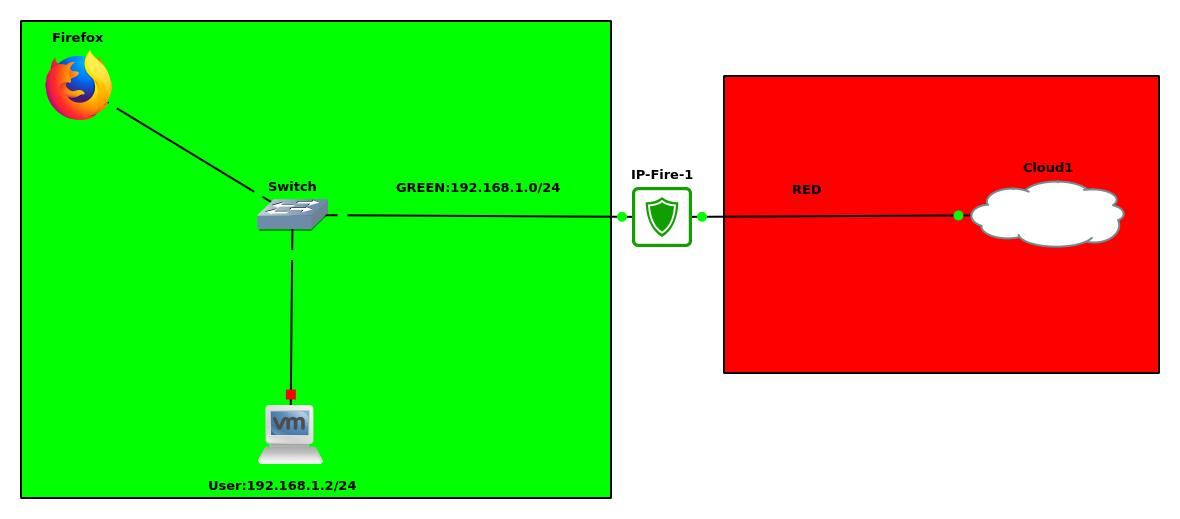
Please can you help me … how can do that with WUI … i used IPFIRE 2.27 (x86_64) … and this is my topology … i want user1 accede to the internet with user and password
I think you need to say where in the wiki instructions you had a problem.
As mentioned I was able to create local authentication and to create a user with a password. Using that name and password then allowed access to the browsing.
Regarding your topology. I don’t understand what the Firefox symbol is that is attached to the switch.
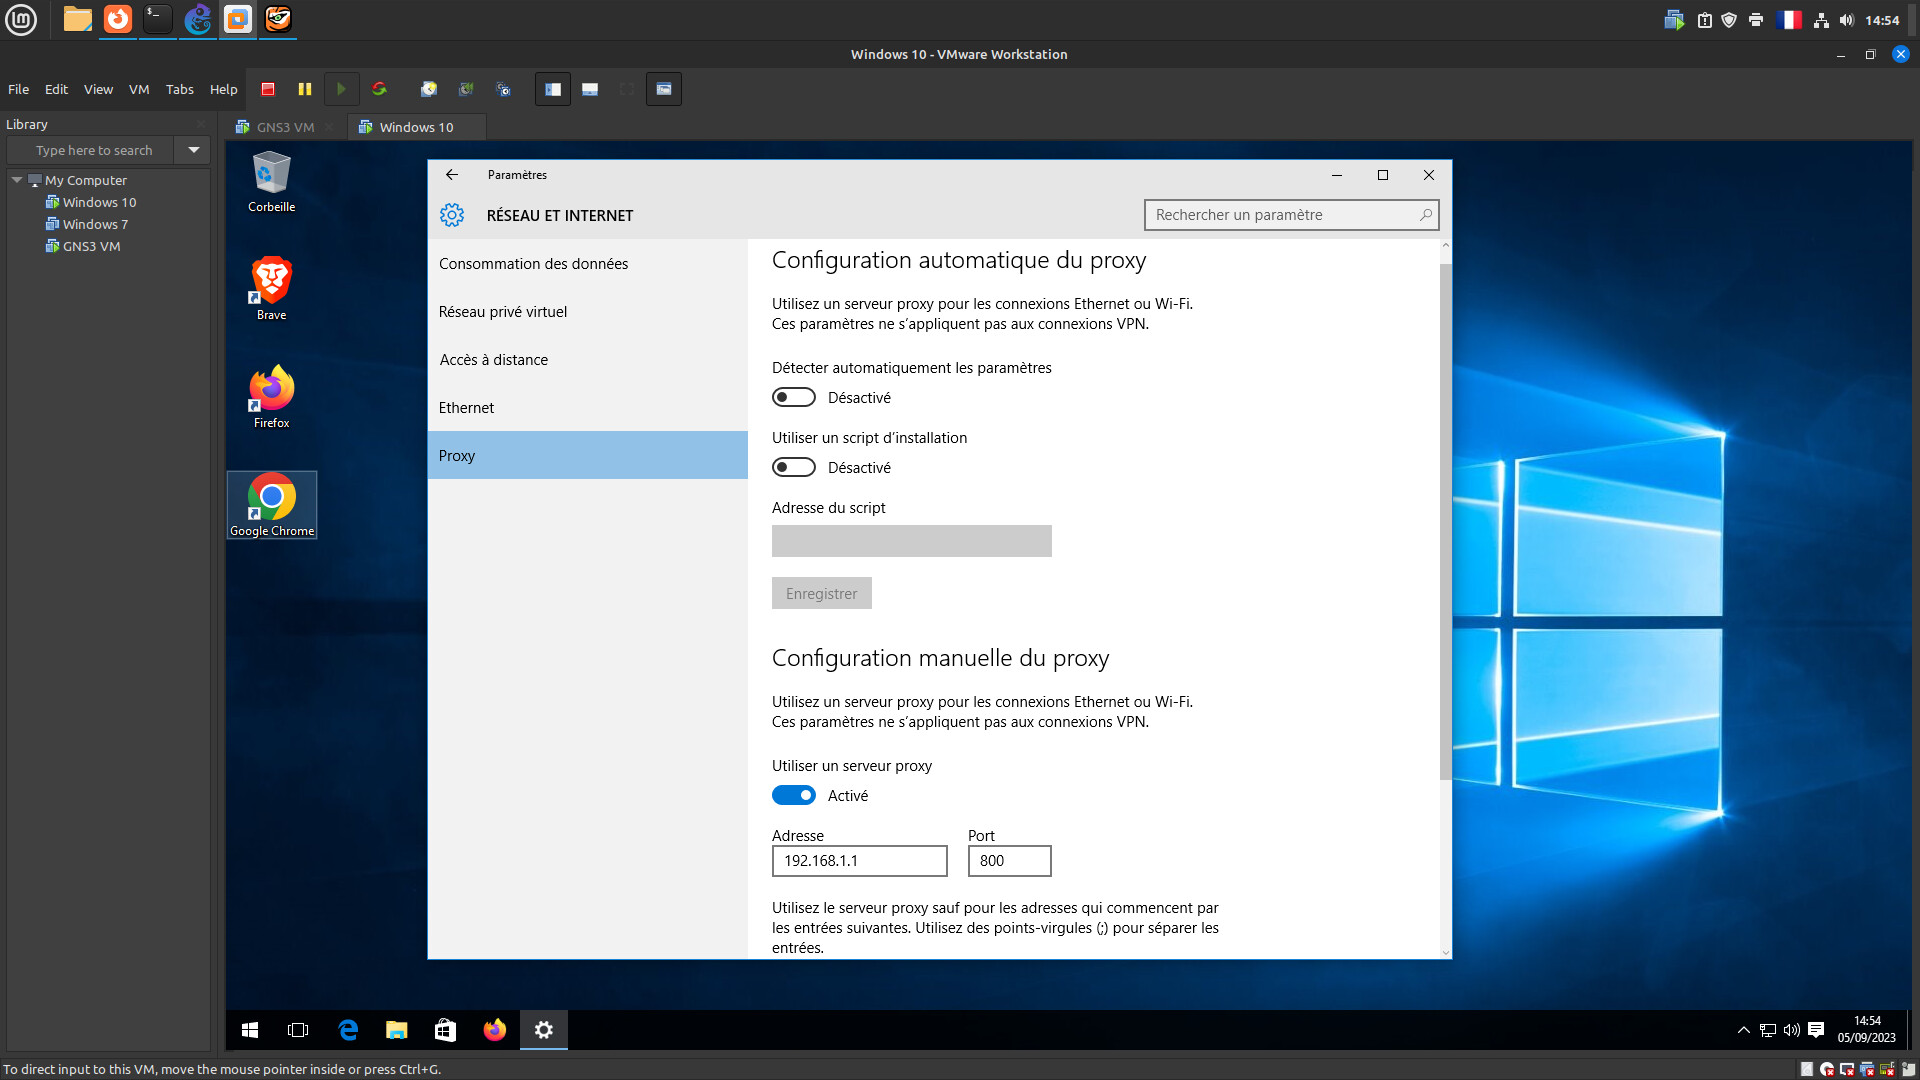
Normally, once you have local authentication set up, the user would use the firefox browser on their local computer and when they try to contact a website on the internet then IPFire and the Web Proxy will open an authentication box asking for the user name and password.
The complicated way using the CLI, defining users and passwords …, is done by the WUI. Thx to the devs making it such simple.
The quality of the answer of ChatGPT as a whole can be measured by the fact about the proxy Squid ( which is not an addon but, as far as I can remember, was always a basic component of IPFire ).
If you mean that you want the proxy settings to be automatically set then the simplest approach is to use the WPAD approach via dhcp or dns as described in this Wiki page.
If you mean that you want the settings to be implemented without the user being able to change them in the browser settings then that is more difficult.
The only other thing I could think of is to set up firewall rules that force the clients to go via the web proxy and blocks them if they try and bypass. That is not so easy to do. I can’t remember if anyone has tried that in the forum.
In the wiki there is a page that covers forcing clients to use the IPFire DNS server. Maybe that approach could be used as a template to follow for using the web proxy. https://wiki.ipfire.org/configuration/firewall/dns
I have no experience with that.
I use the wpad via dhcp/dns on my systems but as I am the only user, I trust myself not to bypass my own setup.
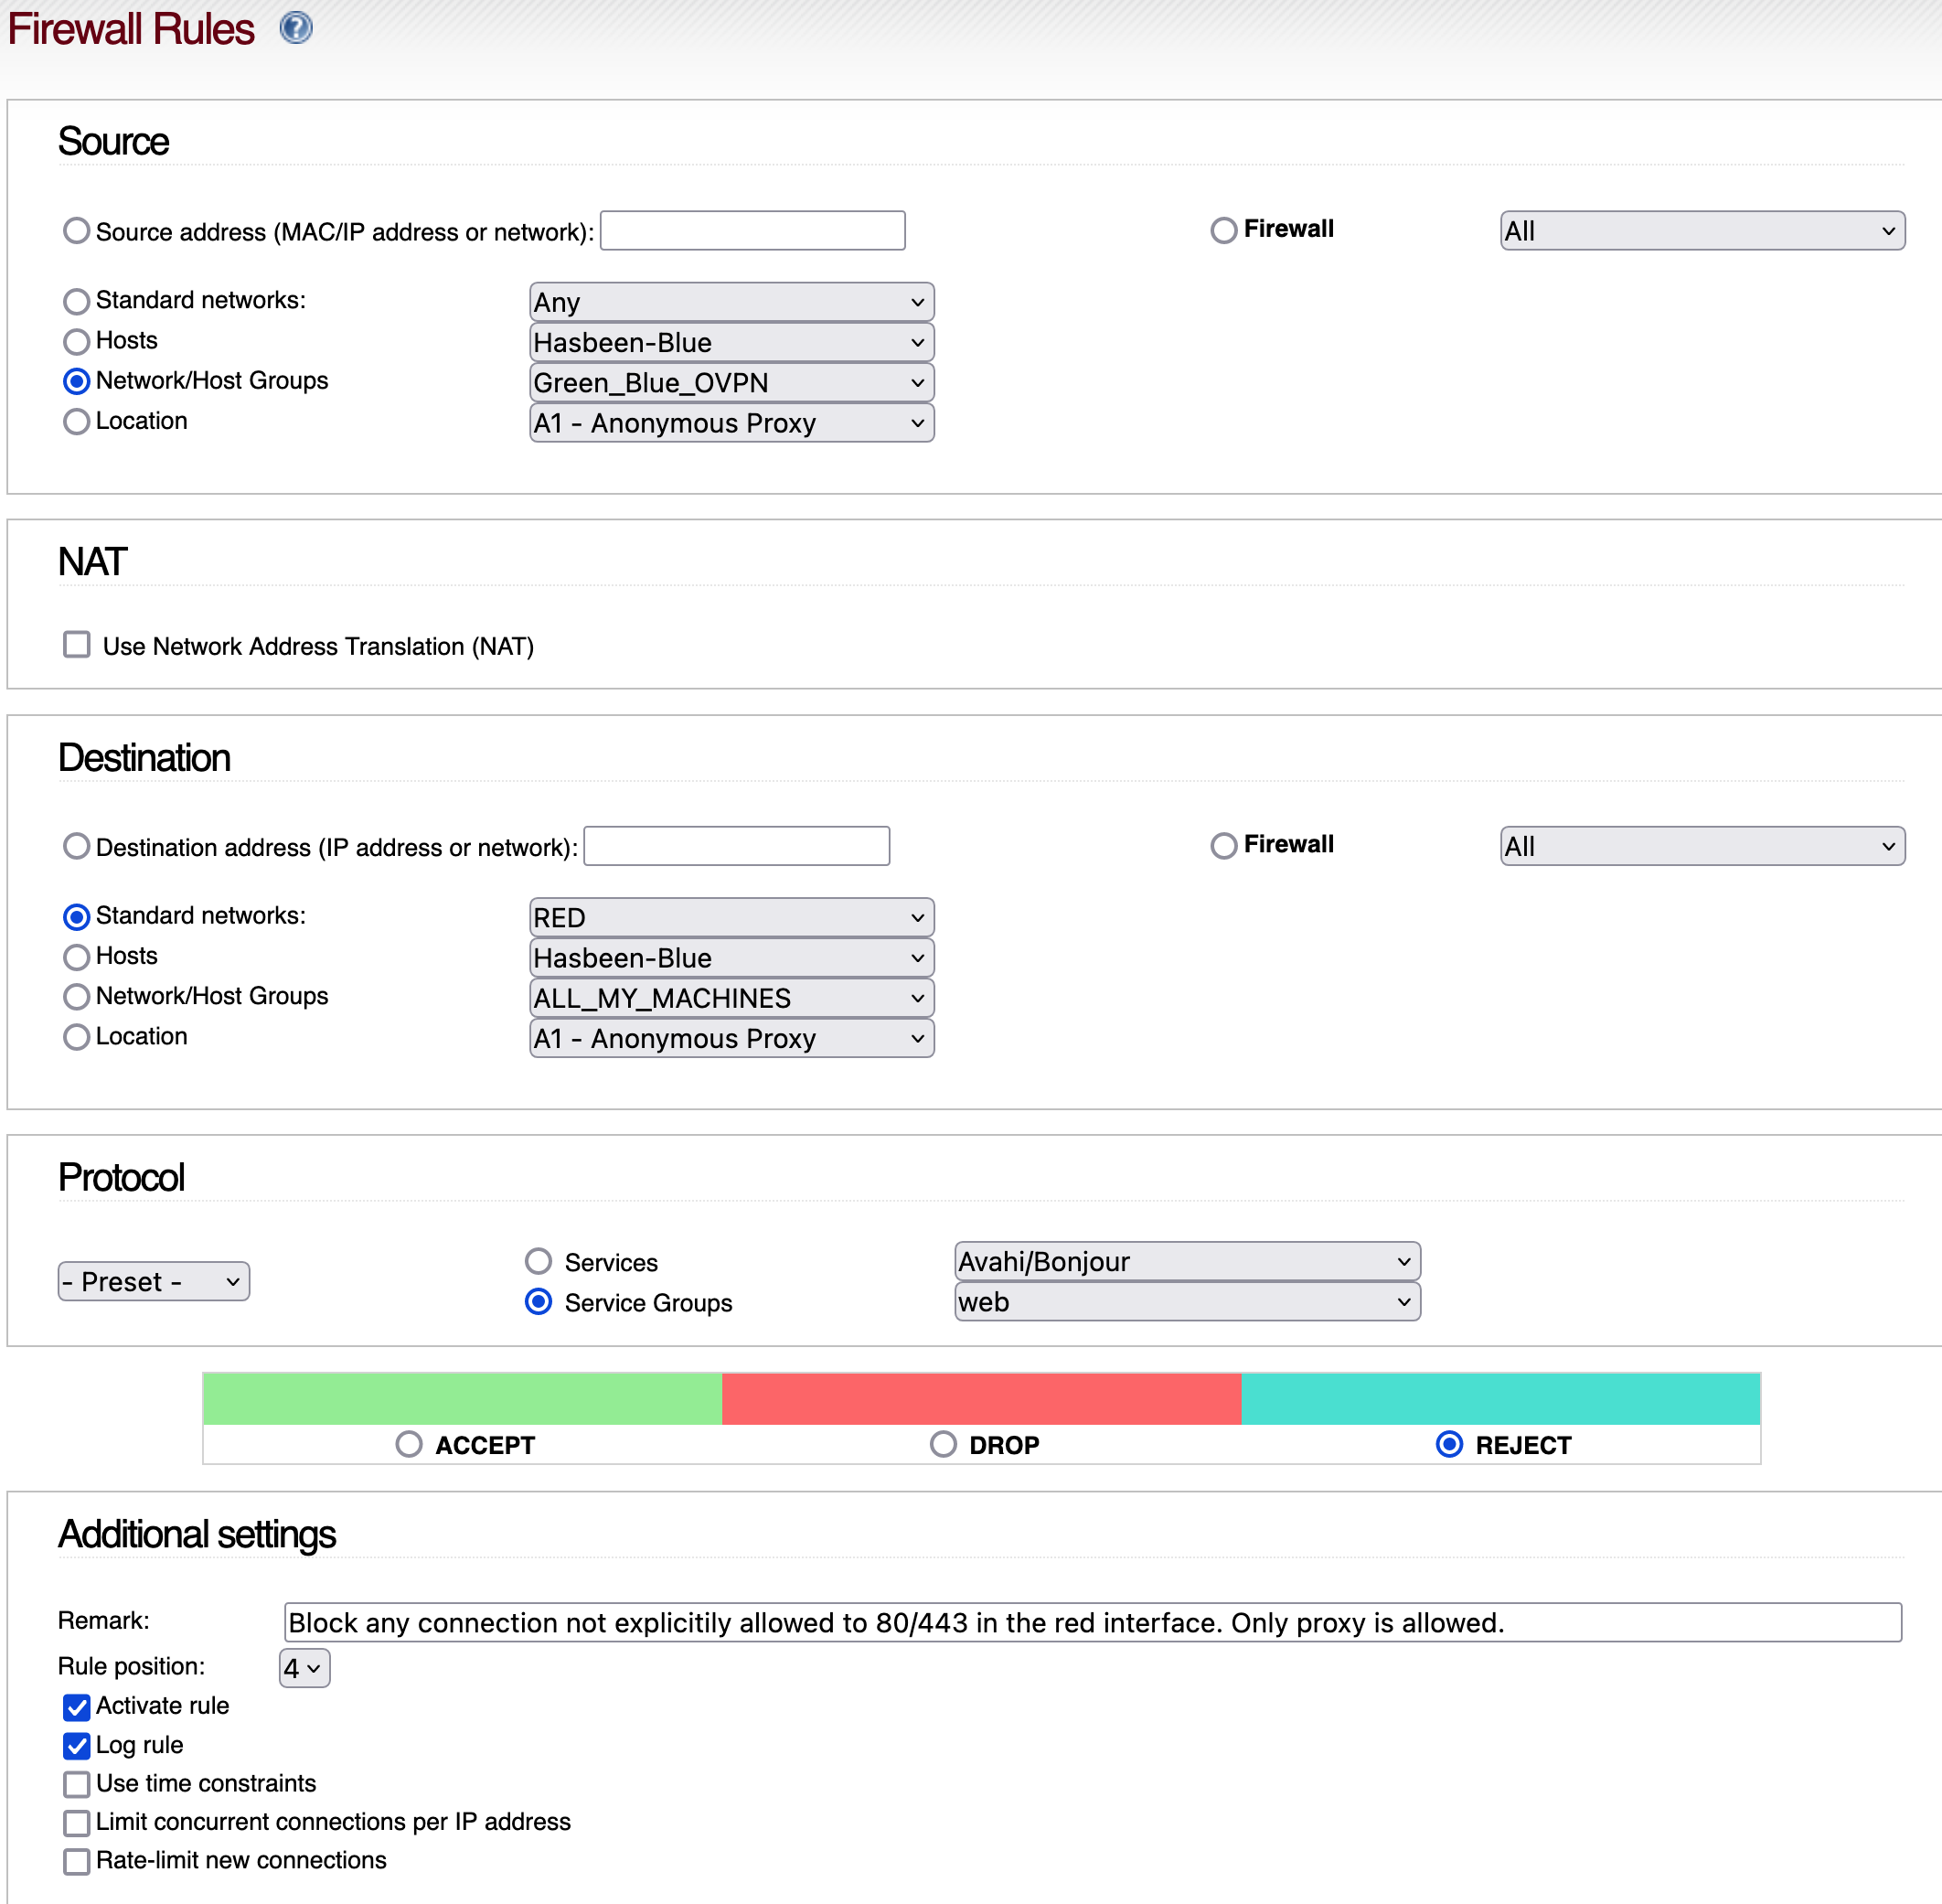
It works very well. I have created a service group for port 80 and 443 called “web” (in the Web User Interface /Firewall/Firewall Groups), which will be available as a selection option in the “protocol” part and this is my WUI setting.