I hope this is a best heading: I’ve used the Mini Appliance for years and bravely installed core 164 Test, now do not have machine access. Used elinks to examine the last backups core 163, 164, and 164. Installing 163 doesn’t work because 164 can-not be replaced. Created a bootable USB with 163 but hesitant installing from the MACbook + Serial because previously it erased the MACbook replacing the OS with IPFire. The reason for the Question-here, how to boot the appliance from the USB directly but can-not determine the Command. Does the Mini Appliance have a means to boot directly from the USB?
Hi,
to keep the original thread on topic, I just moved your post into a new thread.
Not having access to one myself, I am pretty sure it has.
You just need to flash an IPFire ISO image onto an USB drive, and ensure USB is set over SSD/HDD in the BIOS boot device priority of your appliance.
Also, are there any more details on why upgrading to Core Update 164 caused this trouble? It would be good to know, so we can fix the root cause of that, instead just advising users to re-install everything…
Thanks, and best regards,
Peter Müller
1 Like
The ISO image on the USB drive is bootable, if only the Appliance could run it. A possibiity was connect the USB & Laptop and Laptop & Appliance through a serial cable. But IPFire begins automatically. How to Serial console options → Install IPFire (serial) in the boot menu? Michael wrote in 2014: flashing the IPFire flash image on a mSATA SSD is not fun to do.
From the failed 164 beta test image:

Hope that helps. Perhaps the failed 164 can yet start.
Br.
Hi Ken! Welcome to the IPFire community!
I have a MacBook Pro also.
- download the ISO Image.
- Copy the ISO Image to the USB thumb using this:
https://wiki.ipfire.org/installation/write-a-flash-image#macos
-
before booting the Mini Appliance you need to find a serial cable and connect it to the Mac. And make sure the Mac and Serial and the Serial cable all work together. (again before booting the first time!)
-
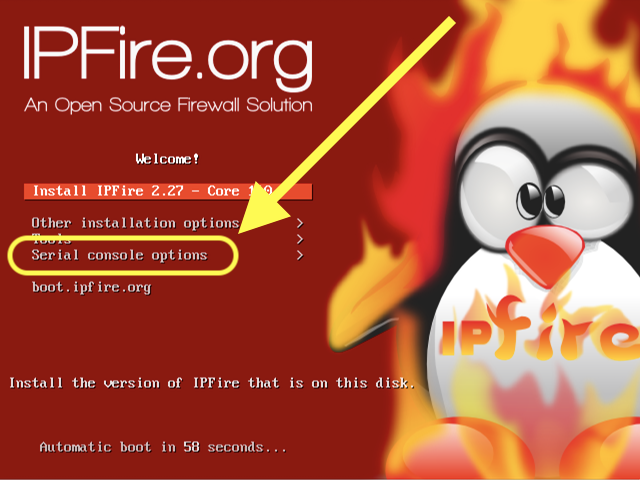
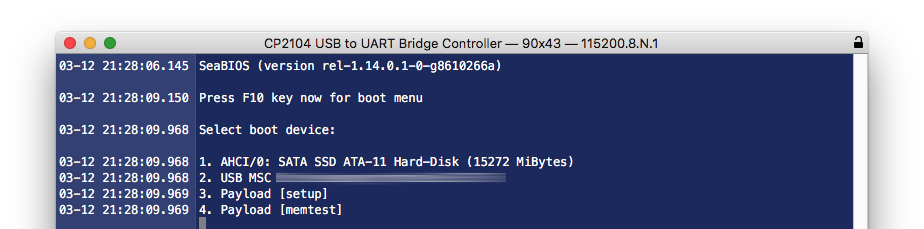
When you finally get ready to boot, plug in the USB thumb drive, and power up. you will see a VERY brief message to hit F10.
It will look similar to this if you use the Mac app named “Serial”.
-
See Select boot device. There will be three or four or five options. pick the USB thumb drive. (on my Mini it is the 2nd choice)
Again - It will look similar to this if you use the Mac app named “Serial”.
-
Read this: wiki.ipfire.org - Step 3: Run the installer
-
pick Serial Console options and start following the Installations.

Does this help? Feel free to ask questions!
4 Likes
USB prepared by BalenaEtcher but Using Terminal method resulted “no such file or direcrtory” when the instructions are disk2s1 tobe USB:
sudo dd bs=1m of=/dev/rdisk2s1 if=/path/to/ipfire-2.27.x86_64-full-core164.iso
when the file is located

How is that Command written?
Don’t use BalenaEtcher. It is for the flash file and not for the ISO file. Only use:
https://wiki.ipfire.org/installation/write-a-flash-image#macos
/Users/WheelOnFire/Desktop/ipfire-2.27.x86_64-full-core164.iso
I suggest spending a little time learning how to use the Mac Terminal. You will find you can drag and drop a filename from your Desktop to the dd command.
sudo dd bs=1m of=/dev/rdisk2s1 if=
the rdisk2s1 portion of the command doesn’t look correct. Can you run diskutil list again and post the output. I am looking for the output of the USB thumb drive only.
It will look similar to this:
iMac:~ jon$ diskutil list
<snip>
/dev/disk3 (external, physical):
   #:                       TYPE NAME                    SIZE       IDENTIFIER
   0:     FDisk_partition_scheme                        *64.0 GB    disk3
   1:                 DOS_FAT_32 UNTITLED                64.0 GB    disk3s1
1 Like

Perfect!
You need only this info for the dd command.
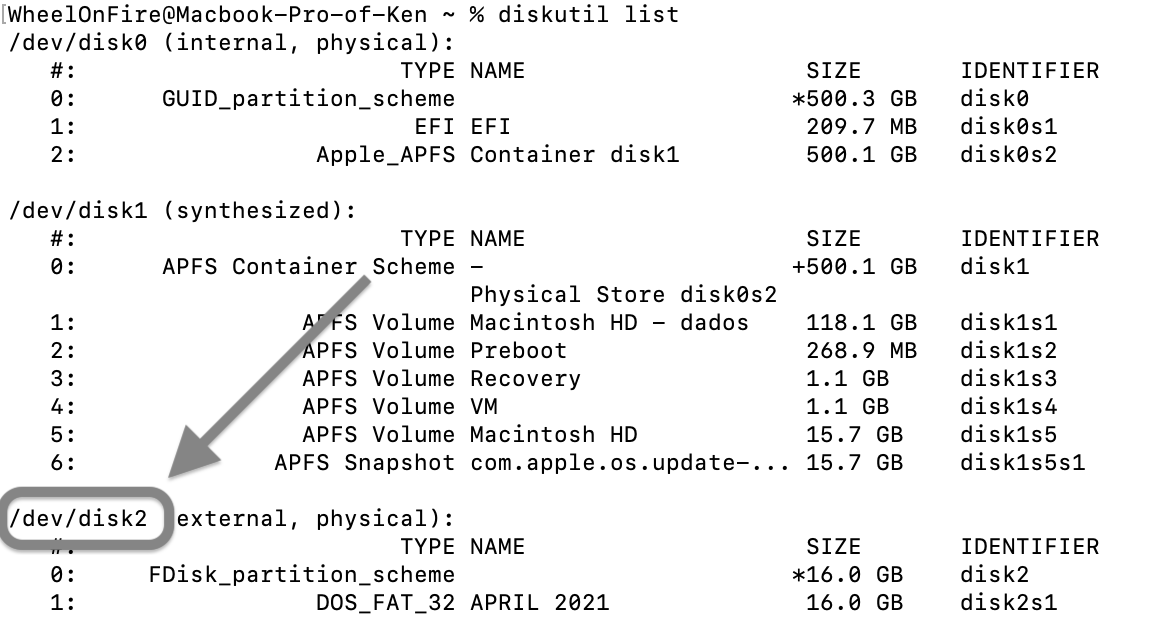
So get rid of the s1 in your dd command. And you end up with this:
sudo dd bs=1m of=/dev/rdisk2 if=/Users/WheelOnFire/Desktop/ipfire-2.27.x86_64-full-core164.iso
1 Like
Could unmounting the USB cause the drive not to be found. It is not visible on the desktop. Your instructions were followed but “Operation not permitted”.


Yes. Those appear to be the instrucitons.
Just wanted to make sure!
And another guess… Is this the first time you’ve used the terminal for a command? If so, then try this:
1 Like
That fixed the Terminal problem. Now the USB is “not readable by this computer” and was reformatted with FAT. That too doesn’t read.
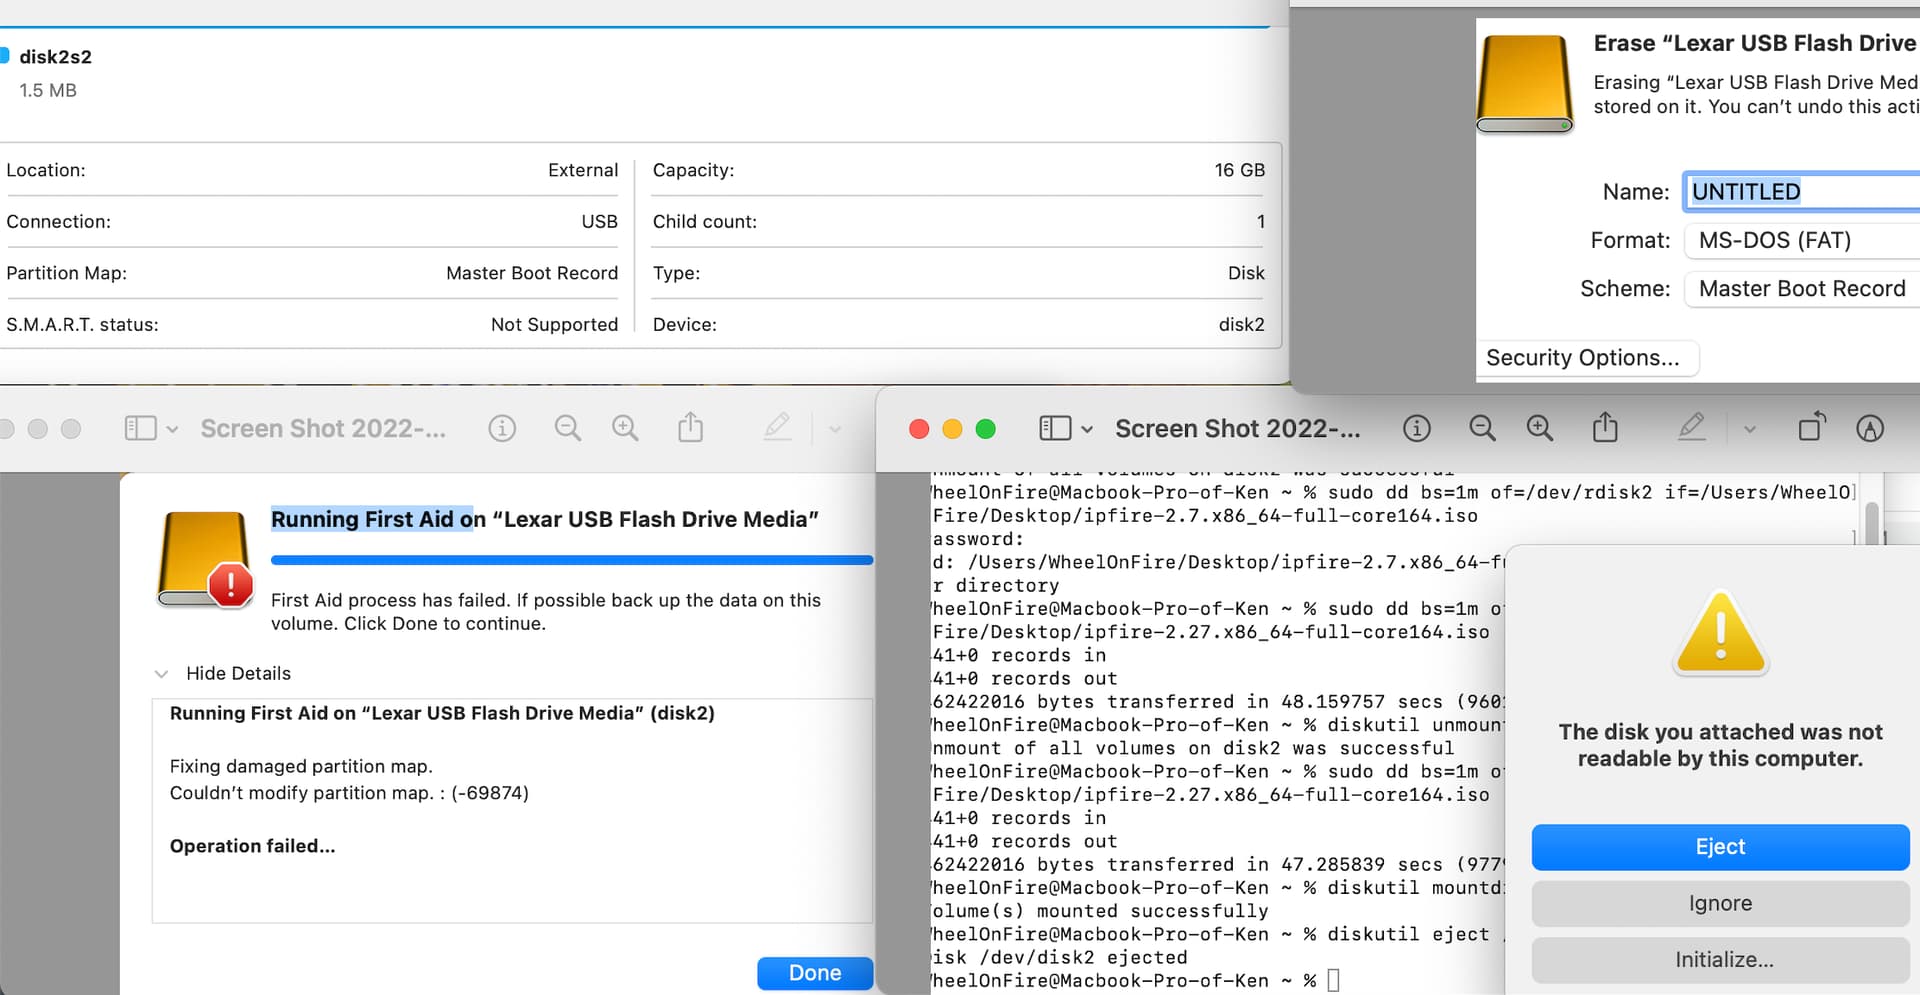
did you get this message after you ran the dd command?
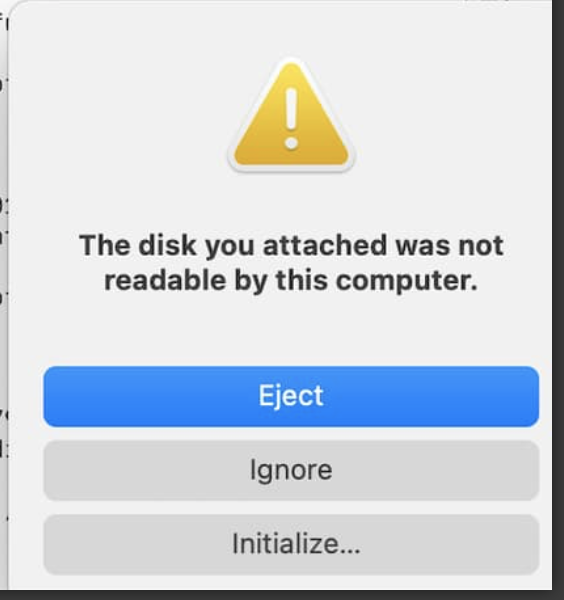
If so, then the dd command probably worked.
Note - The completed USB Drive will be unreadable by the Mac!
Since we are working in the terminal, then the Terminal screen is the one that helps the most. And I cannot quite read that screen.
1 Like
Sticking the USB and Mini Appliance & Serial resulted:
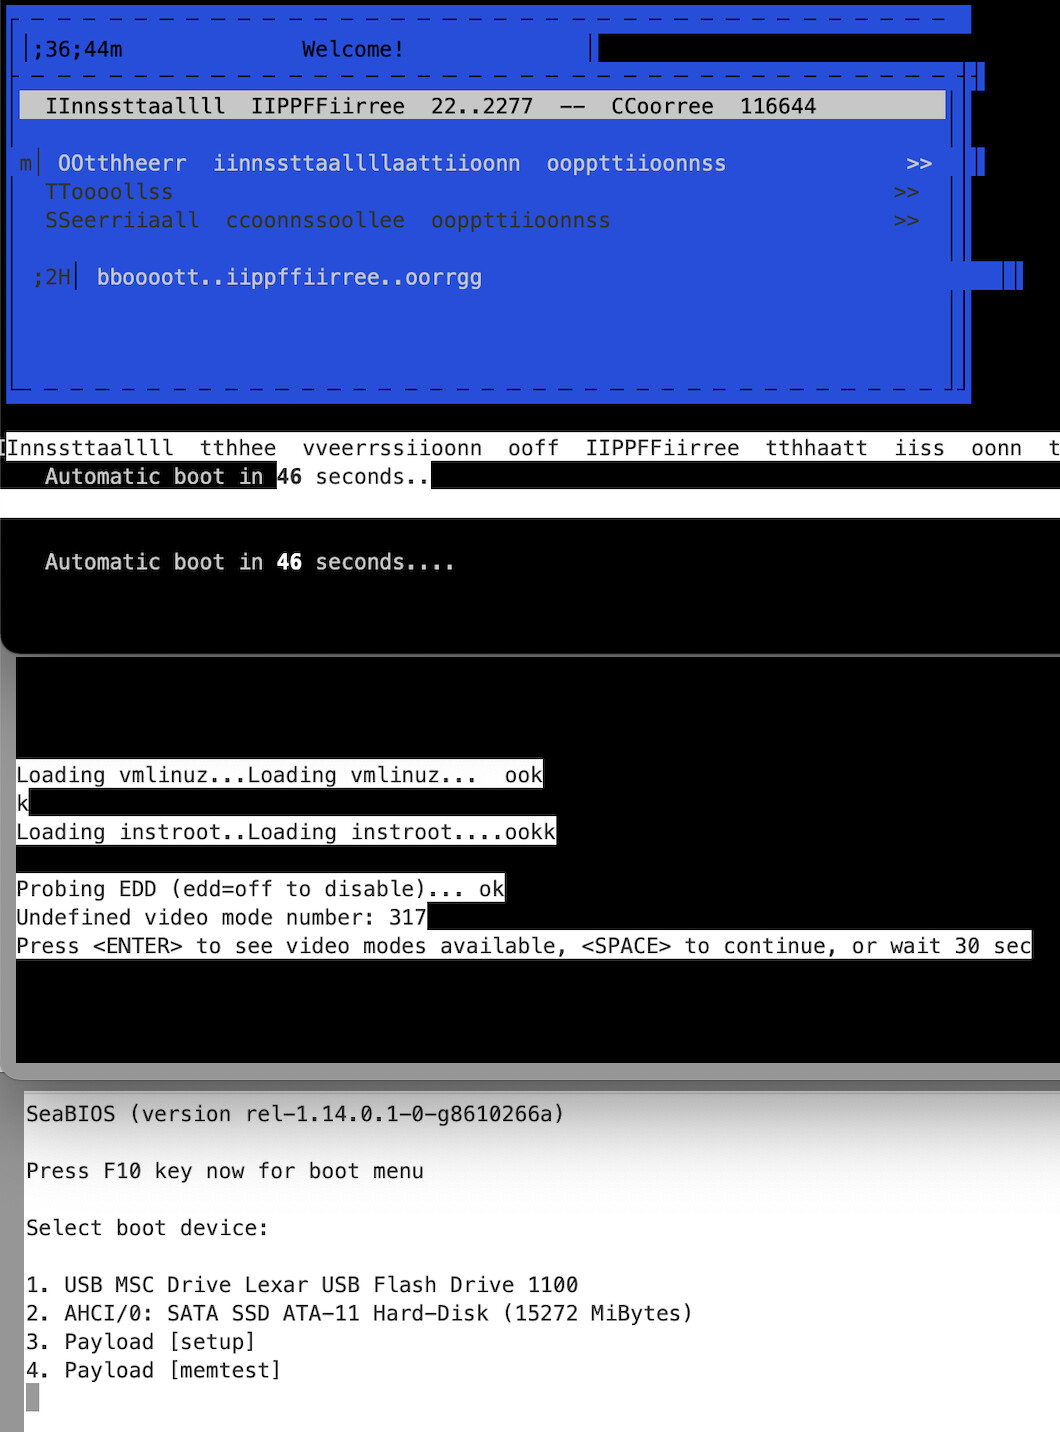
That doesn’t look right. And the choices didn’t appear to advance the install procedure.
Is that right?
Sorry to say… it is correct. I saw the same thing recently. I thought it was a quirk.
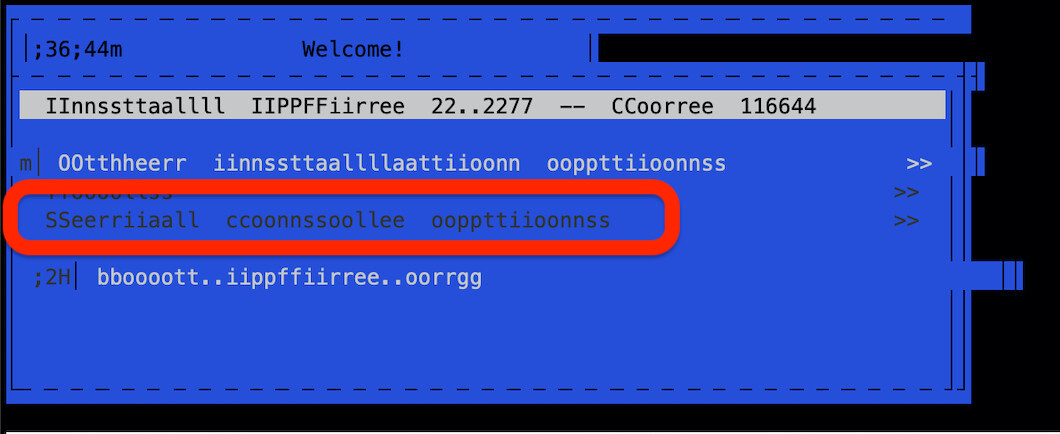
On the screen with the blue, click on the line that begins with SSeerriiaall
EDIT: reported to Bugzilla
https://bugzilla.ipfire.org/show_bug.cgi?id=12801
2 Likes
Its been two years since I last setup the Mini Appliance and before that a bare bones version. I don’t remember the file system and used ext4. Everything else appeared ok. Green>nic34/Red>nic35 then identified nics: red=36/green=37. But the reboot produced the same errors.

ext4 is perfect!
How did you set up the RED network?
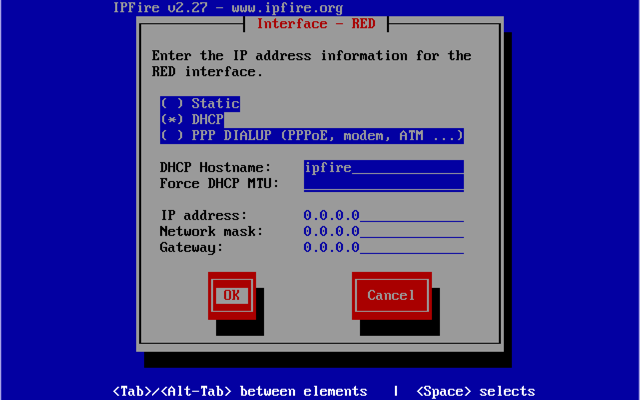
You can go back by entering the setup command.
https://wiki.ipfire.org/installation/step5#setting-red-interface-address
You MAY have an issue with green (maybe a wrong screenshot was sent?)?
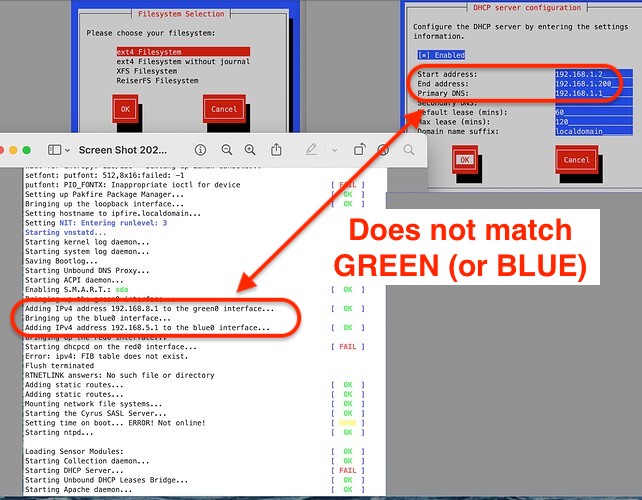
If green works OK and you can talk to the IPFire device then forget I brought this up!
2 Likes
Red network is DHCP and as is. Where is the DHCP configuration screen. After Command:Setup > Network Settings - DHCP configuraiton screen is not available
Cellular > Router > Ipfire is complete. But Ipfire > Lan incomplete.
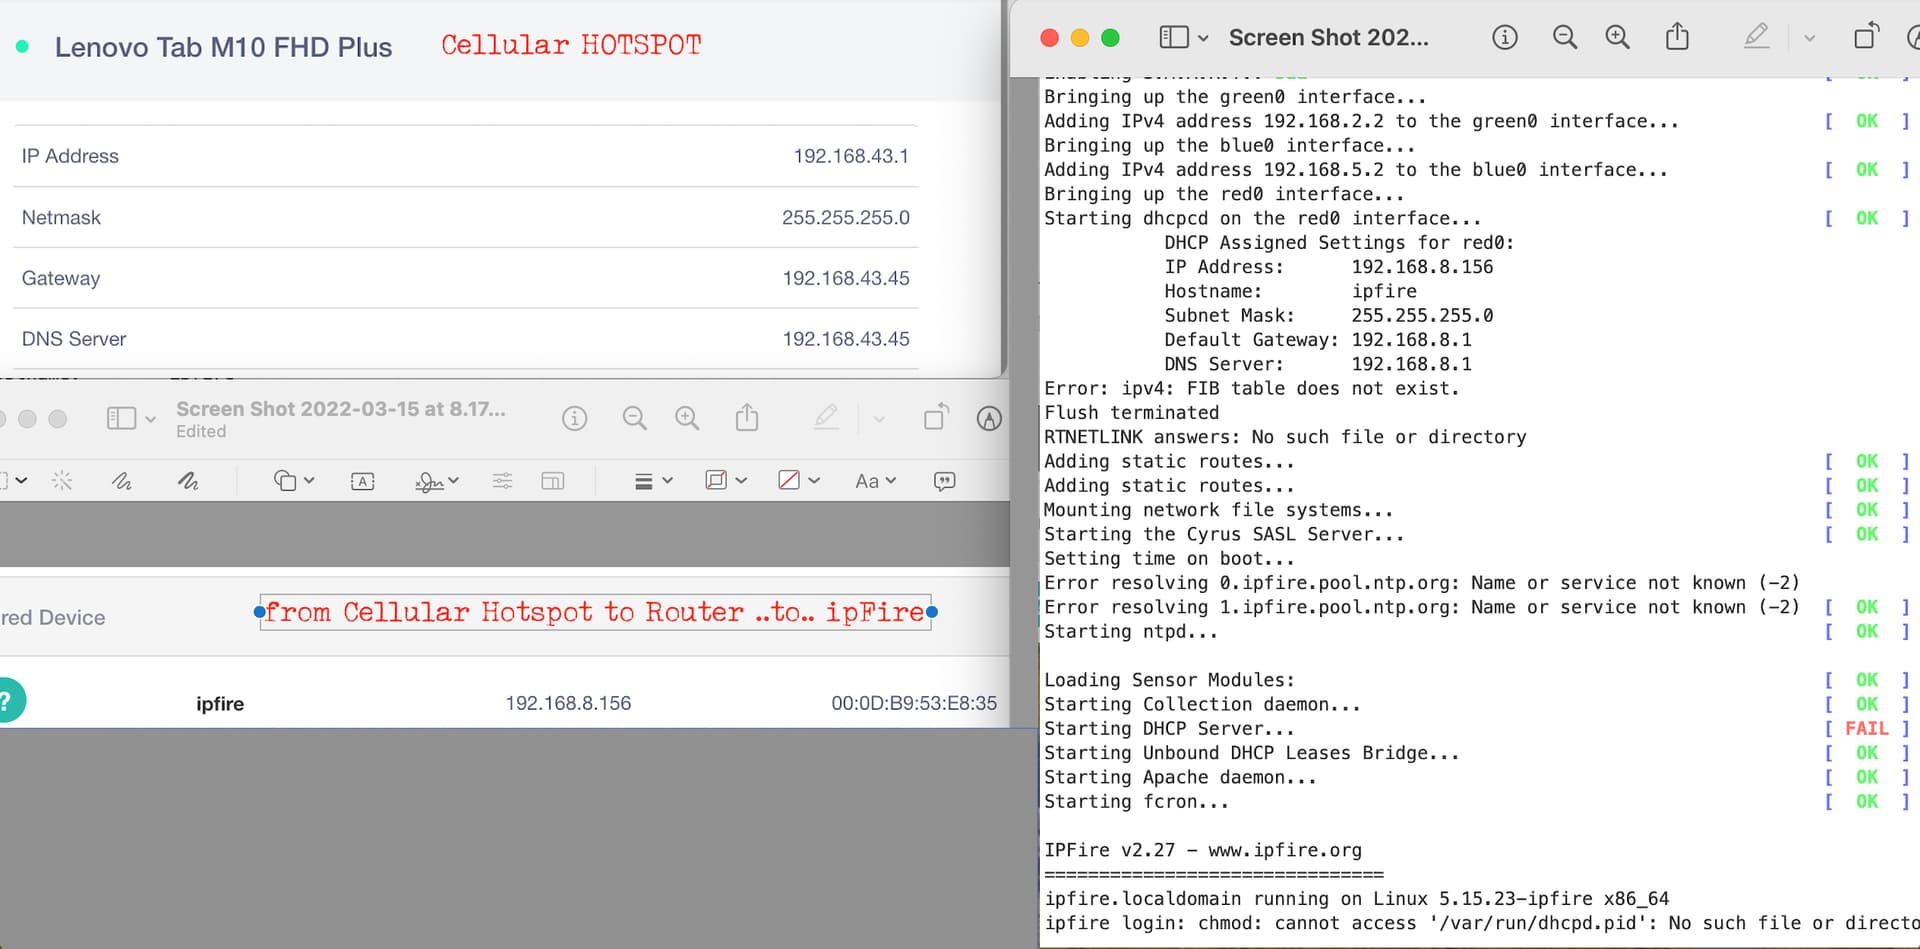
red network is DHCP 192.168.8.*
green network is static 192.168.2.2 (from your last screenshot)
access it as https://192.168.2.2:444/ then you can show the dhcp range for green.
(Network > DHCP server, top part of the screen)
1 Like